Sentries
Overview
Sentry is a log collection agent within the Logpresso platform, ensuring secure transmission of logs to the Logpresso server through a TLS channel. The process involves mutual certificate-based authentication for heightened security.
In Logpresso version 4.0.2312.0, the Sentry management features have been enhanced, allowing for the straightforward installation of Sentry instances with a single command. Improved Sentry management uses the following network ports:
- TCP 7140: Data communication between Sentry and Logpresso server
- TCP 44300: Deployment of Sentry installation files and certificates
Ensure these ports are open on the local firewall to allow the Logpresso server to receive data from the Sentry. Note that specific port numbers may vary based on the operating system in use.
Sentry Deployment
To deploy a Sentry, ensure you have the JDK and the Sentry installation package.
JAVA
To run a Sentry, a Java Runtime Environment (JRE) is required. The JRE is distributed with the Sentry installation file from the Logpresso server.
Download JRE
First, acquire a trusted JRE package. Download the JRE file from a reliable OpenJDK site like Adoptium or Microsoft. The OpenJDK file must have an extension of .tar.gz (for Linux) or .zip (for Windows).
Before uploading the JRE file to the Logpresso server, ensure that the file name adheres to the following naming convention:
- A file name must start with the prefix:
jdk-orjre-. - Only numeric major version numbers are allowed between the prefix and the first dot (
.).- File names recognizable by Logpresso server (best practices):
- jre-11.0.14.1.tar.gz (detailed version number:
11.0.14) - jdk-11.zip (brief version number:
11)
- jre-11.0.14.1.tar.gz (detailed version number:
- File names not recognizable by Logpresso Server:
- jre-8u151-linux-x64.tar.gz (non-numeric characters present before the first dot(
.))
- jre-8u151-linux-x64.tar.gz (non-numeric characters present before the first dot(
- File names recognizable by Logpresso server (best practices):
- For Linux, the JRE file extension must be tar.gz.
- For Windows, the JRE file extension must be zip.
Upload JRE
To move the JRE file to the deployment directory, use the following command:
# Edit to suit your environment.
# PKGDIR: Directory where the logpresso server files are located.
PKGDIR="/opt/logpresso"

# Create a JRE directory for Linux/Windows
sudo -u logpresso mkdir -p ${PKGDIR}/download/{linux,win}/x64

# Copy installation files
sudo -u logpresso cp PATH_TO_JRE_FILE {PKGDIR}/linux/x64
sudo -u logpresso cp PATH_TO_JRE_FILE {PKGDIR}/win/x64
Sentry Installation Package
Navigate to Settings > Packages and upload the Sentry installation package. See Packages for instructions on uploading packages.
Install Sentry
Installing a Sentry on a target server involves two main steps:
- Create a Sentry
- Run the Sentry installation command on the server.
The installation command includes an identifier for the Sentry, target server information, and information about the authentication token to be used for certificate issuance and host authentication during installation. The command is generated based on the host's operating system: Bash for Linux or PowerShell for Windows. Executing the command on the host automatically installs both the Sentry and JRE, establishing a connection to the server.
Step 1: Create Sentry
To create a Sentry:
-
In Settings > Sentries click Add on the toolbar.

-
In the Add Sentry dialog box, enter the information required to install the Sentry and click Add.
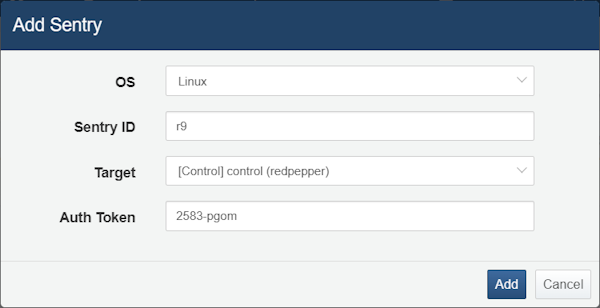
- OS: OS of the host on which you want to install the Sentry (Linux or Windows).
- Sentry ID: Unique ID to identify the Sentry
- Target: Server to which the Sentry will connect. A list of cluster nodes (servers) registered in Settings > Cluster is displayed.
- Auth Token: Randomly assigned authentication token for the Sentry installation (e.g.
9425-tnsa)
-
Follow the instructions in the Add Sentry message to copy the installation command. Then run it from an administrator terminal on the host where you want to install the Sentry.
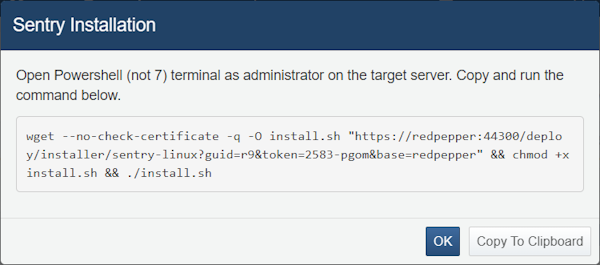
- Click Copy to Clipboard to copy the installation command to the clipboard on your PC.
- Click OK to close the window.
For Linux
Run the installation command for Linux in a bash shell. The command has the following format, with capitalized parts automatically assigned during generation:
# ADDR_1: Address of the server deploying the Sentry package and certificate
# GUID: Sentry ID
# TOKEN: Authentication token
# ADDR_2: Address of the server to communicate with the Sentry

wget --no-check-certificate -q -O install.sh \
"https://ADDR_1:44300/deploy/installer/Sentry-linux?guid=GUID&token=TOKEN&base=ADDR_2" && \
chmod +x install.sh && \
./install.sh
If using curl instead of wget on Linux:
# ADDR_1: Address of the server deploying the Sentry package and certificate
# GUID: Sentry ID
# TOKEN: Authentication token
# ADDR_2: Address of the server to communicate with the Sentry

curl -k -s -o install.sh \
"https://ADDR_1:44300/deploy/installer/Sentry-linux?guid=GUID&token=TOKEN&base=ADDR_2" && \
sed -i 's/wget --no-check-certificate -q -O/curl -k -s -o/g' install.sh && \
chmod +x install.sh && \
./install.sh
For Windows
The installation command for Windows has the following format, with capitalized parts automatically assigned during generation:
# ADDR_1: Address of the server deploying the Sentry package and certificate
# GUID: Sentry ID
# TOKEN: Authentication token
# ADDR_2: Address of the server to communicate with the Sentry

cd $env:TEMP;
add-type "
	using System.Net;
	using System.Security.Cryptography.X509Certificates;
	public class TrustAllCertsPolicy : ICertificatePolicy {
		public bool CheckValidationResult(ServicePoint a, X509Certificate b, WebRequest c, int d) {
			return true;
		}
	}";

[System.Net.ServicePointManager]::CertificatePolicy = New-Object TrustAllCertsPolicy
Invoke-WebRequest `
-Uri 'https://ADDR_1:44300/deploy/installer/Sentry-linux?guid=GUID&token=TOKEN&base=ADDR_2' `
-OutFile install.cmd; cmd /c install.cmd
The installation commands provided by the Logpresso server are designed for PowerShell 5.1, which is pre-installed on all Windows systems. If your PowerShell version is 5.1 or higher, run it with the following modification:
# ADDR_1: Address of the server deploying the Sentry package and certificate
# GUID: Sentry ID
# TOKEN: Authentication token
# ADDR_2: Address of the server to communicate with the Sentry

Set-Location $env:TEMP;
Invoke-WebRequest -SkipCertificateCheck `
-Uri 'https://ADDR_1:44300/deploy/installer/Sentry-linux?guid=GUID&token=TOKEN&base=ADDR_2' `
-OutFile install.cmd; cmd /c install.cmd
Step 2: Deploy Sentry
Run the copied command on the target host where you want to install the Sentry. The Sentry will be automatically installed and started upon execution.
The installation directory is /opt/logpresso-sentry for Linux Sentry, and C:\Program Files\Logpresso Sentry for Windows Sentry.
For Linux
-
Ensure that the prerequisites net-tools, unzip, and wget are installed. If not, run the following command to install them.
# unzip, wget are required for installing the Sentry. # net-tools is required for the Sentry to collect system information. # On RHEL sudo dnf install net-tools unzip wget # On Debian sudo apt-get install net-tools unzip wget -
In a bash shell, run the command line generated in Step 1: Create Sentry as root.
-
You can check the Sentry service status by running the following command on the Logpresso server:
systemctl status logpresso-Sentry.service -
Check the connection status of the Sentry. If the Sentry's connection status is not displayed as green, check the local firewall and ensure the proper network communication between the Sentry and the server.
For Windows
- Open a PowerShell as an administrator, then run the command line created in Step 1: Create Sentry.
- Ensure that the Logpresso service is marked as running in the Services tab of the Task Manager. You can run the following command to check the status in Windows PowerShell:
sc.exe query Logpresso - Check the connection status of the Sentry within your Logpresso. If the Sentry's connection status is not displayed as green, check the local firewall and ensure the proper network communication between the Sentry and the server.
Sentry Status
You can check the status of a Sentry in the Sentry list.
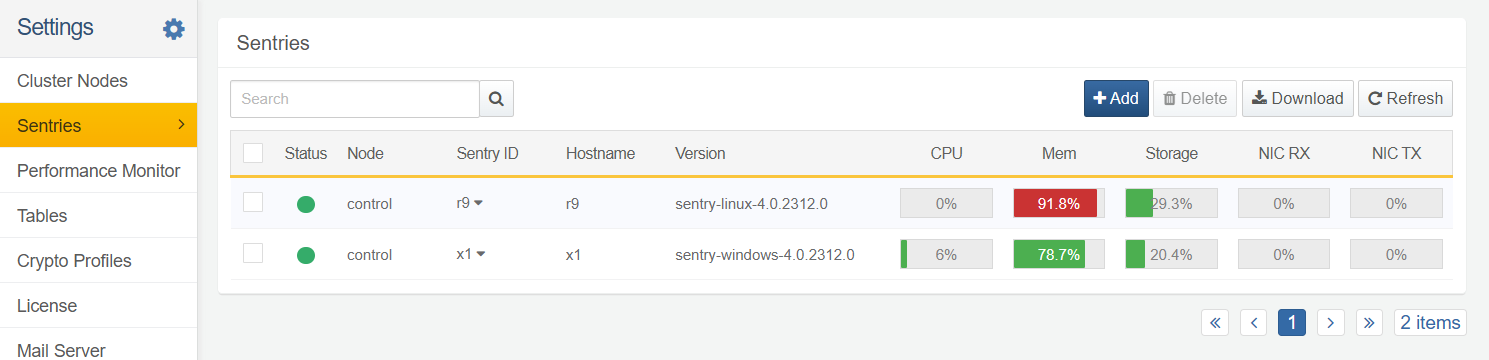
- Status: Green if the Sentry is connected to the server; Grey if the Sentry is not connected.
- Node: Identifier of the cluster node that controls the Sentry. A data node is denoted by data and a control node is denoted by control.
- Sentry ID: Sentry ID
- Hostname: Name of the host on which the Sentry is installed.
- Version: Sentry version
- CPU: CPU usage (%)
- MEM: Memory usage (%)
- Storage: Disk usage(%). The highest value is displayed if you have multiple storage partitions.
- NIC RX: NIC RX bandwidth usage(%). The highest value is displayed if there are more than one network interface.
- NIC TX: NIC TX bandwidth usage(%). The highest value is displayed if there are more than one network interface.
Manage Sentry Remotely
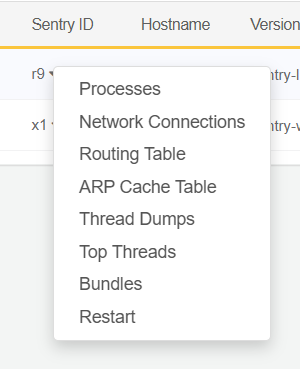
Click the Sentry ID to access remote management functions: You can view the Sentry host's process list, network connectivity information, routing table, ARP cache, thread dump information, bundle list, or restart the Sentry.
-
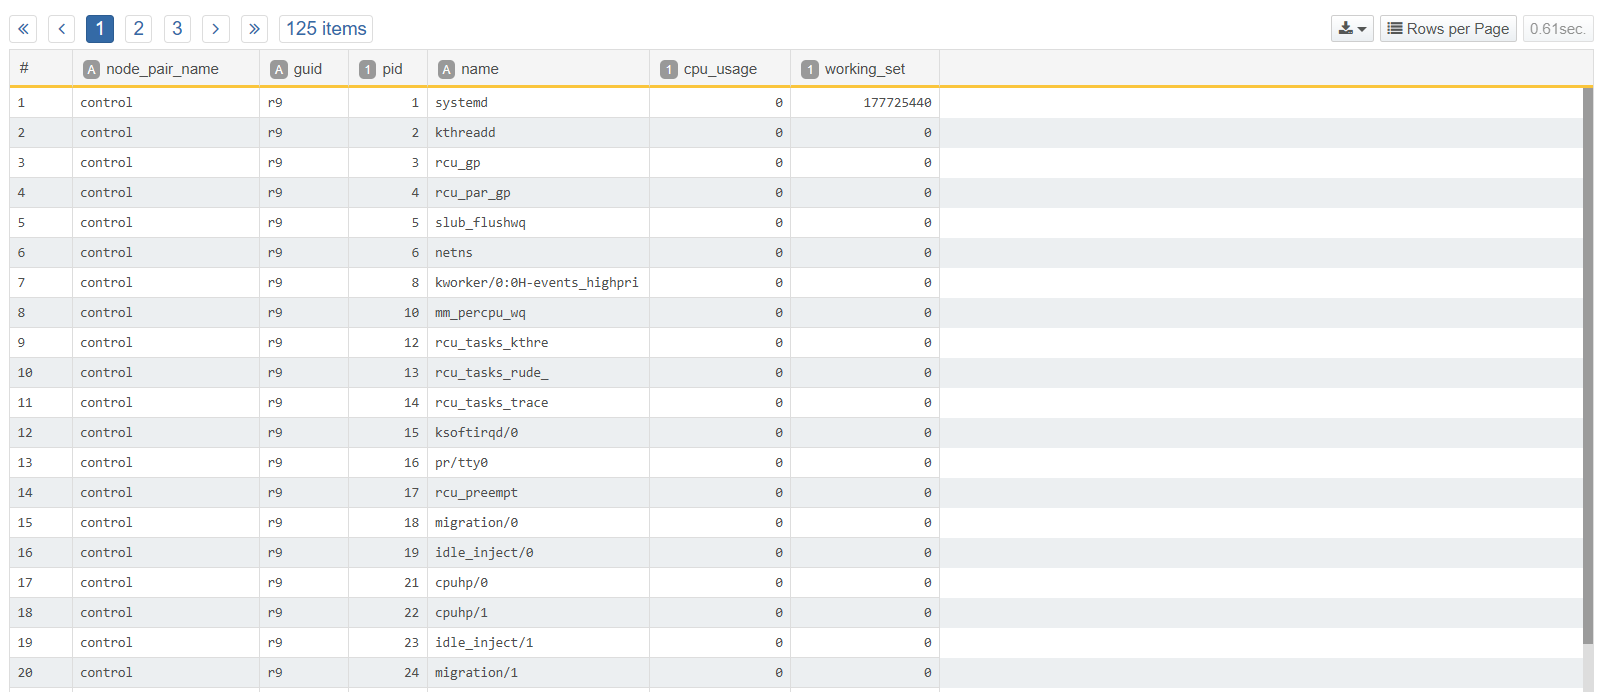
Processes: Shows the list of processes on the Sentry host.
-
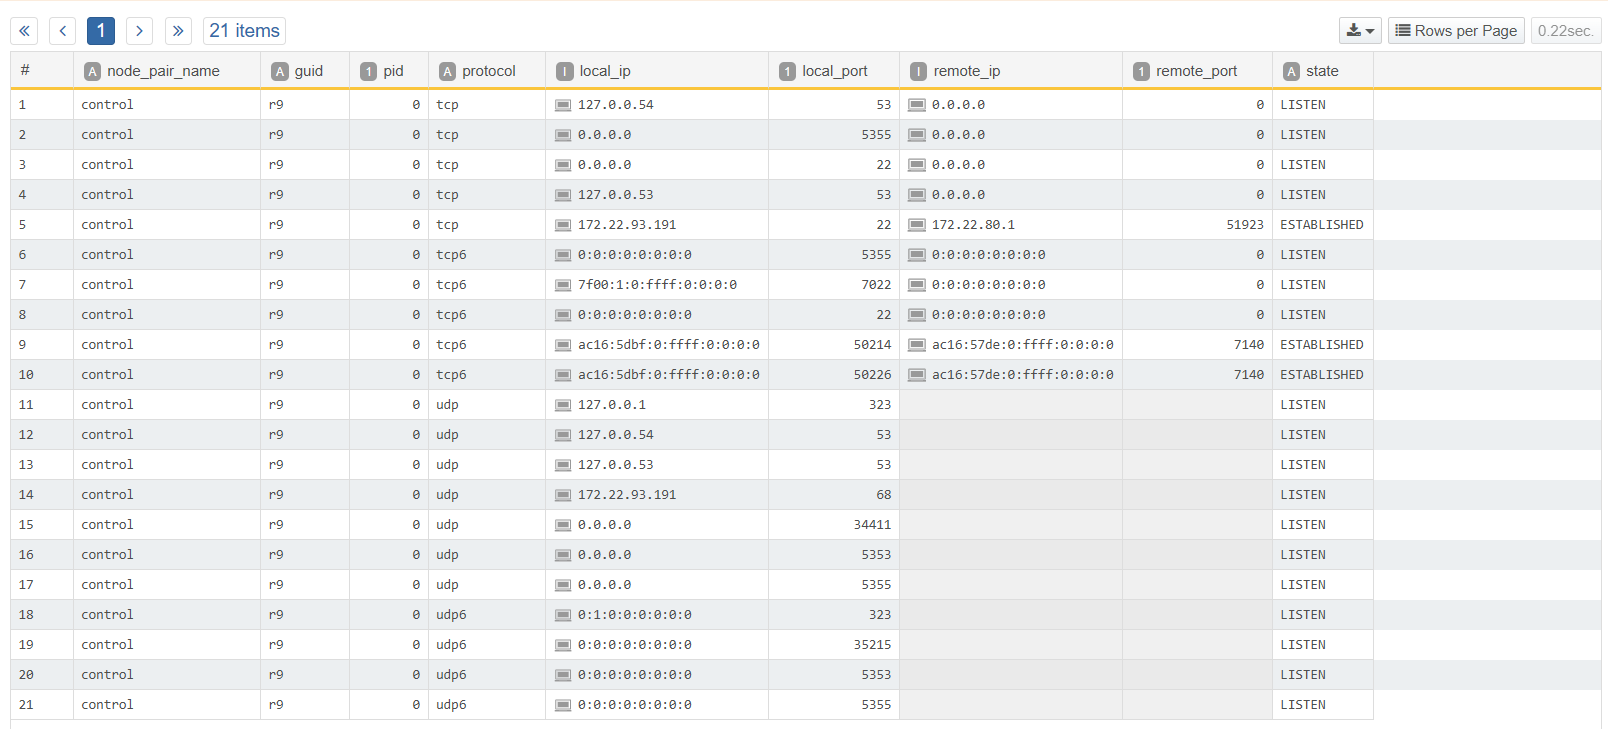
Network Connections: Displays the list of network sessions the Sentry host is connected to.
-
Routing Table: Displays the routing table of the Sentry host.

-
ARP Cache Table: Displays the ARP cache on the Sentry host.

-
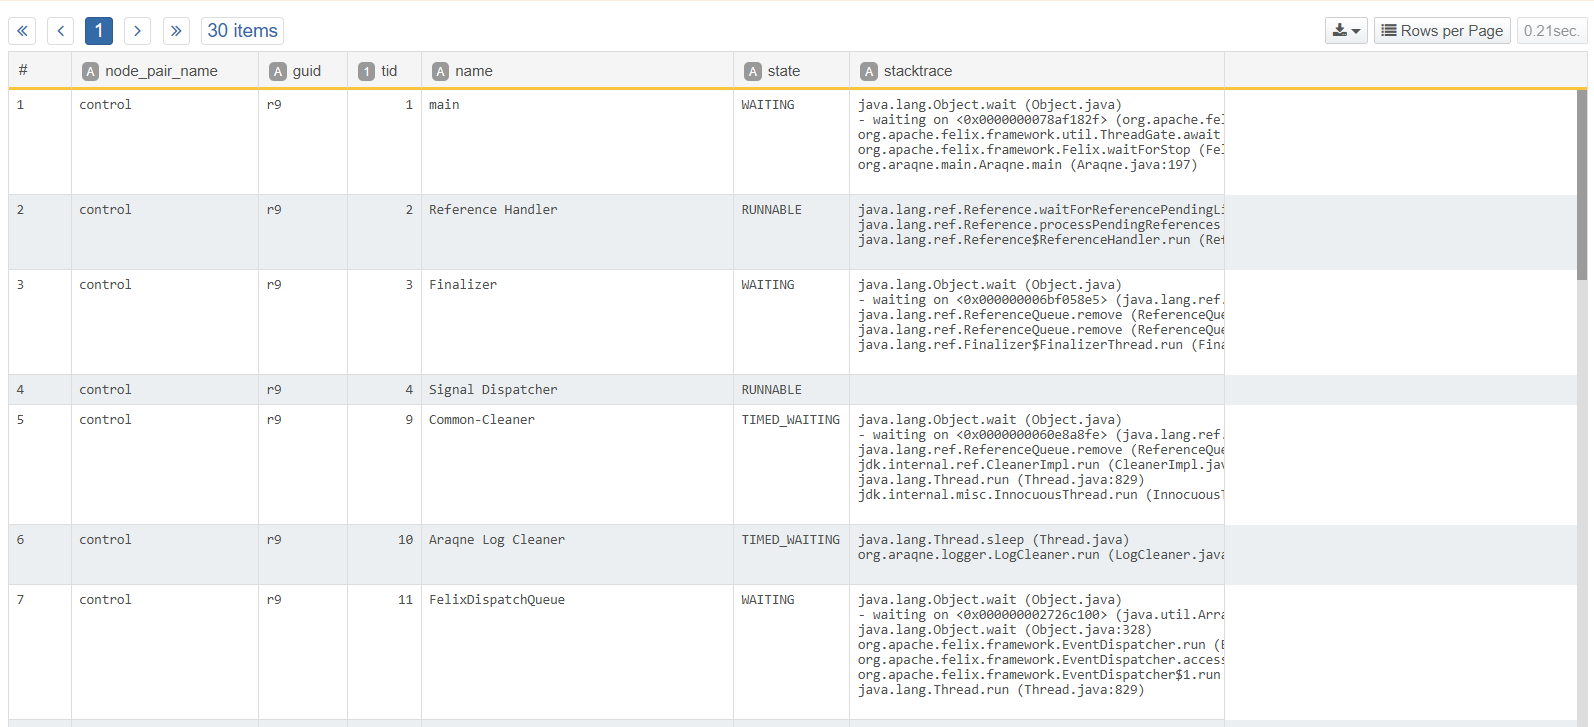
Thread Dumps: Displays the list of threads used by the Sentry while running.
-
Top Threads: Displays the system load on a thread.

-
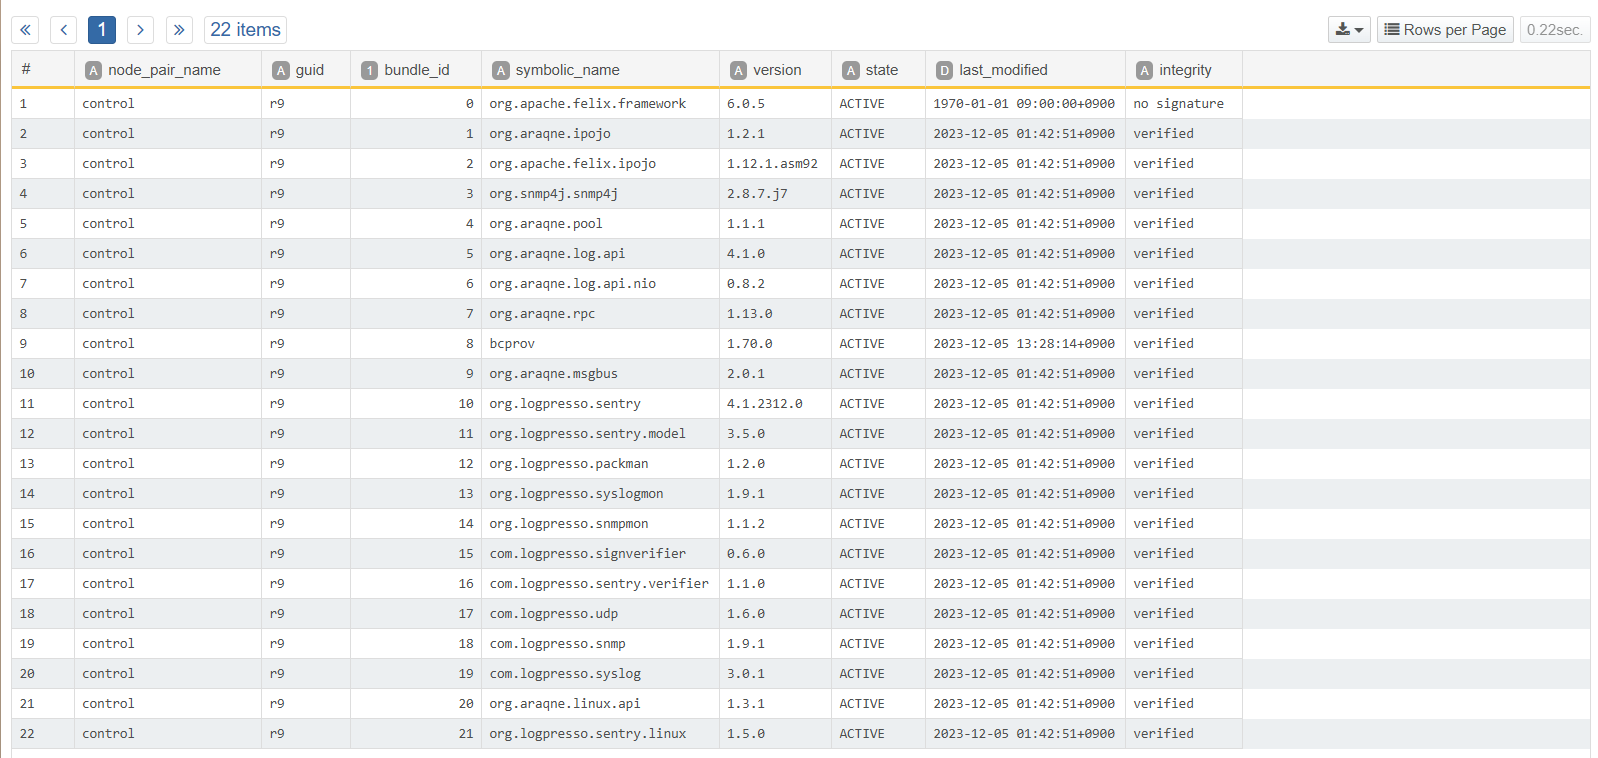
Bundles: Displays a list of bundles installed on the Sentry.
-
Restart: Restarts the Sentry.
Uninstall Sentry
To completely uninstall a Sentry; first remove the Sentry from the managed host, and delete the Sentry information registered on the Logpresso server.
Step 1: Run Command to uninstall Sentry
For Linux
To uninstall a Sentry on a Linux host, open a bash shell with root privileges and run the following command:
# Stop and uninstall Sentry
sudo systemctl stop logpresso-Sentry.service
cd /opt/logpresso-Sentry
sudo ./logpresso uninstall Sentry
sudo rmdir "$PKGDIR"
For Windows
To uninstall a Sentry on a Windows host, open Powershell as an administrator and run the following command:
# Stop Logpresso service
sc.exe stop Logpresso

# Check Logpresso status
sc.exe query Logpresso

# Delete Logpresso service
sc.exe delete Logpresso

# Remove a registry key
$reg="HKLM:\\SOFTWARE\\WOW6432Node\\Apache Software Foundation\\Procrun 2.0\\Logpresso\\"
Remove-Item -Path $reg -Recurse

# Remove Sentry files and folders
Set-Location "C:\Program Files\Logpresso Sentry\"
# Run the following lines, then answer the question with a Y.
cmd.exe /c logpresso.cmd uninstall Sentry
Set-Location ..
Remove-Item -Recurse -Path "C:\Program Files\Logpresso Sentry"
Step 2: Remove Sentry from Logpresso Server
To delete a Sentry from Logpresso server:
-
Navigate to System > Sentries and tick the checkbox of the Sentry you want to delete.
-
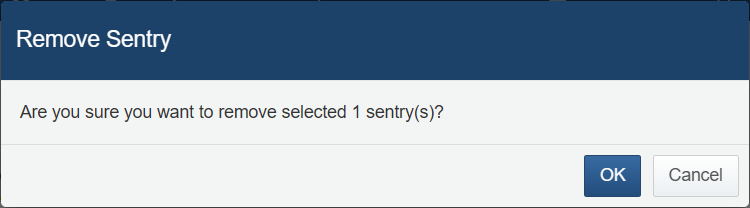
Click Delete on the toolbar.
-
Click OK on the Remove Sentry dialog box to confirm the deletion. If you do not want to delete, click Cancel.