Connect Profiles
Overview
Connect profiles are objects that contain identification and authentication information necessary for accessing external databases or FTP/SFTP/SSH servers. Connect profiles can be utilized in query commands and loggers that directly access data sources to collect data.
Search Connect Profile
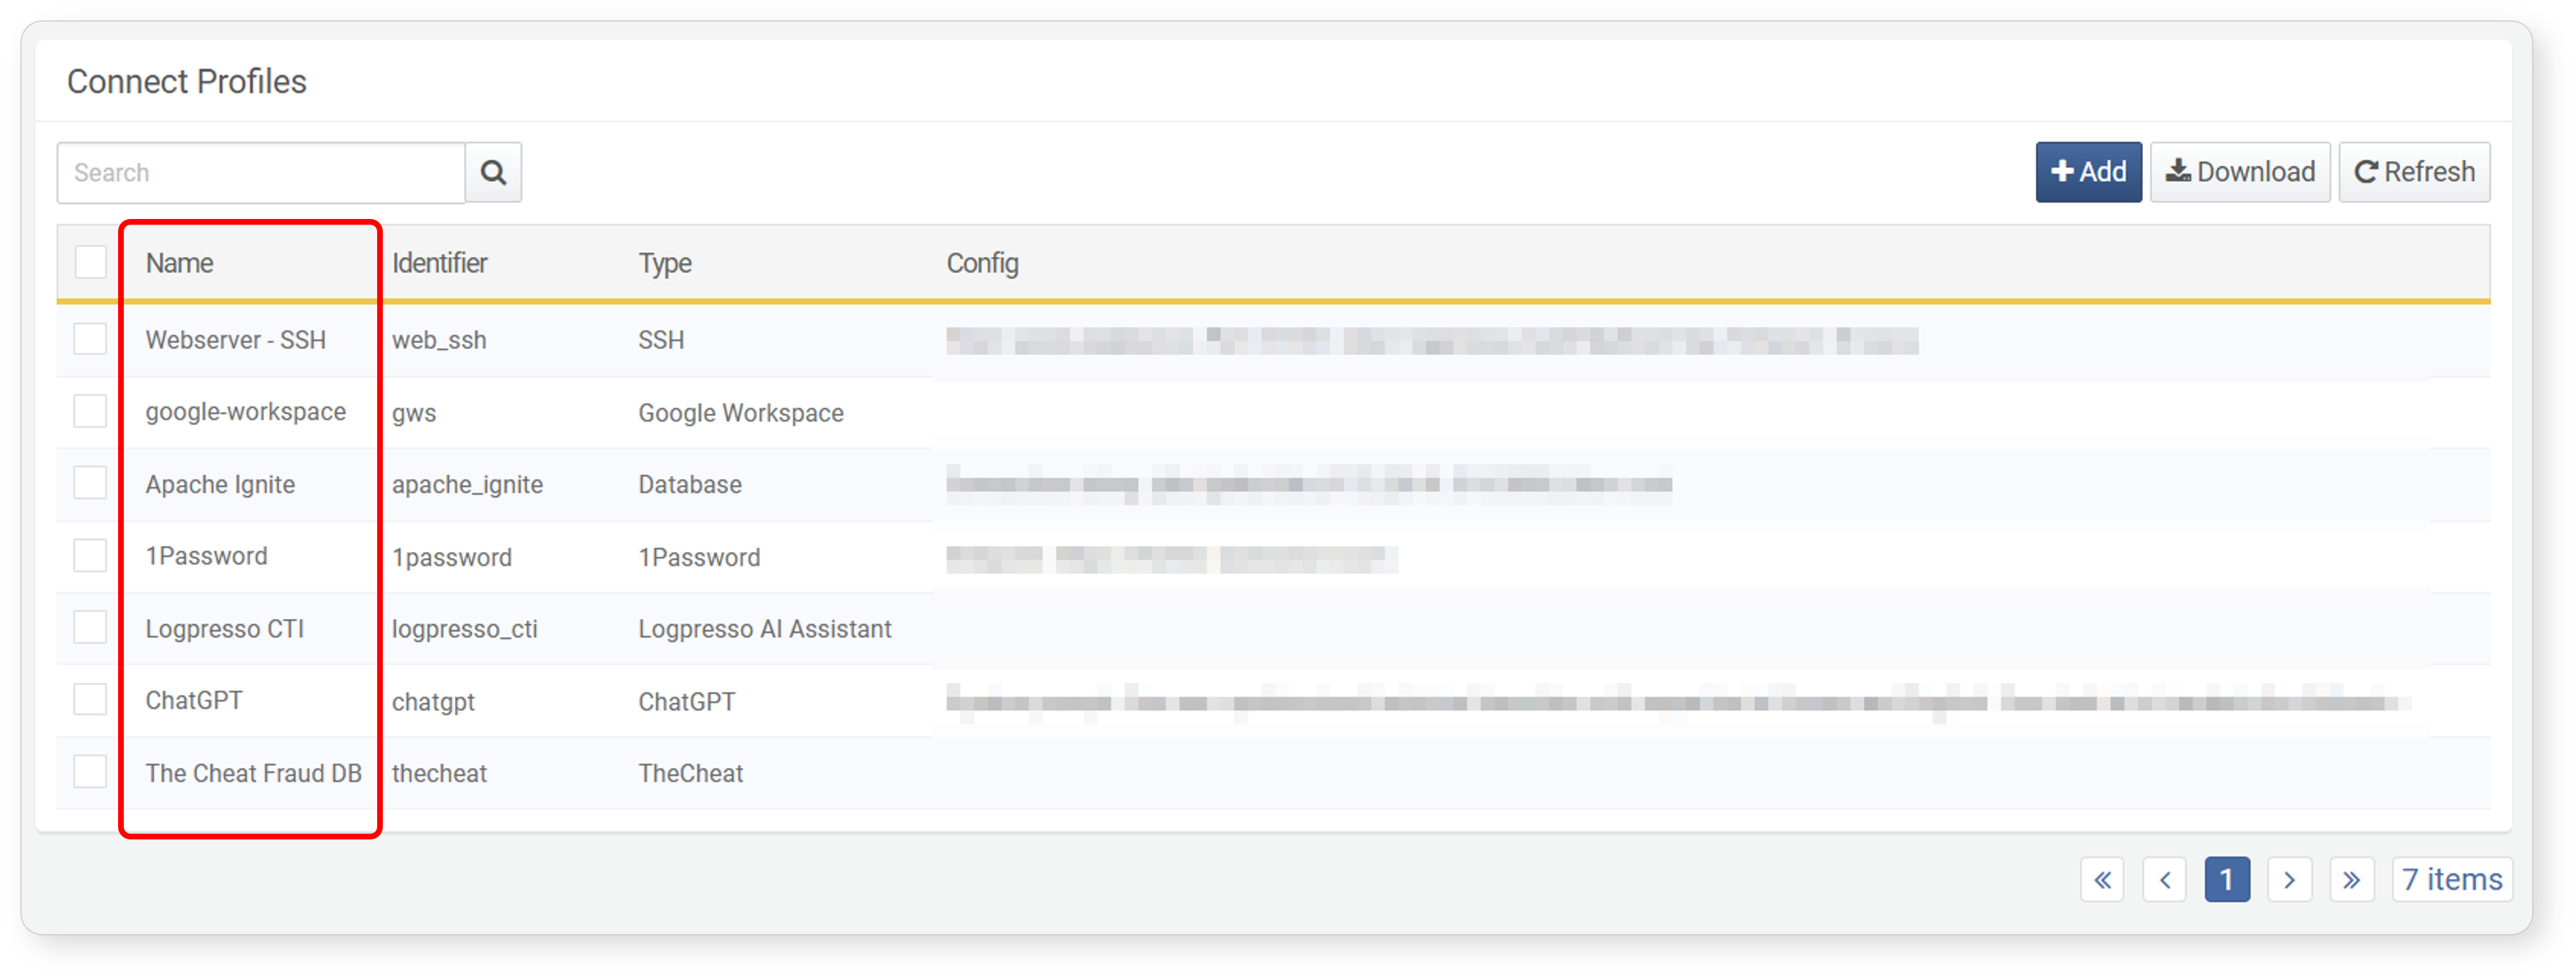
You can view the list of connect profiles in Settings > Connect Profiles.
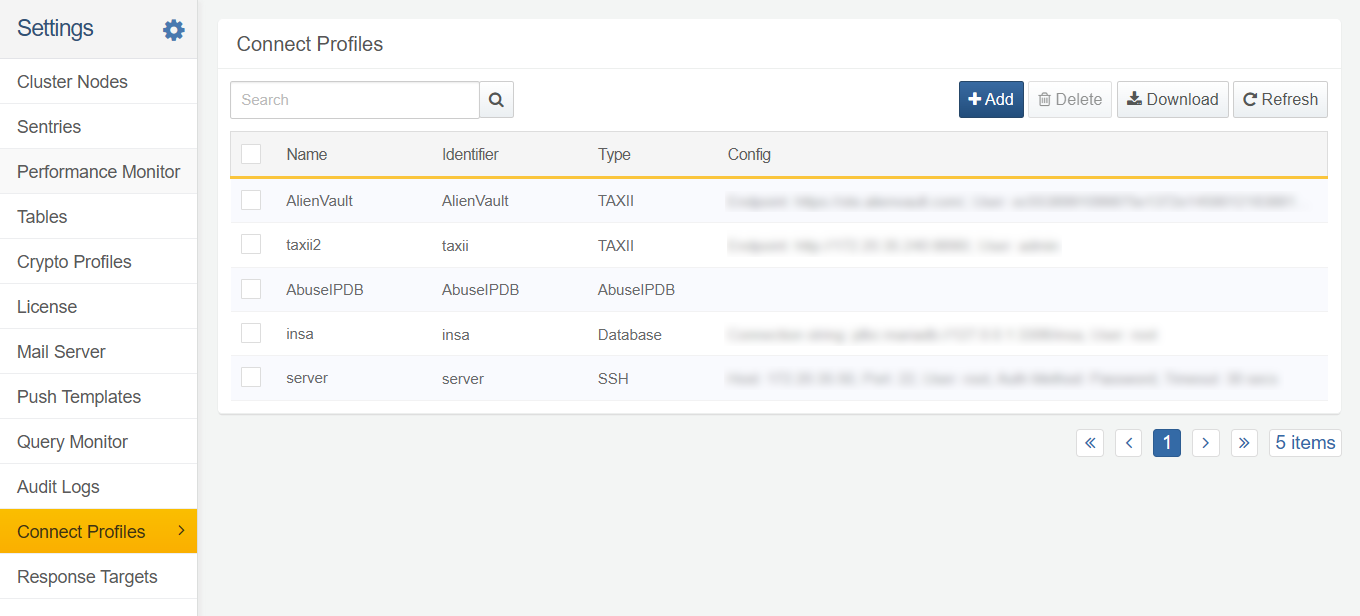
- Name: The name of the connect profile.
- Identifier: A unique identifier used to reference the connect profile in query commands and loggers.
- Type: The type of the connect profile.
- Config: A list of configuration values for the connect profile.
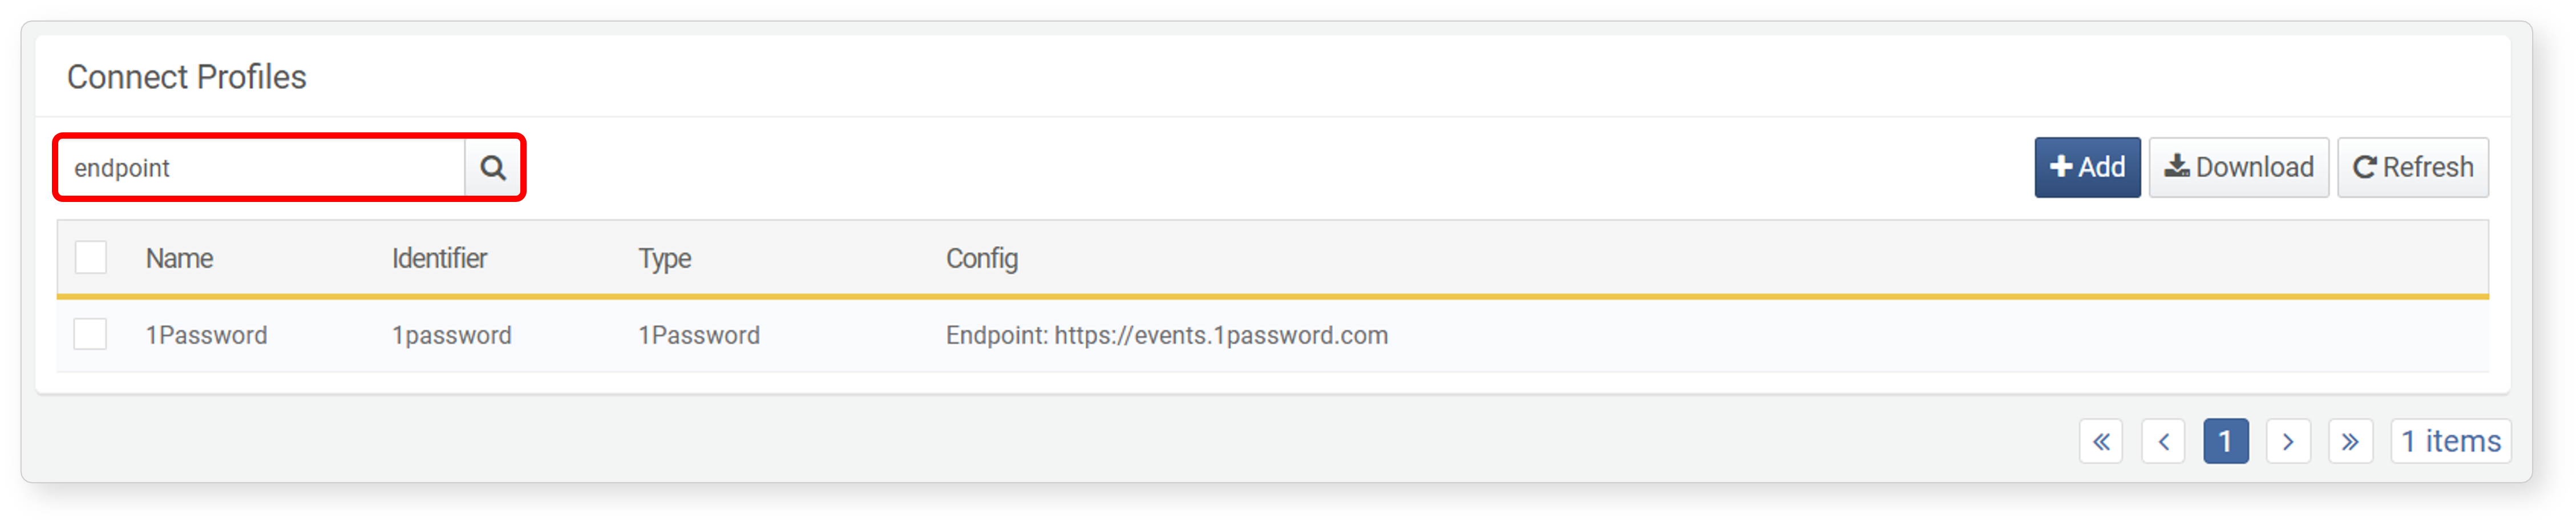
To find a specific connect profile in the list, use the search tool in the toolbar. The search tool will display profiles that contain the entered keywords in Name, Identifier, or Config. The connect profile search tool is not case-sensitive.
Add Connect Profile
To add a connect profile:
-
Click Add in the toolbar under Settings > Connect Profiles.

-
In the Add Connect Profile screen, input or select the properties for Basic Settings and Detailed Settings. Properties highlighted in sky blue are mandatory fields.
-
Review the entered or selected properties for accuracy and click OK in the upper right corner.
The following sections describe the Basic Settings and detailed settings for the connect profile.
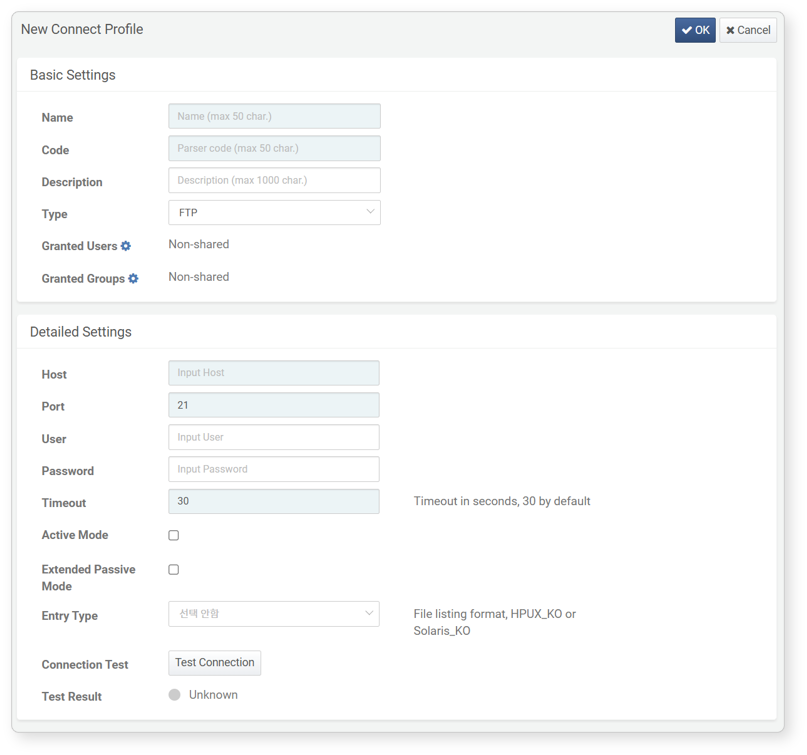
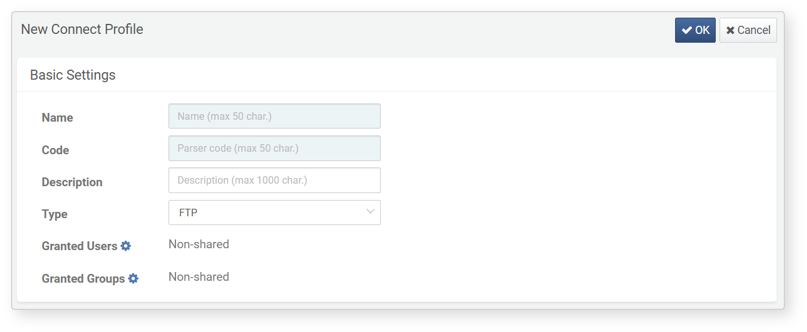
Basic Settings
Basic settings consist of general unique configuration items for the connect profile, which are necessary for identifying and using the connect profile.
-
Name: The name to identify the connect profile. The name can include English letters, numbers, Korean characters, and special characters, and must not duplicate the names of other connect profiles.
-
Code: A unique identifier to identify the connect profile in Logpresso queries, loggers, etc. The identifier can include English letters, numbers, and underscores ('_').
NoteThe identifier 'sonar' cannot be used when the profile type is database.
-
Description: A description of the connect profile
-
Type: The type of the connect profile. Profiles provided by apps are also included in this list. The selected type will change the properties of the Detailed Settings.
-
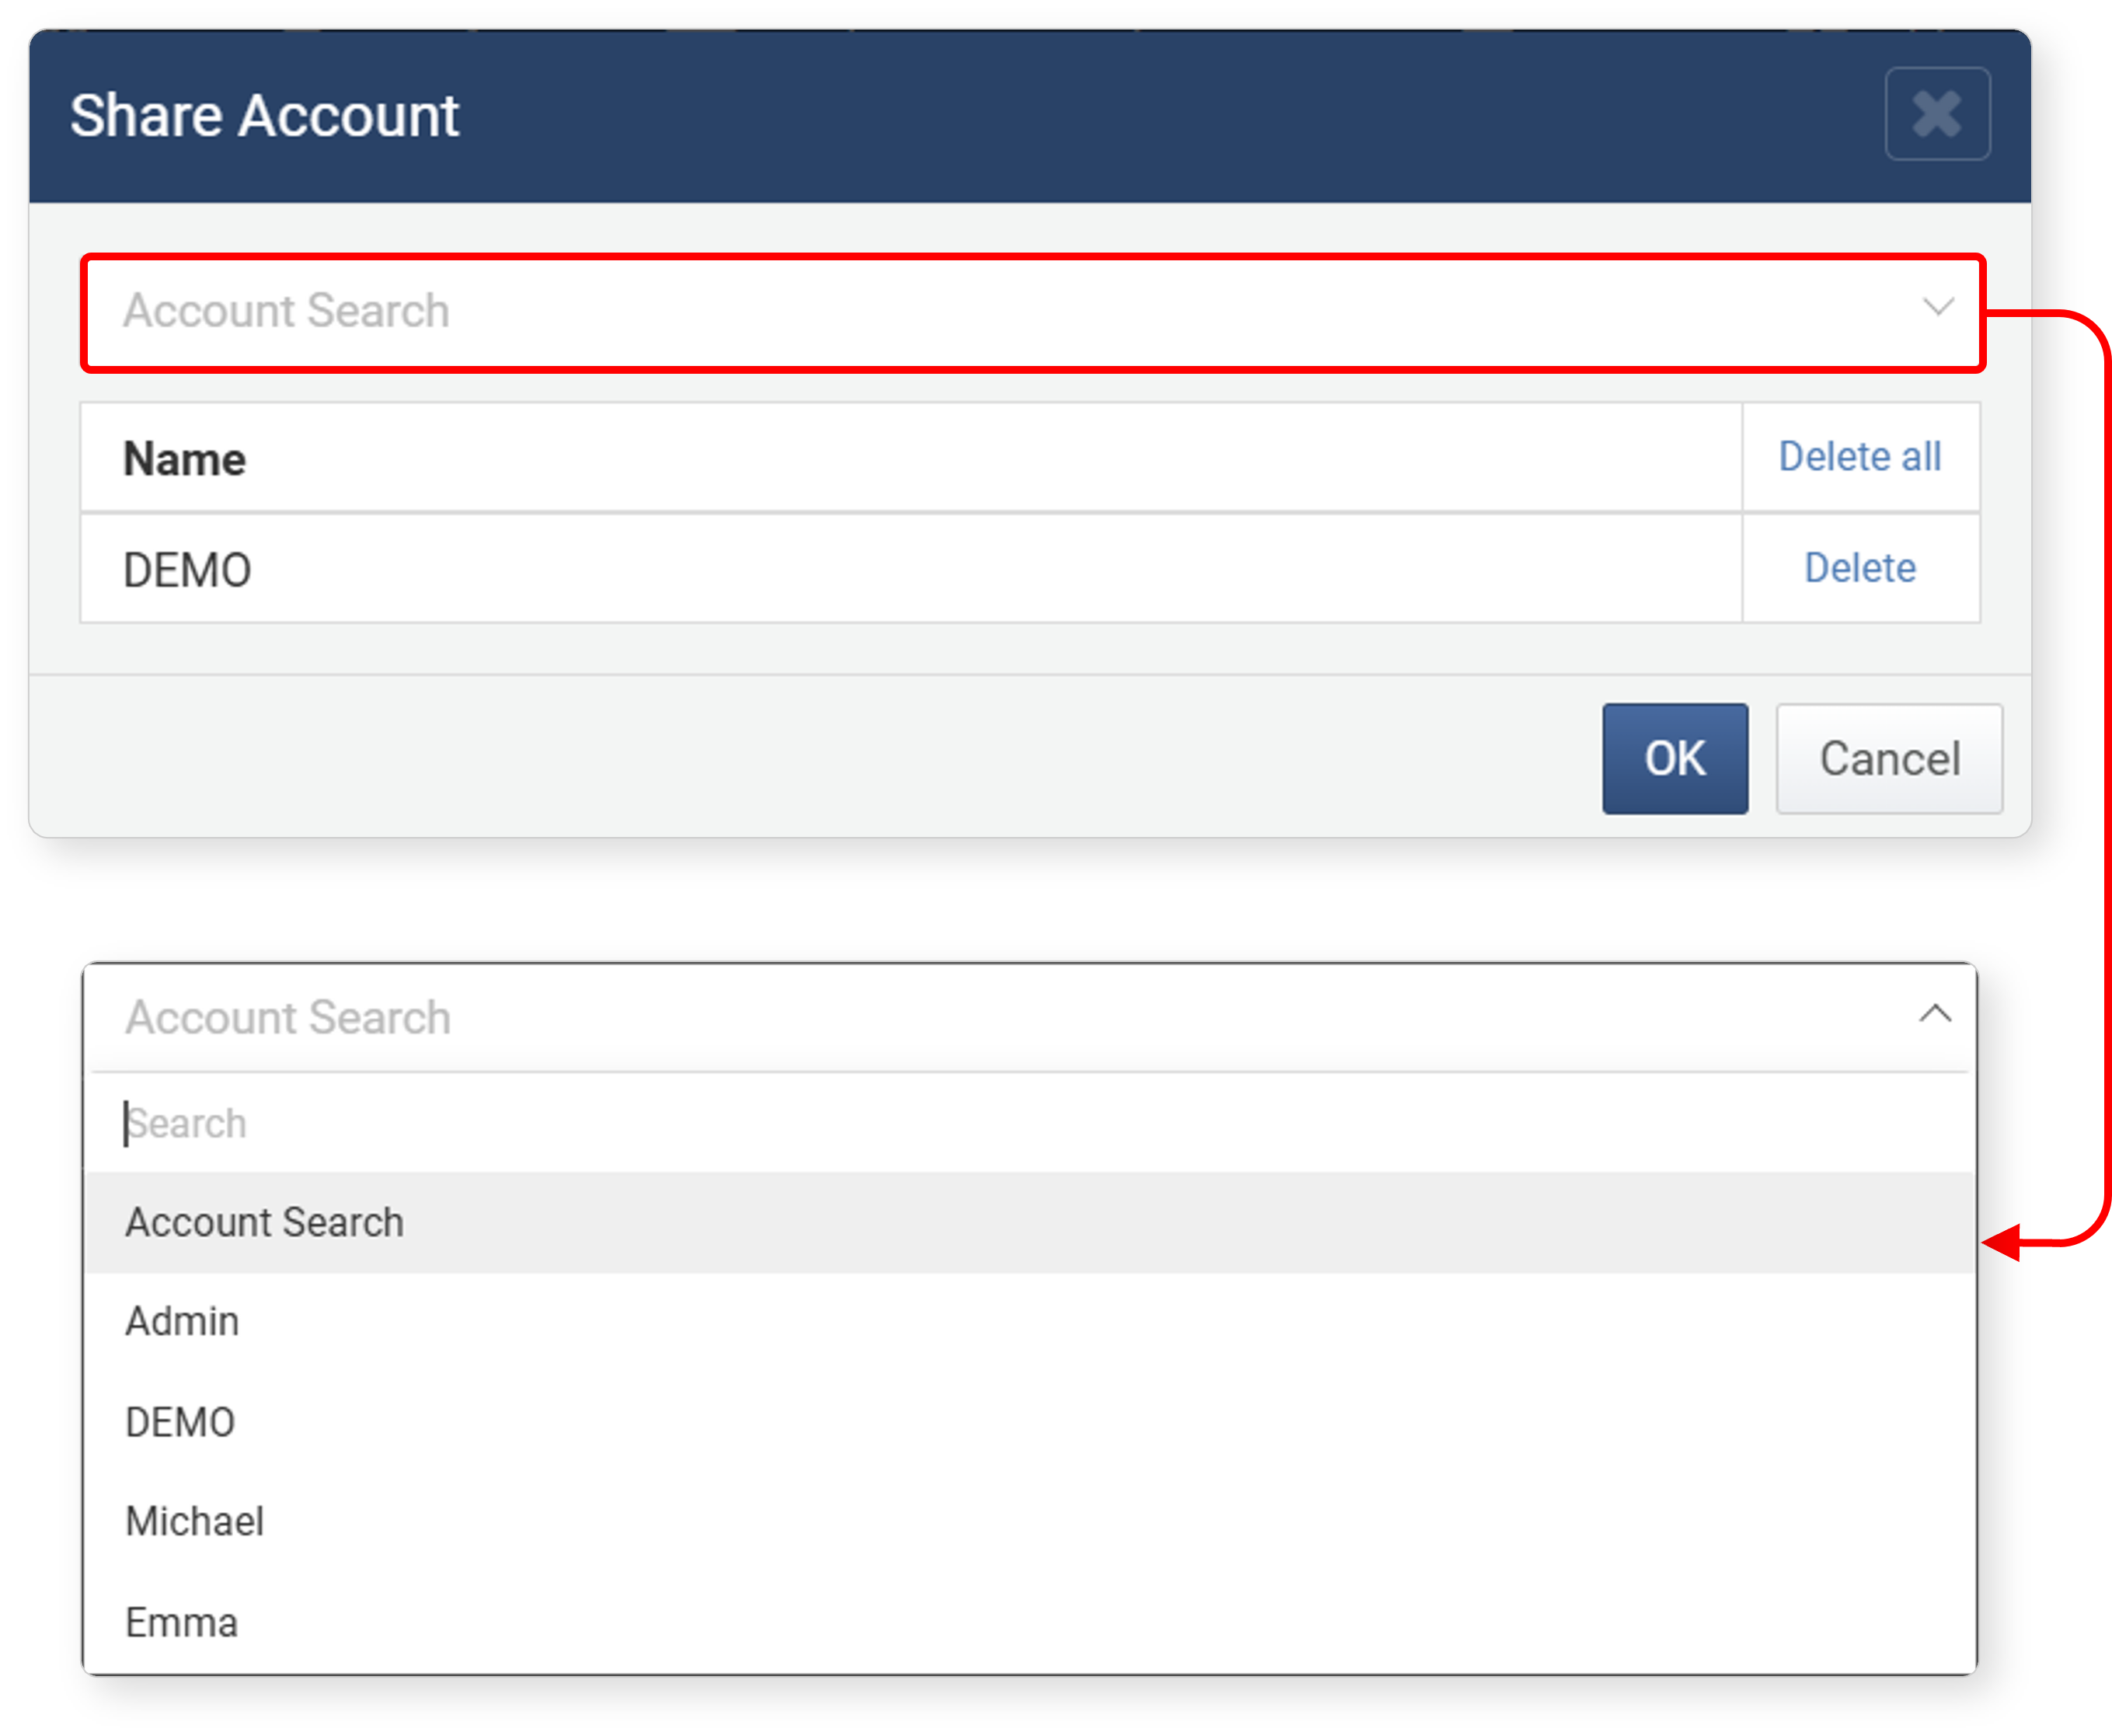
Granted Users: Users (accounts) allowed to use the connect profile. Click the gear icon, then search/select accounts from the list to share the connect profile.
-
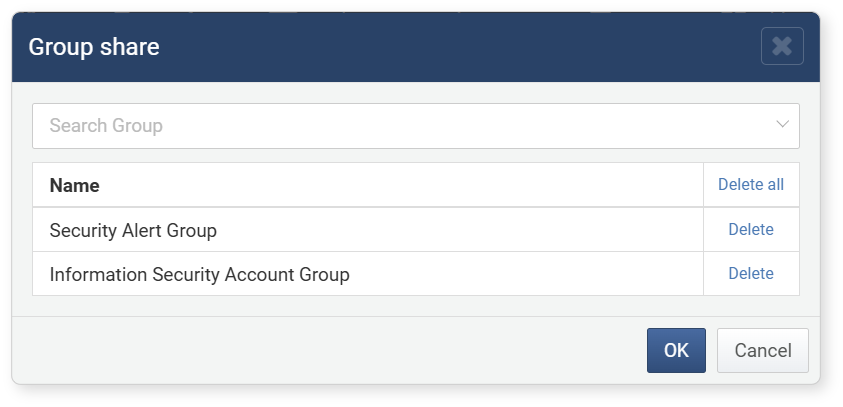
Granted Groups: User groups allowed to use the connect profile. Click the gear icon, then search/select account groups from the list to share the connect profile.
Detailed Settings
Detailed settings are determined by the Type in the Basic Settings. In addition to the types provided by default when installing Logpresso Sonar, there may be types provided by apps. This section describes only the default detailed settings properties. For connect profiles provided by apps, refer to the installation manual of the respective app in the Logpresso Store.
FTP
When the type is FTP, refer to the following list for detailed settings.
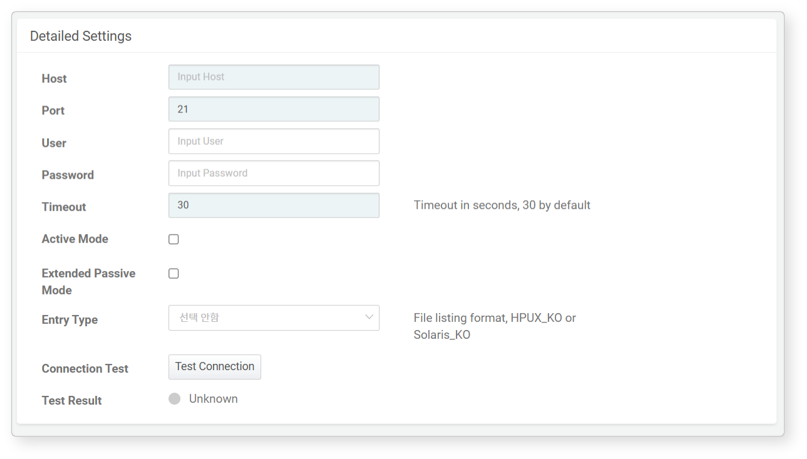
- Host: The IP address or hostname of the FTP server to connect to
- Port: The service port number of the FTP server (default: 21)
- User: The account ID to log in to the FTP server. If the server supports anonymous login, this field can be left blank.
- Password: The password for the FTP server login account. If the server supports anonymous login, this field can be left blank.
- Timeout: Connection wait time (default: 30 seconds)
- Active Mode: Check this box if the FTP server uses active mode for data transfer (default: unchecked).
- Extended Passive Mode: Check this box if the FTP server has an IPv6 address (default: unchecked).
- Entry Type: The operating system information of the FTP server. If the FTP server's operating system is Solaris, select Solaris Korean; if it is HP, select HP-UX Korean (default: not selected).
LDAP
When the connect profile type is LDAP, refer to the following list for detailed settings.
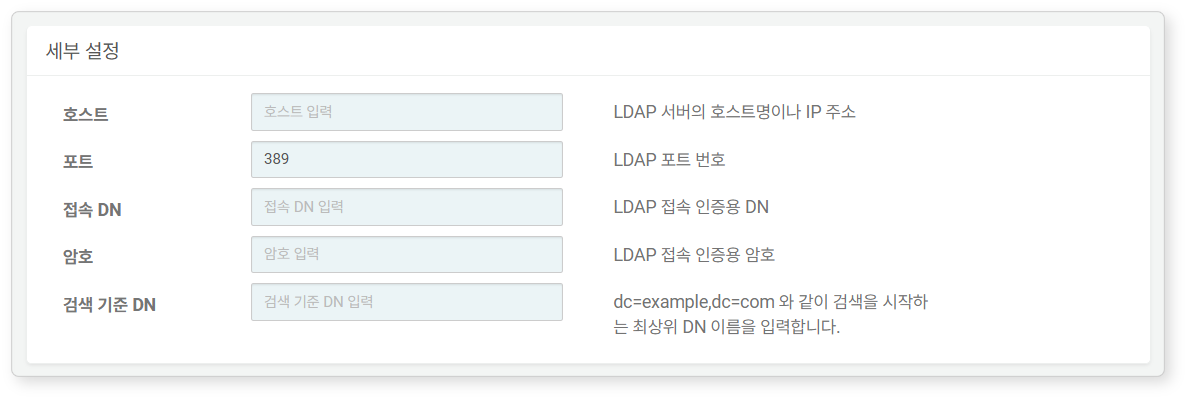
- Host: The IP address or hostname of the LDAP server to connect to.
- Port: The service port number of the LDAP server (default: 389).
- Bind DN: The DN used for authentication when accessing LDAP.
- Password: The password for authentication when accessing LDAP.
- Base DN: The top-level DN that serves as the basis for searches.
SNMPv3
When the connect profile type is SNMPv3, refer to the following list for detailed settings. SNMPv3 connect profiles are used with SNMP trap receivers, SNMPv3 GET collectors, and SNMPv3 interface statistics collectors.

- User Name: Enter the security user name for SNMPv3 communication.
- Authentication Protocol: Select the hash algorithm for user authentication. Choose from
MD5,SHA,SHA224,SHA256,SHA384,SHA512(optional). - Authentication Password: Enter the authentication passphrase for user authentication (optional).
- Encryption Protocol: Select the encryption algorithm for message encryption. Choose from
DES,AES,3DES,AES192,AES256(optional). - Encryption Key: Enter the privacy passphrase for message encryption (optional).
- NoAuthNoPriv: When neither authentication password nor encryption key is set
- AuthNoPriv: When only authentication password is set without encryption key
- AuthPriv: When both authentication password and encryption key are set
To use encryption, authentication must also be configured. Encryption key cannot be set independently.
SSH
When the connect profile type is SSH, refer to the following list for detailed settings. SSH connect profiles are used for SFTP or SSH connections.
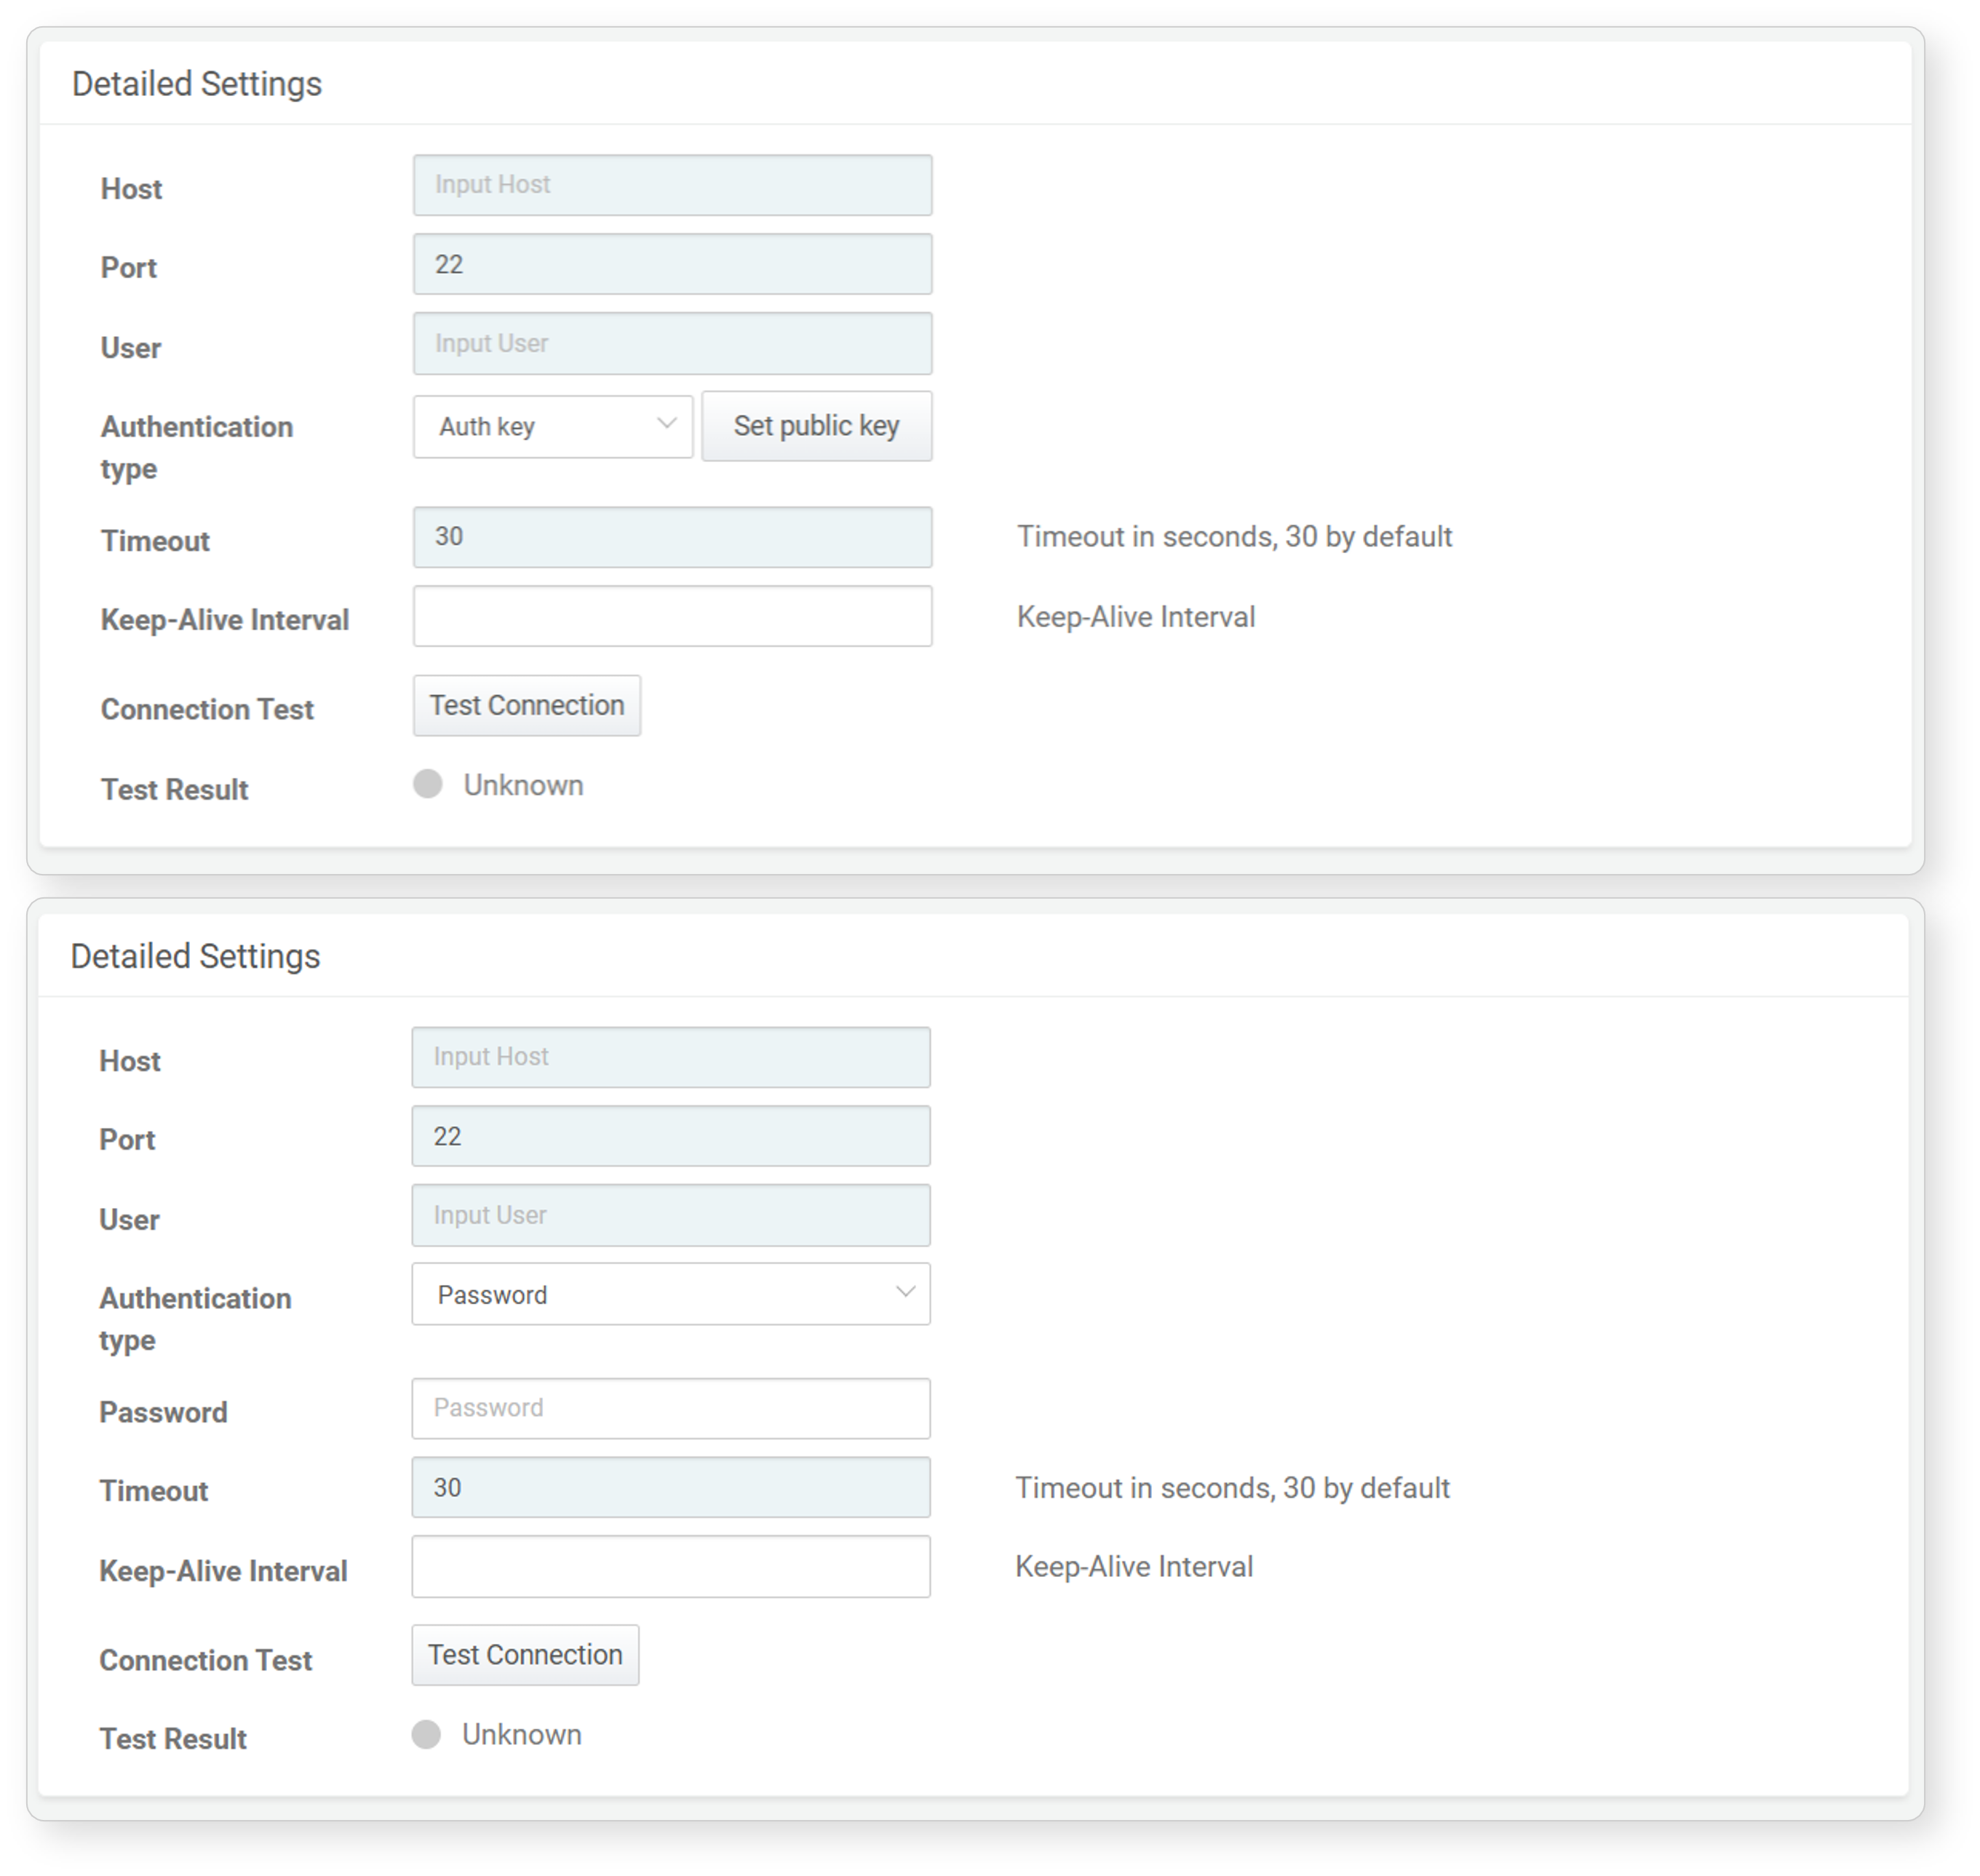
- Host: The IP address or hostname of the SSH server to connect to.
- Port: The service port number of the SSH server (default: 22).
- User: The account ID to log in to the SSH server.
- Authentication Type: Choose between Authentication Key or Password (default: Authentication Key).
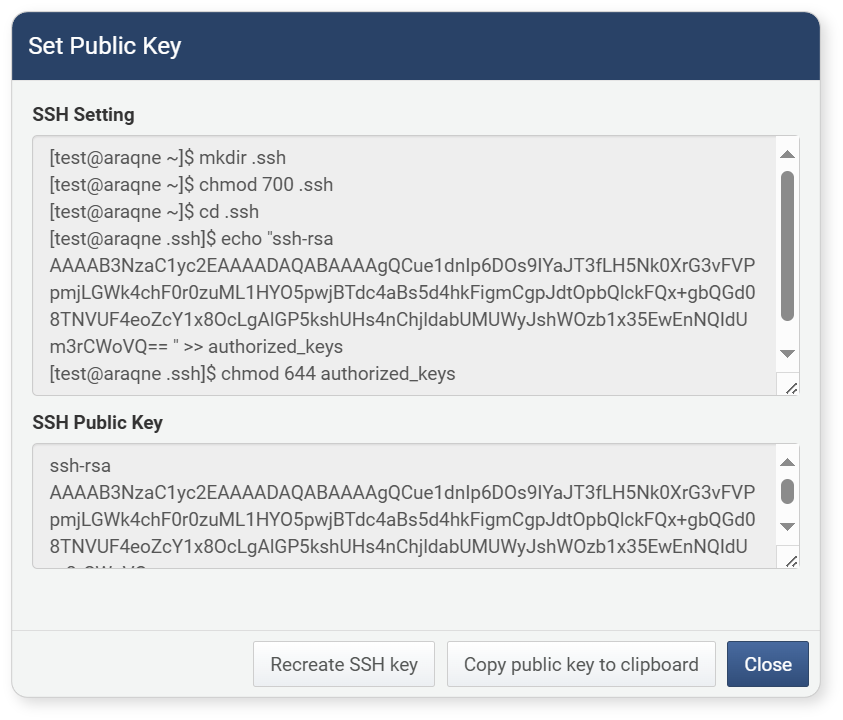
- If Authentication Key is selected, click Set Public Key and use the Copy Public Key to Clipboard option in the dialog to copy the SSH public key to the clipboard. If SSH key renewal or replacement is needed, click Regenerate SSH Key.
- If Password is selected, enter the password for the login account.
- If Authentication Key is selected, click Set Public Key and use the Copy Public Key to Clipboard option in the dialog to copy the SSH public key to the clipboard. If SSH key renewal or replacement is needed, click Regenerate SSH Key.
- Timeout: Connection wait time (default: 30 seconds).
- Keep-Alive Interval: The interval for sending keep-alive packets (default: none). Enter
0or leave it unspecified to not send keep-alive packets.
TAXII
When the connect profile type is TAXII, refer to the following list for detailed settings.
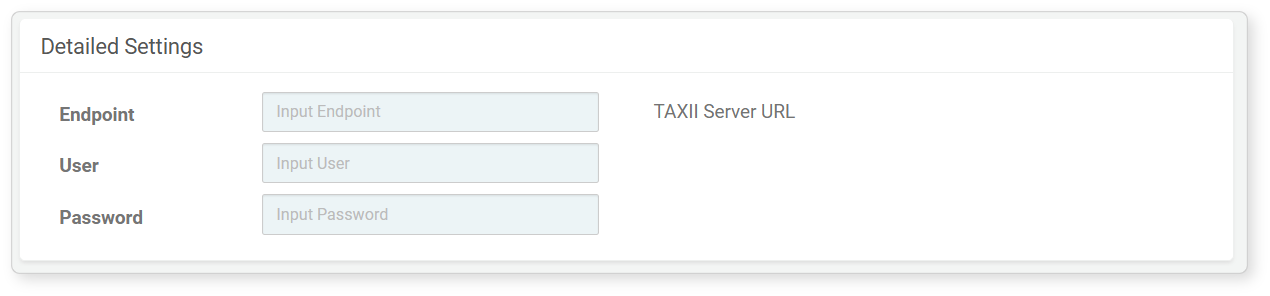
- Endpoint: The URL of the TAXII server to connect to (e.g., https://otx.example.com).
- User: The account ID to log in to the TAXII service.
- Password: The password for authentication when accessing the TAXII service.
Database
When the connect profile type is Database, refer to the following list for detailed settings.
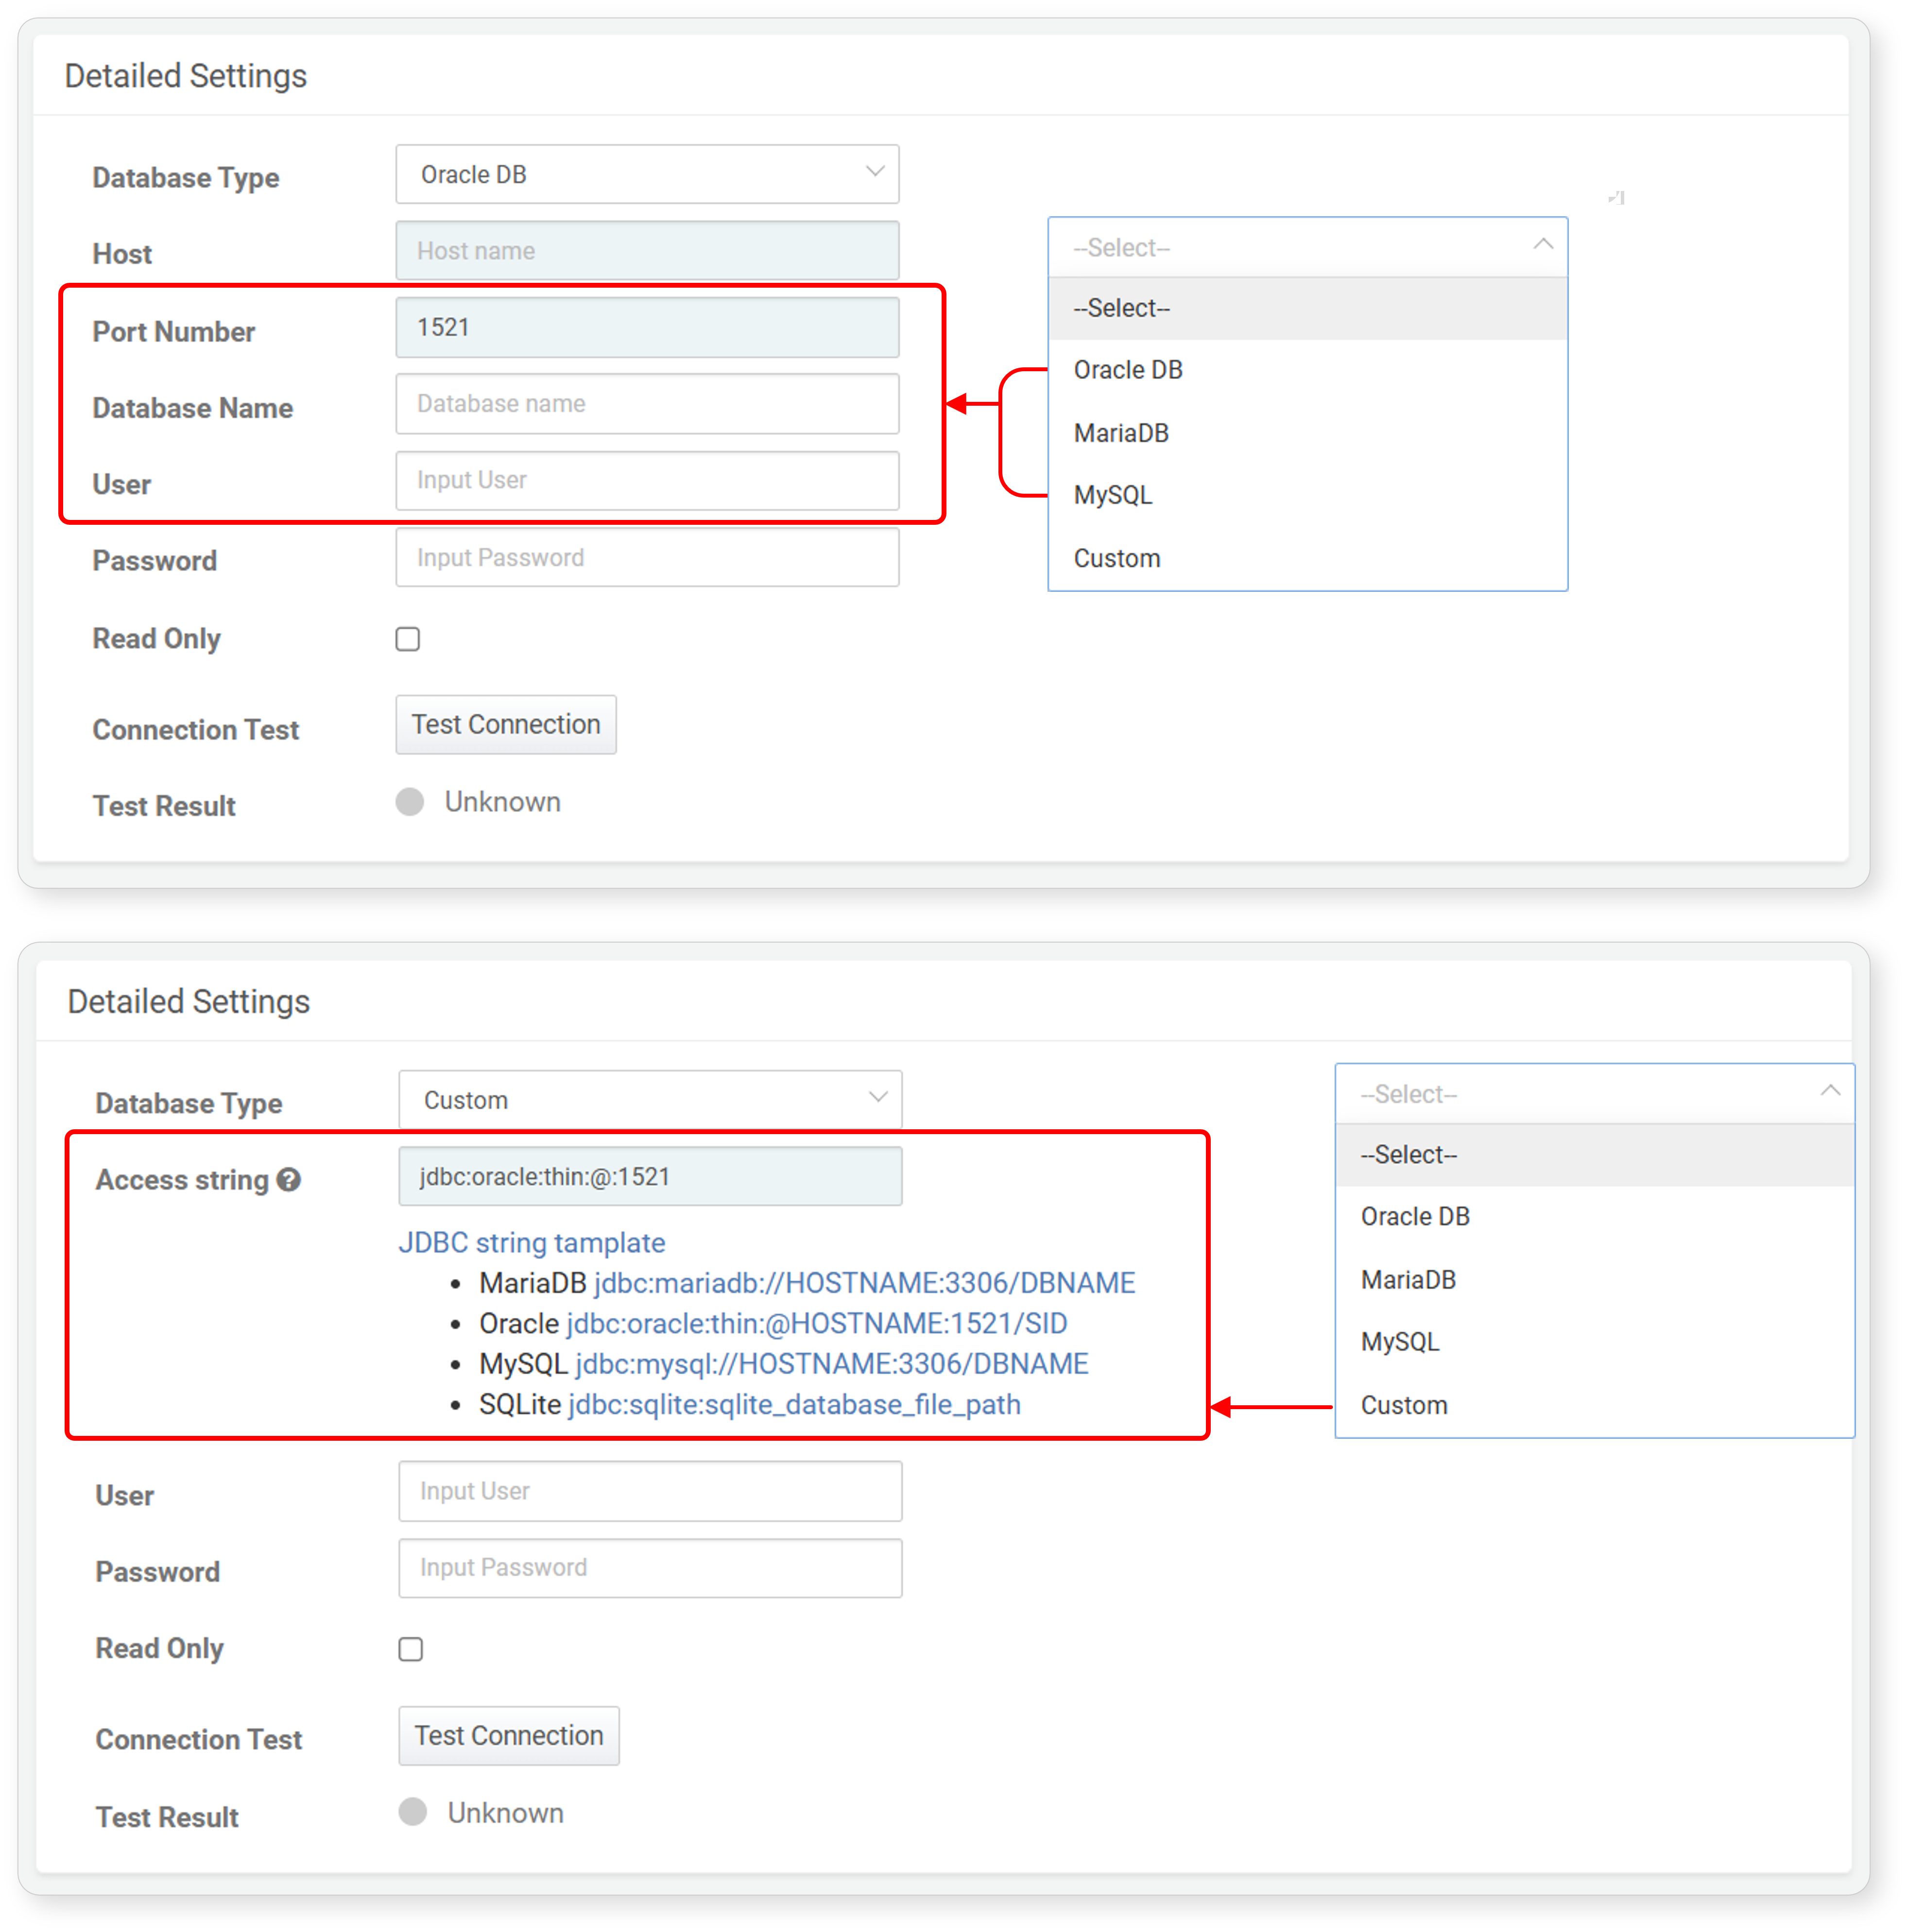
- Database Type: Select the type of database to connect to from the list (default: none). The database list includes Oracle DB, MariaDB, MySQL, and Custom by default. If a JDBC driver is installed via an app, it can be selected from this list.
- To specify a JDBC connection string directly, select Custom.
- To connect to SQLite, select Custom.
- Host: The IP address or hostname of the database server.
- Port Number: The service port number of the database server. The default port number is automatically assigned based on the selected database type. Users can change the default port number.
- Database Name: The name of the database to connect to. If unspecified, it connects to all databases on the database server.
- Connection String: (When Custom is selected in Database Type) Enter the JDBC string directly. Clicking JDBC String Template will show example strings to input. Clicking any example string will automatically fill it in the input field. Modify the filled string as needed.
- User: The database account ID.
- Password: The password for the database account.
- Read-Only: Whether the database connection is read-only (default: unchecked).
Logpresso CTI
When the connect profile type is Logpresso CTI, refer to the following list for detailed settings.

- API Key: The API key required for using Logpresso CTI.
- HTTP Proxy: The IP and port of the HTTP proxy server.
Logpresso AI Assistant
When the connect profile type is Logpresso AI Assistant, refer to the following list for detailed settings.

- API Key: The API key required for using Logpresso AI Assistant.
- HTTP Proxy: The IP and port of the HTTP proxy server.
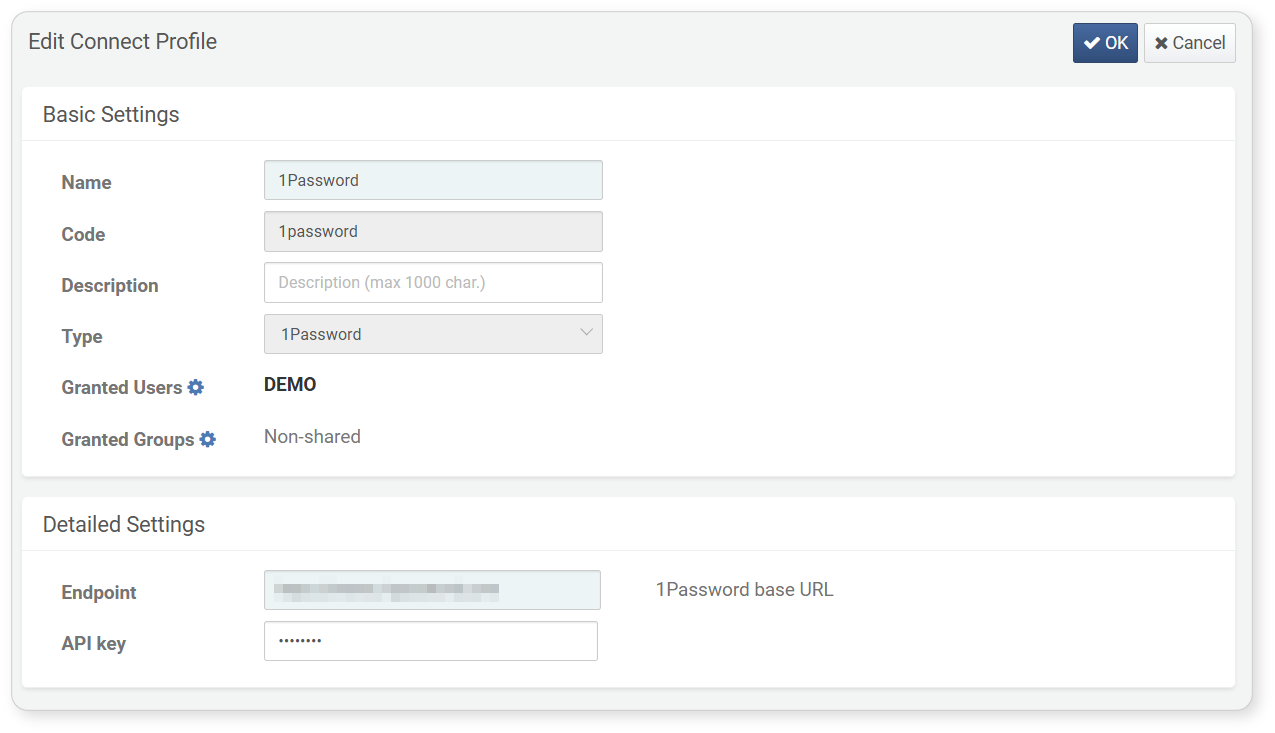
Edit Connect Profile
To modify a connect profile:
- Click the Name of the connect profile you wish to modify in Settings > Connect Profiles.
- In the Edit Connect Profile screen, modify the properties of the connect profile and click OK. The Identifier and Type properties cannot be modified. For descriptions of the properties that can be modified, refer to Add Connect Profile.
Delete Connect Profile
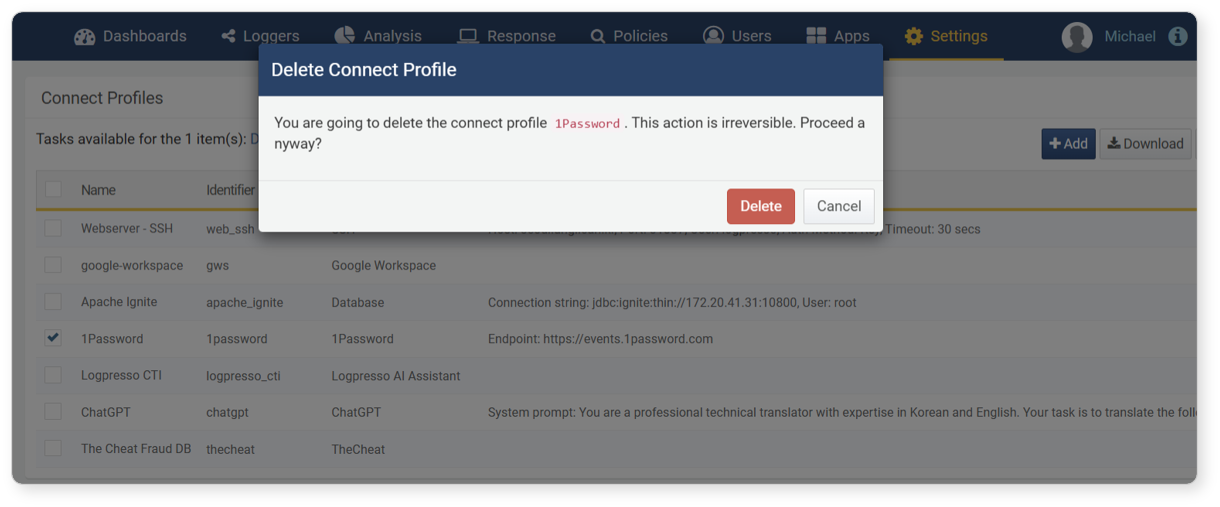
To delete a connect profile:
- Select the checkbox of the connect profile you wish to delete in Settings > Connect Profiles.
- Click Delete in the toolbar.
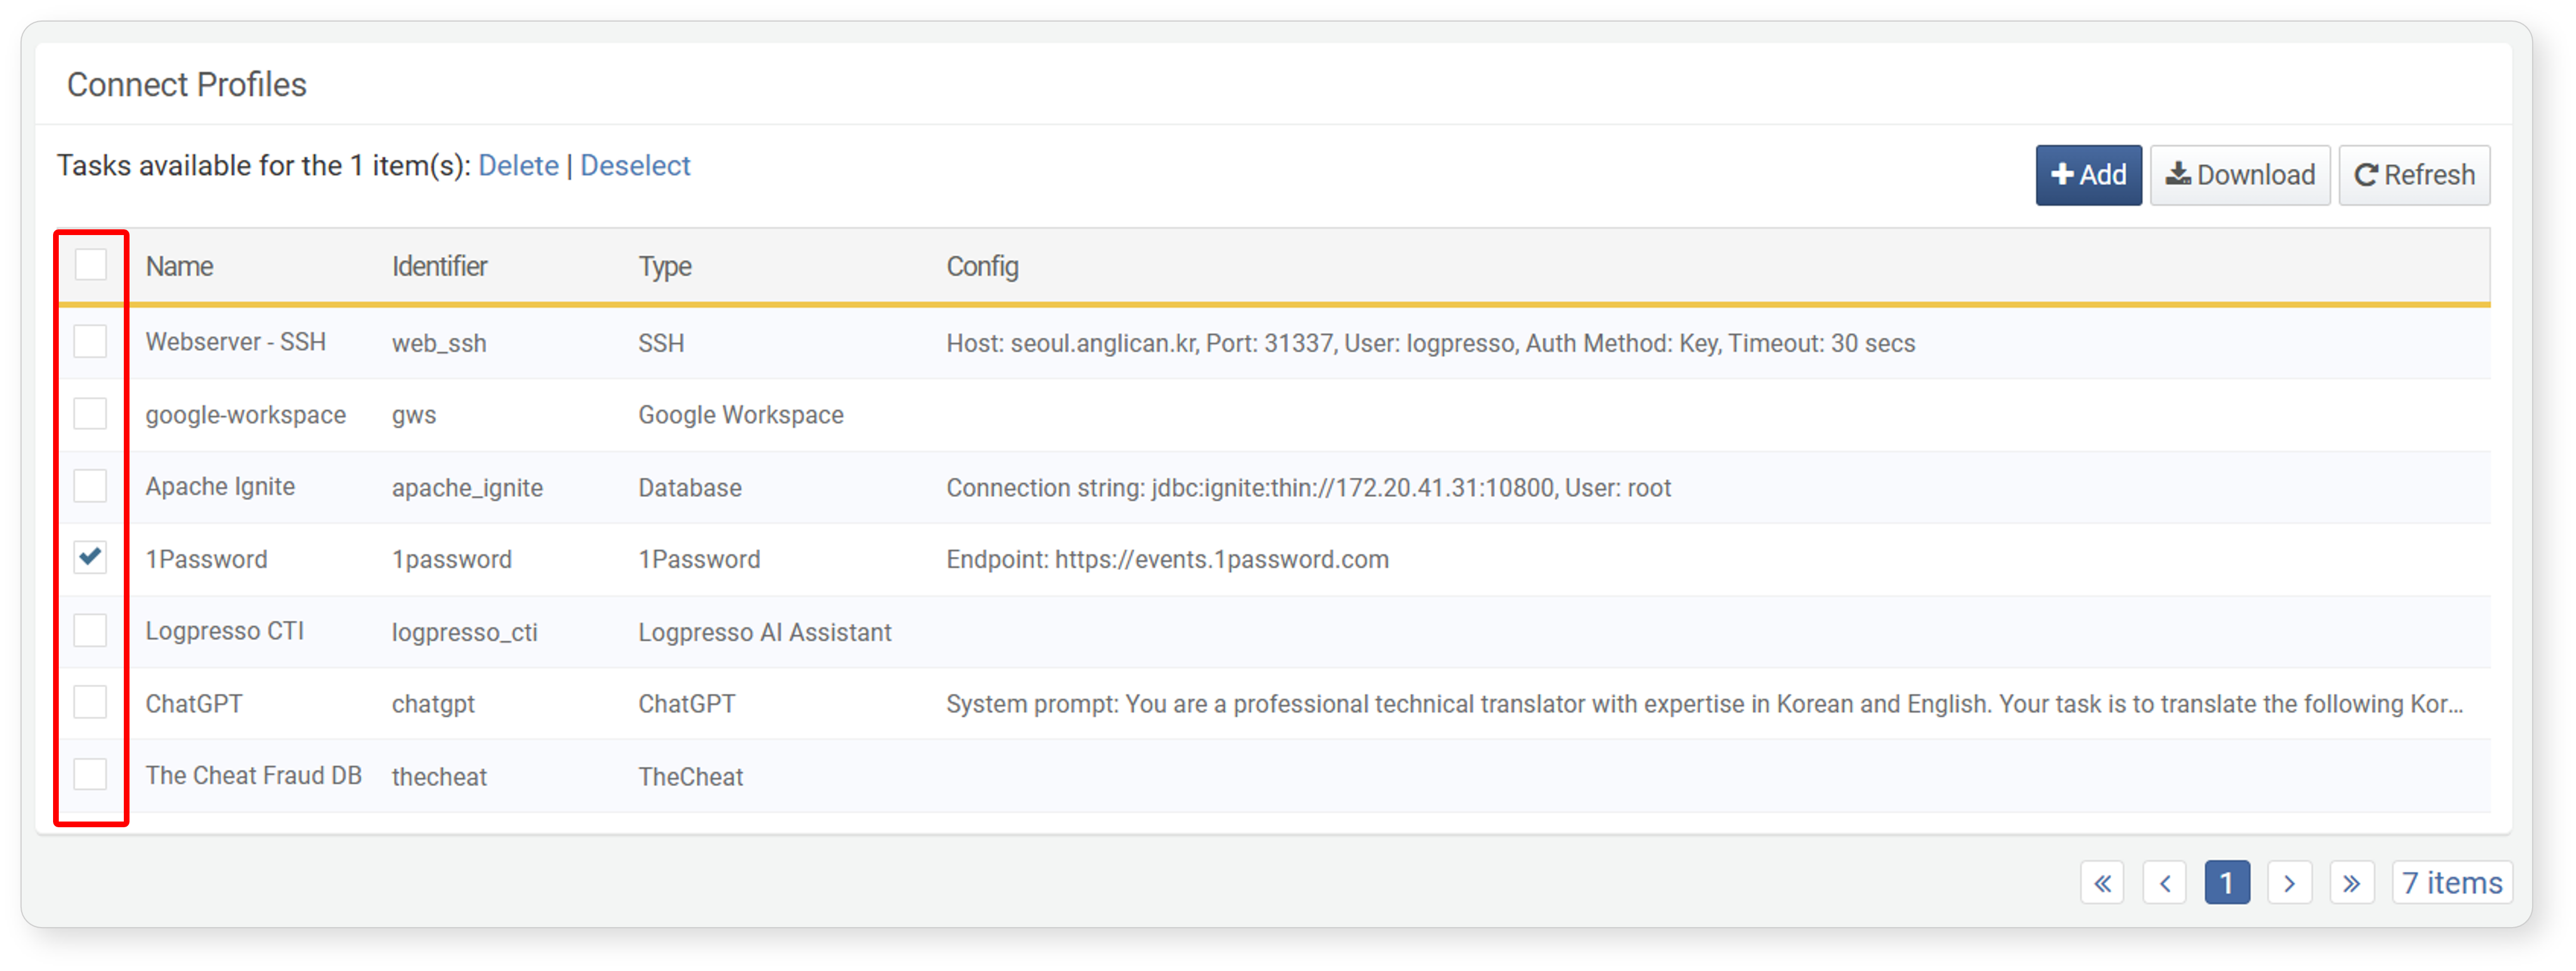
- In the Delete Connect Profile dialog, review the list of connect profiles to be deleted and click Delete. Click Cancel if you do not wish to delete.