Subnet Groups
Overview
Subnets can be managed in groups and applied to detection policies. Typically, subnet groups are used to define subnets, monitor network boundary activities, or handle policy exceptions.
Search Subnet Group
You can view the subnet group list in Policy > Subnet Groups.
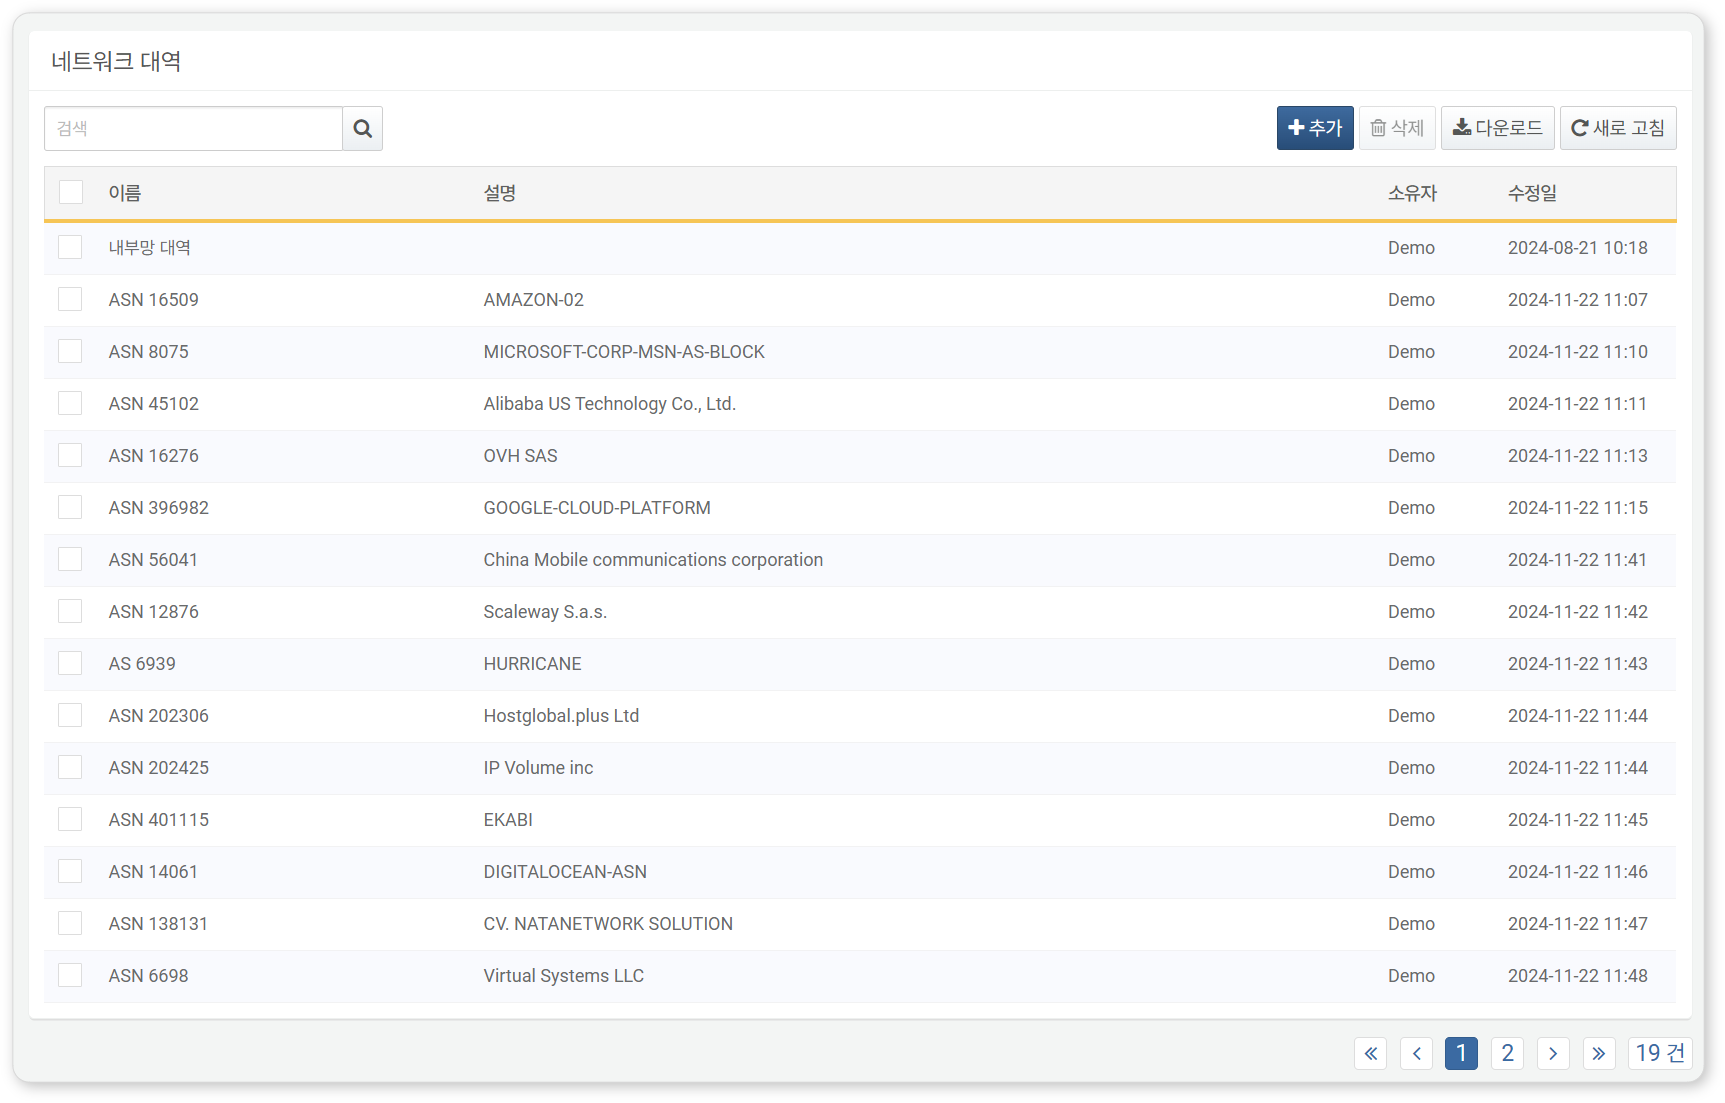
- Name: Unique name of the subnet group
- Description: Description of the subnet group
- Owner: User account that added the subnet group
- Modified At: Date the subnet group was created or last modified
Download Subnet Group List
To download the subnet group list as a file to your local PC, click Download in the toolbar.
Refresh Subnet Group List
To update the subnet group list with the latest information, click Refresh in the toolbar.
Search Subnet In Subnet Group
In the Edit Subnet Group screen, use the search tool in the toolbar. You can search using a combination of a single IP address, whitespace characters, and keywords. The search behavior varies depending on whitespace usage, as follows:
If the search term does not contain whitespace character:
- IP address only: Displays subnets that include the entered IP address.
- Keyword only: Displays subnets where the Name or Description contains the keyword.
If the search term contains one or more whitespace characters:
- IP address and keyword: Displays subnets that contain the IP address and where the Name or Description contains the keyword. Only one IP address can be used as a search term.
- Multiple keywords: Displays subnets where the Name or Description contains all the keywords.
The search is not case-sensitive.
Add Subnet Group
To add a subnet group:
-
In the subnet group list, click Add in the toolbar.
-
In the Add Subnet Group dialog box, enter or select the required values, then click OK.
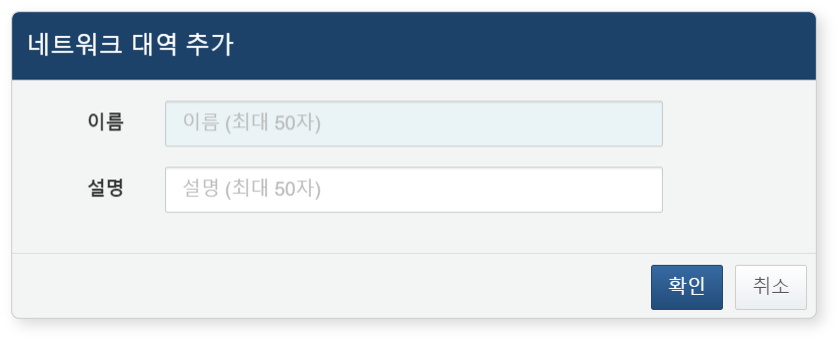
- Name: Unique name for the subnet group (up to 50 characters)
- Description: Description of the subnet group (up to 50 characters)
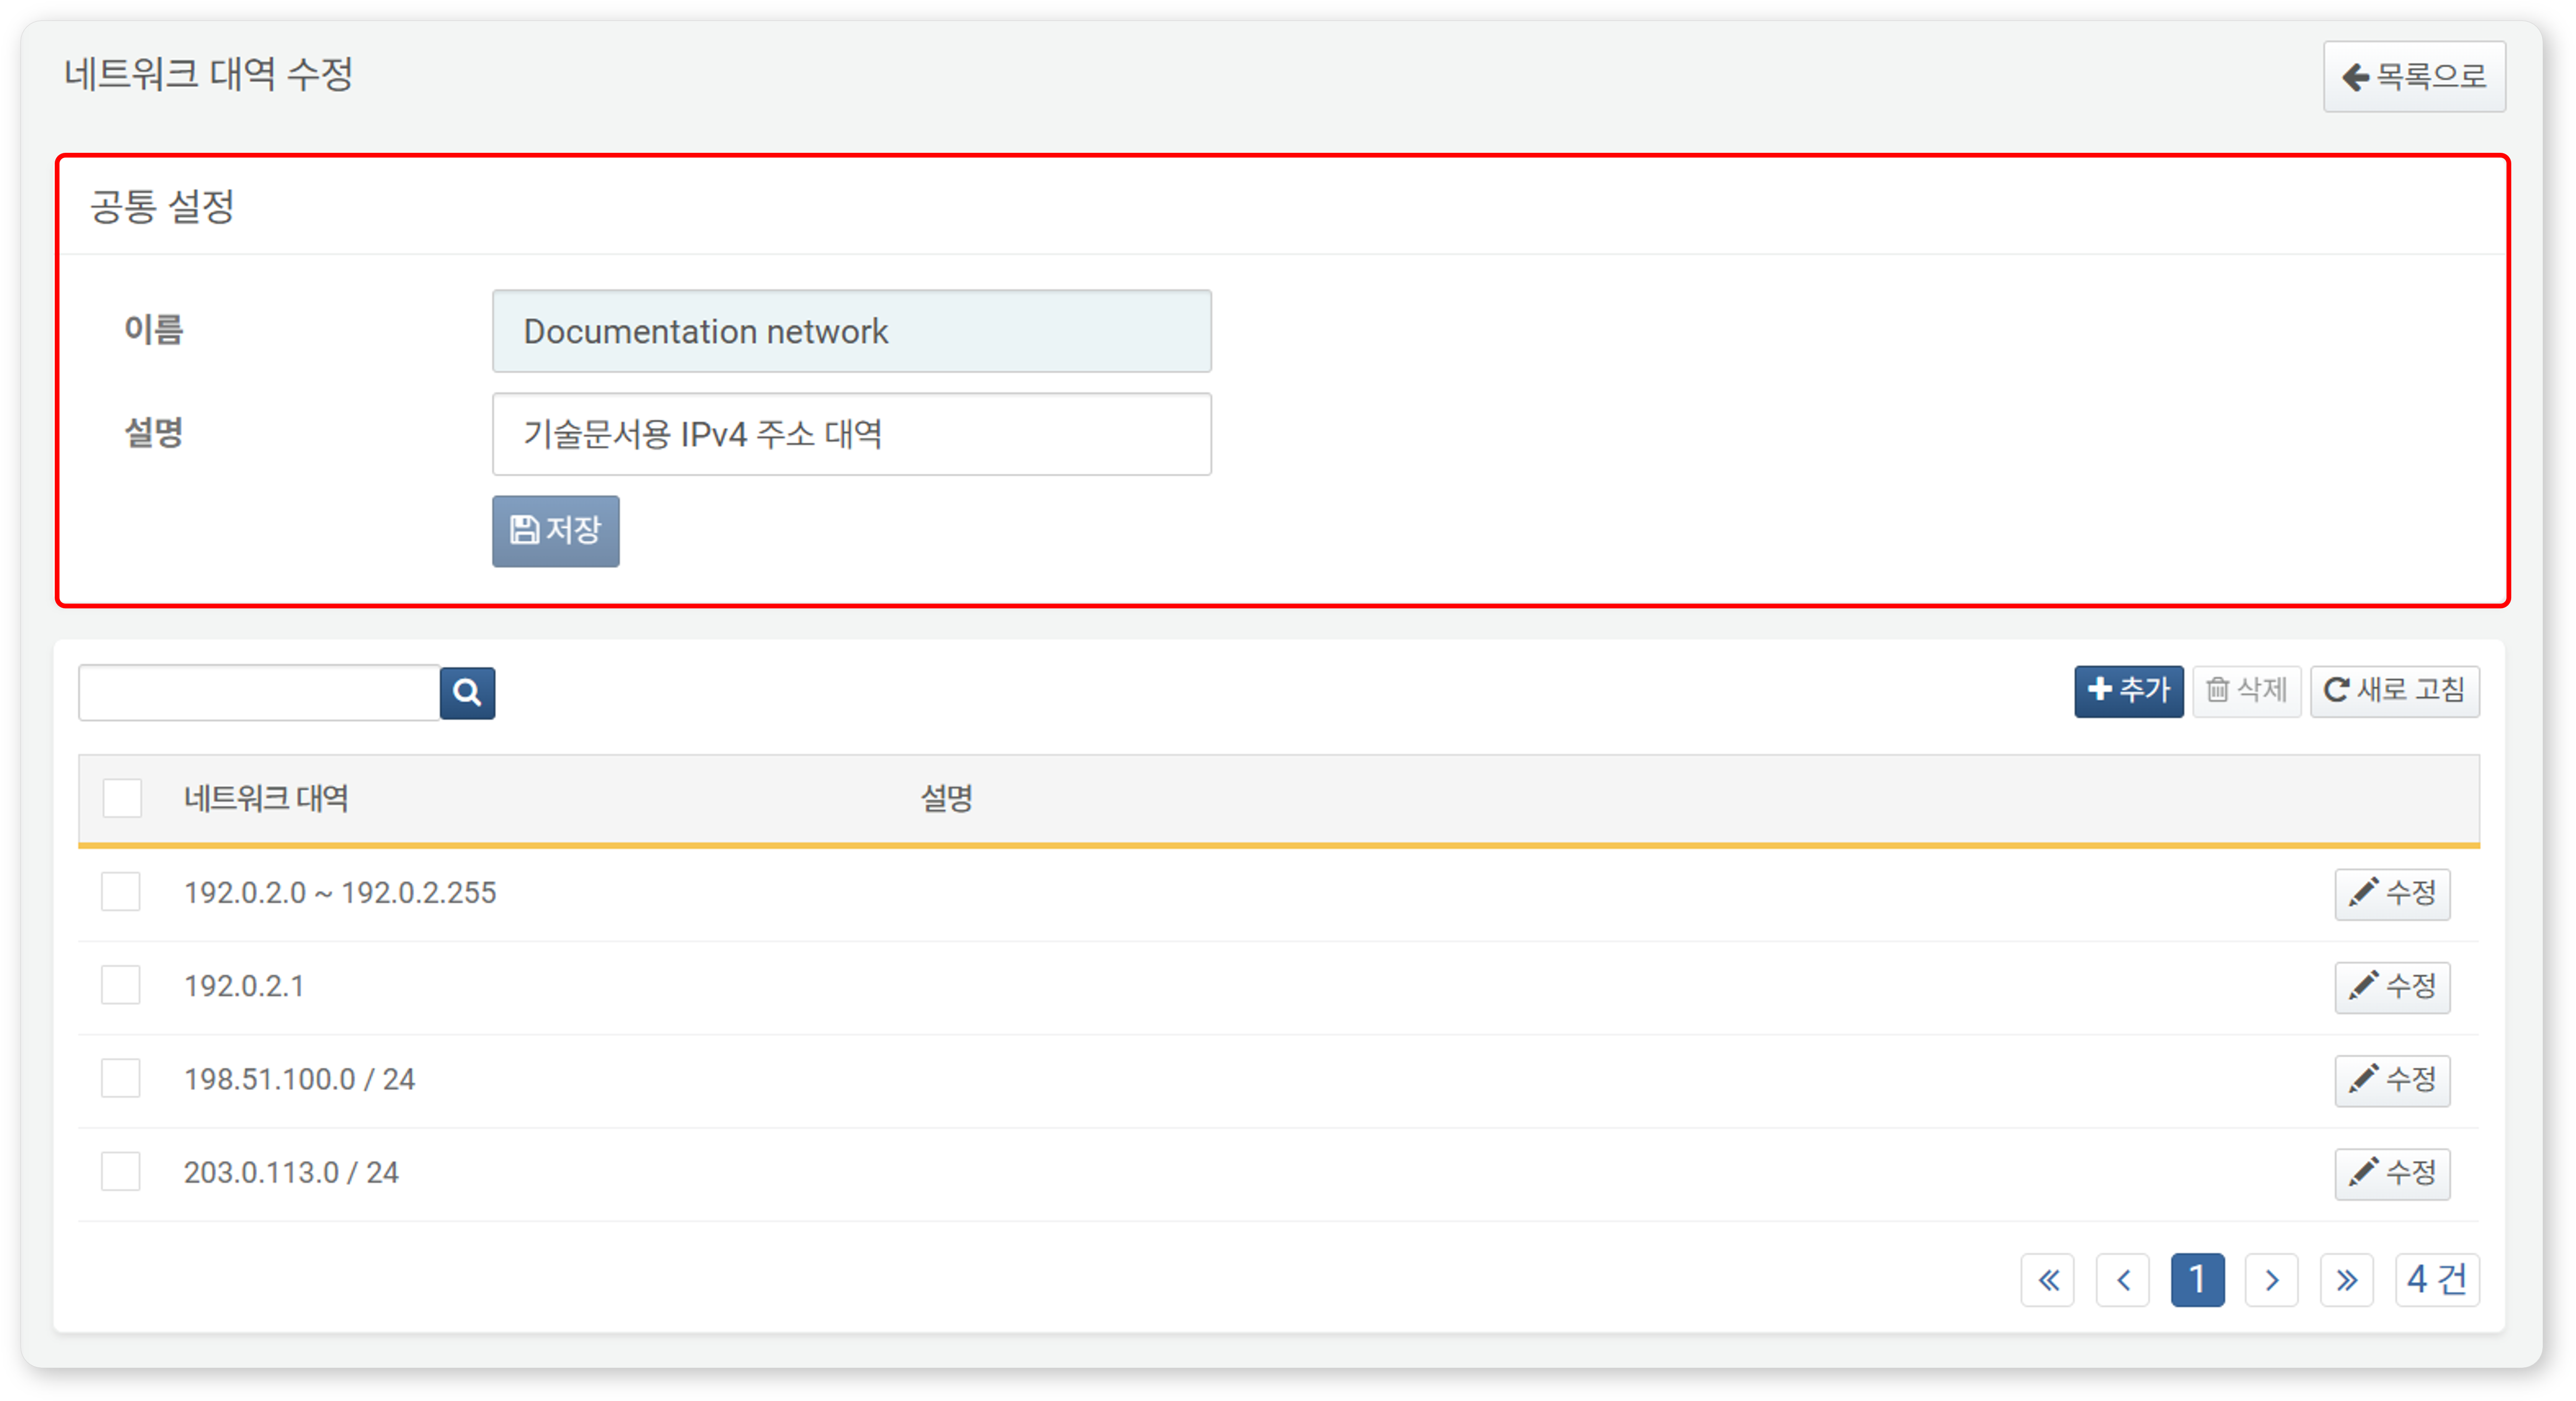
Edit Subnet group
To edit a subnet group:
-
In the subnet group list, click the Name of the subnet group you want to edit.
-
In the Edit Subnet Group screen, modify the information and click Save.
Search Subnet In Subnet Group
In the Edit Subnet Group screen, you can check registered subnets.
- Subnet: Displays subnet information
- A single IP (e.g., 192.0.2.1)
- An IP range (e.g., 192.0.2.1 ~ 192.0.2.254)
- A CIDR block (e.g., 192.0.2.0/24)
- Description: Detailed description of the IP address
The Edit Subnet Group page also supports search functionality, which follows the same rules described in Search Subnet Group. However, there are some differences:
- The search is limited to IP addresses within the selected subnet group.
- Since subnets do not have a Name, only subnets with descriptions that contain the search term will be displayed.
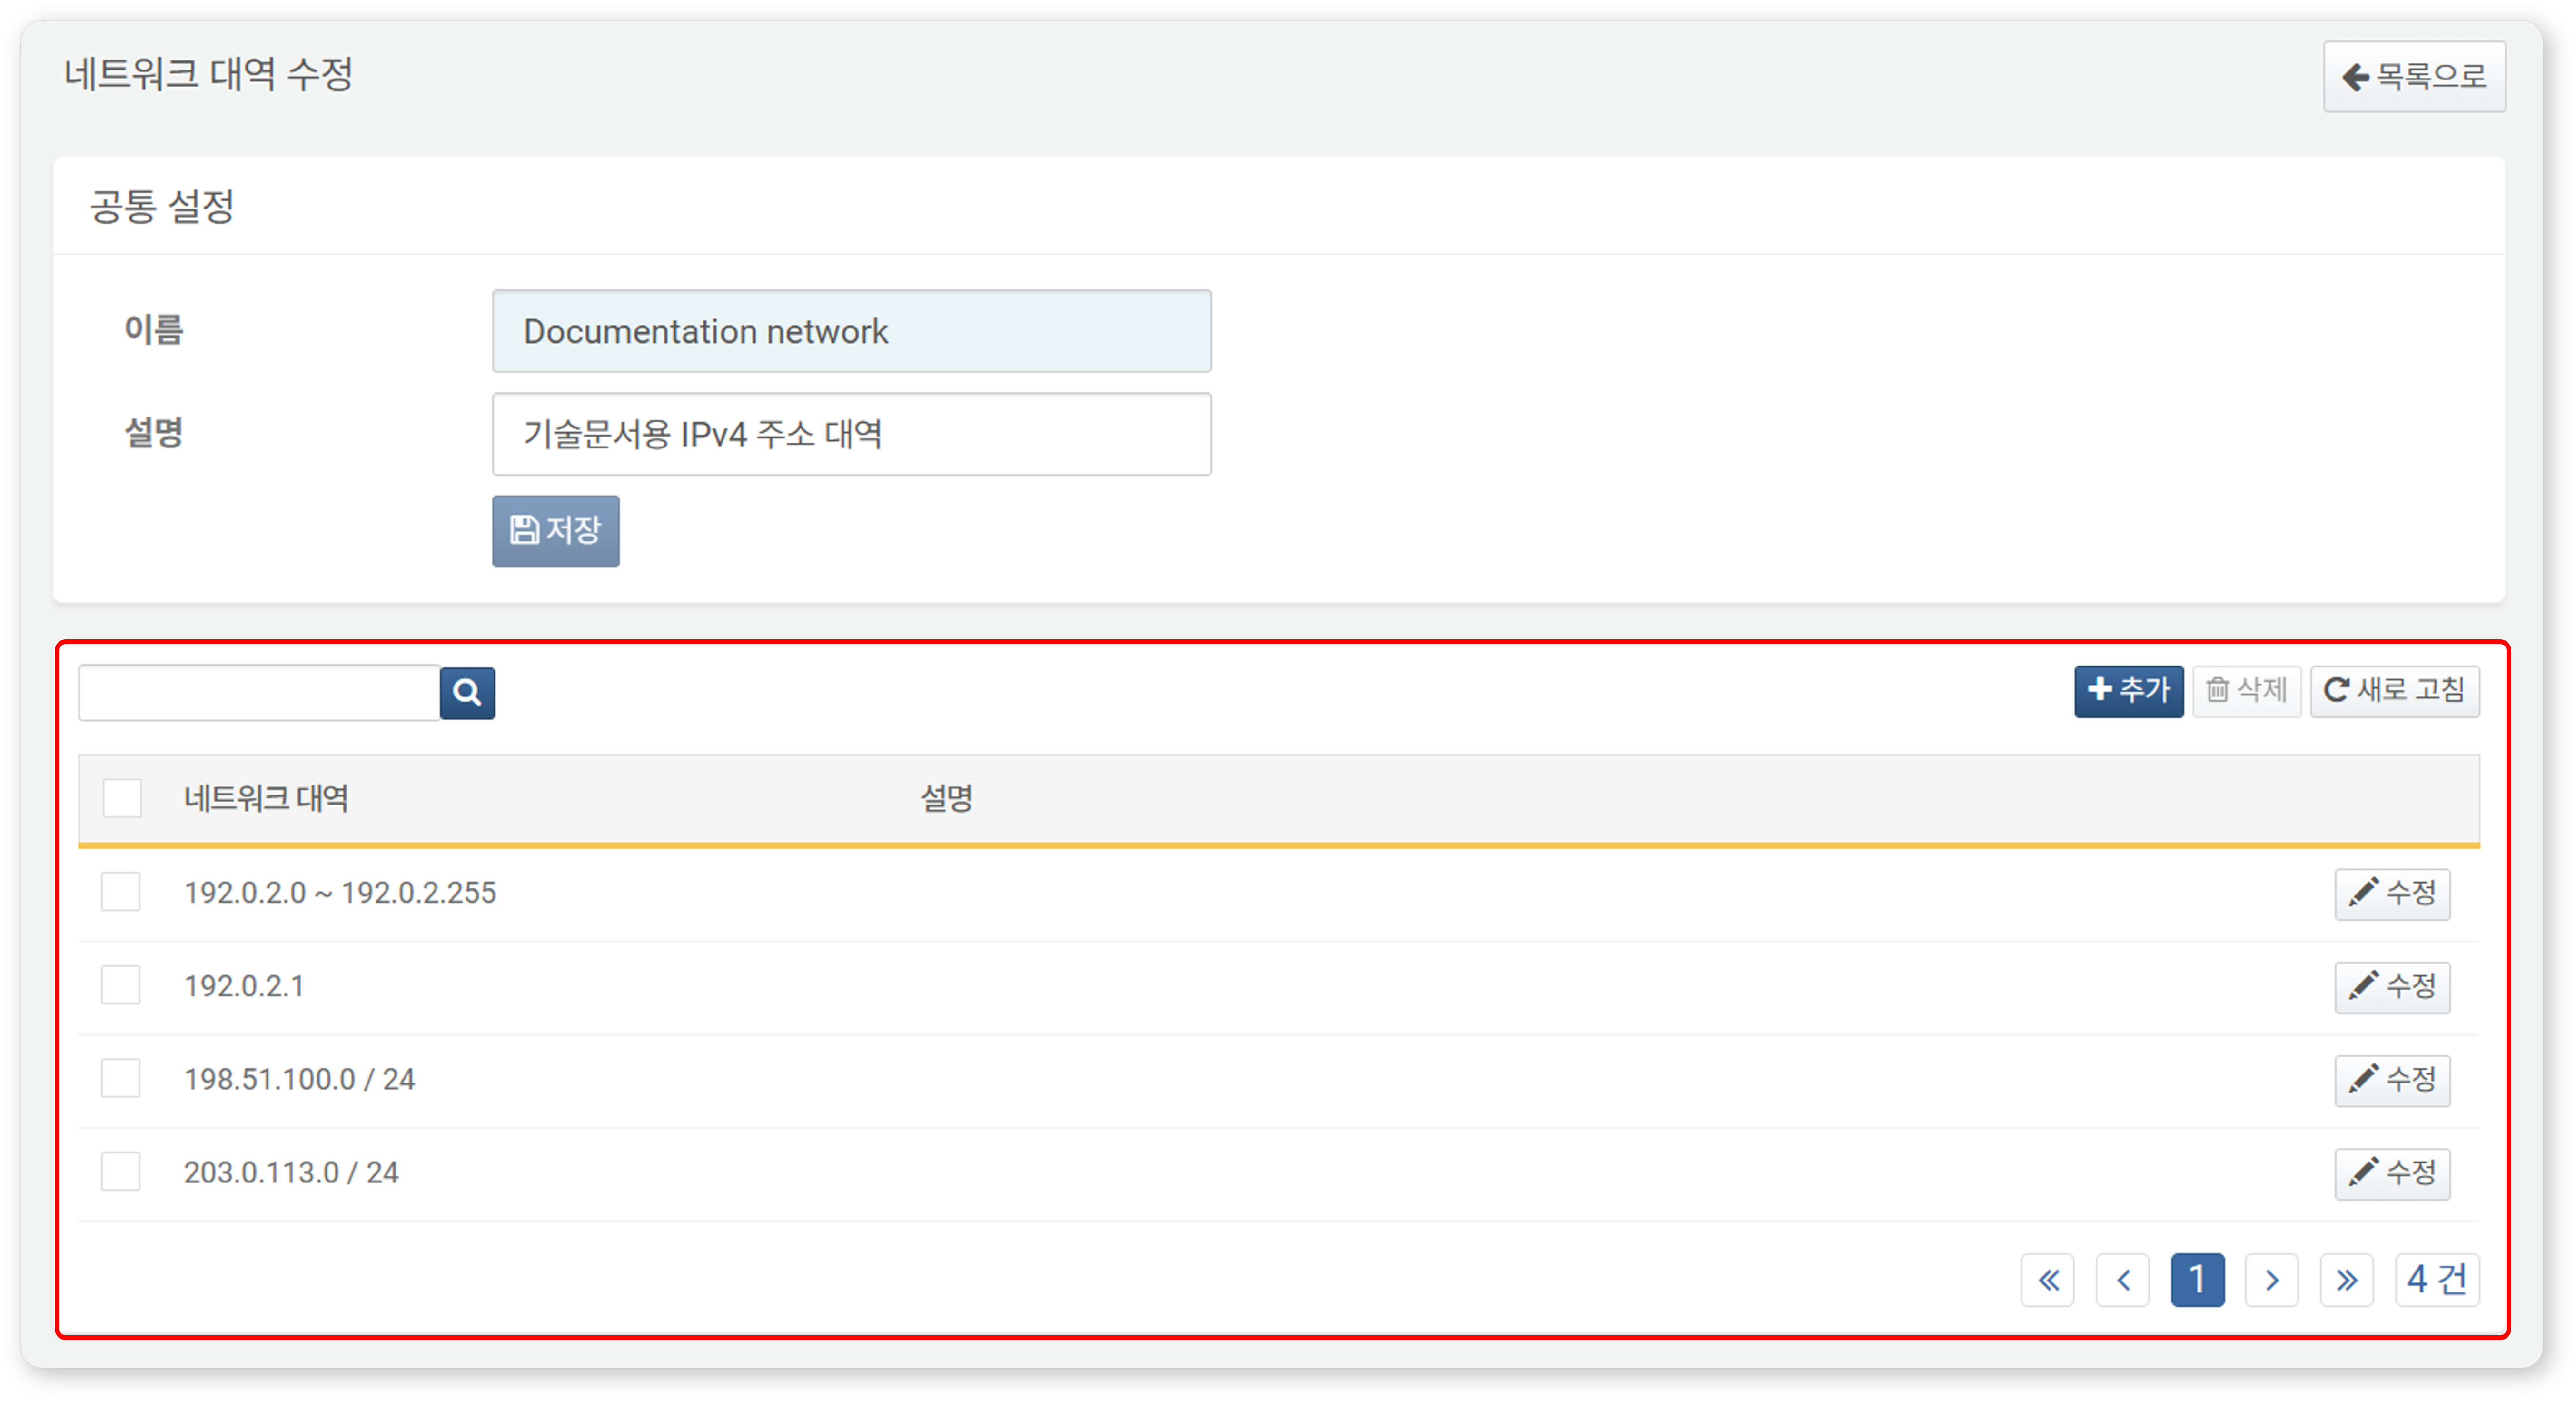
Add Subnet to Subnet Group
To add a subnet to a subnet group:
- In the Edit Subnet Group screen, click Add in the toolbar.
- In the Add Subnet dialog box, enter the network information, then click OK. The fields to be entered will vary depending on the selected network type (IP Address Range, Single IP Address, CIDR).
-
When the Type is IP Range:
- From: The first IPv4 address of the network range
- To: The last IPv4 address of the network range
-
When the Type is Single IP Addr.:
- IP Address: The IPv4 address
-
When the Type is CIDR:
- Network Address: The network address, excluding the host address part of the IPv4 address.
- (Subnet Mask) Bits: The subnet mask bits for the network address (1-32)
-
Description: A detailed description of the network (up to 255 characters)
Edit Subnet
To edit a subnet registered in a subnet group:
- In the Edit Subnet Group screen, click Edit in the row of the subnet you want to edit.
- In the Edit subnet dialog box, update the information and click OK.
Delete Subnet
To delete a subnet registered in a subnet group:
- In the Edit Subnet Group screen, select the checkbox for the network you want to delete.
- Click Delete in the toolbar.
- In the Delete Subnet dialog box, review the list of networks to be deleted, then click Delete to confirm. To cancel, click Cancel.
Using Subnet Group
Subnet groups can be used in the following ways:
Scenario Builder
In Policy > Stream Rules, you can build a scenario to check whether a suspicious IP address is already registered in an address group.
The following table summarizes subnet-related rules available in the scenario builder when the input field type is IP. For more details, refer to Rules and Parameters by Field Type.
| Rule | Parameter | Range | Description |
|---|---|---|---|
| IP Address in subnet group | Target subnet group | Select a subnet group. | Filters field values that are included in the selected subnet group. |
Query
When adding or modifying a detection rule in Policis > Stream Rules or Policis > Batch Rules, you can use the matchnet command or matchnet() function to utilize subnet groups. Keep in mind that subnet groups can be used in any feature that supports query input.
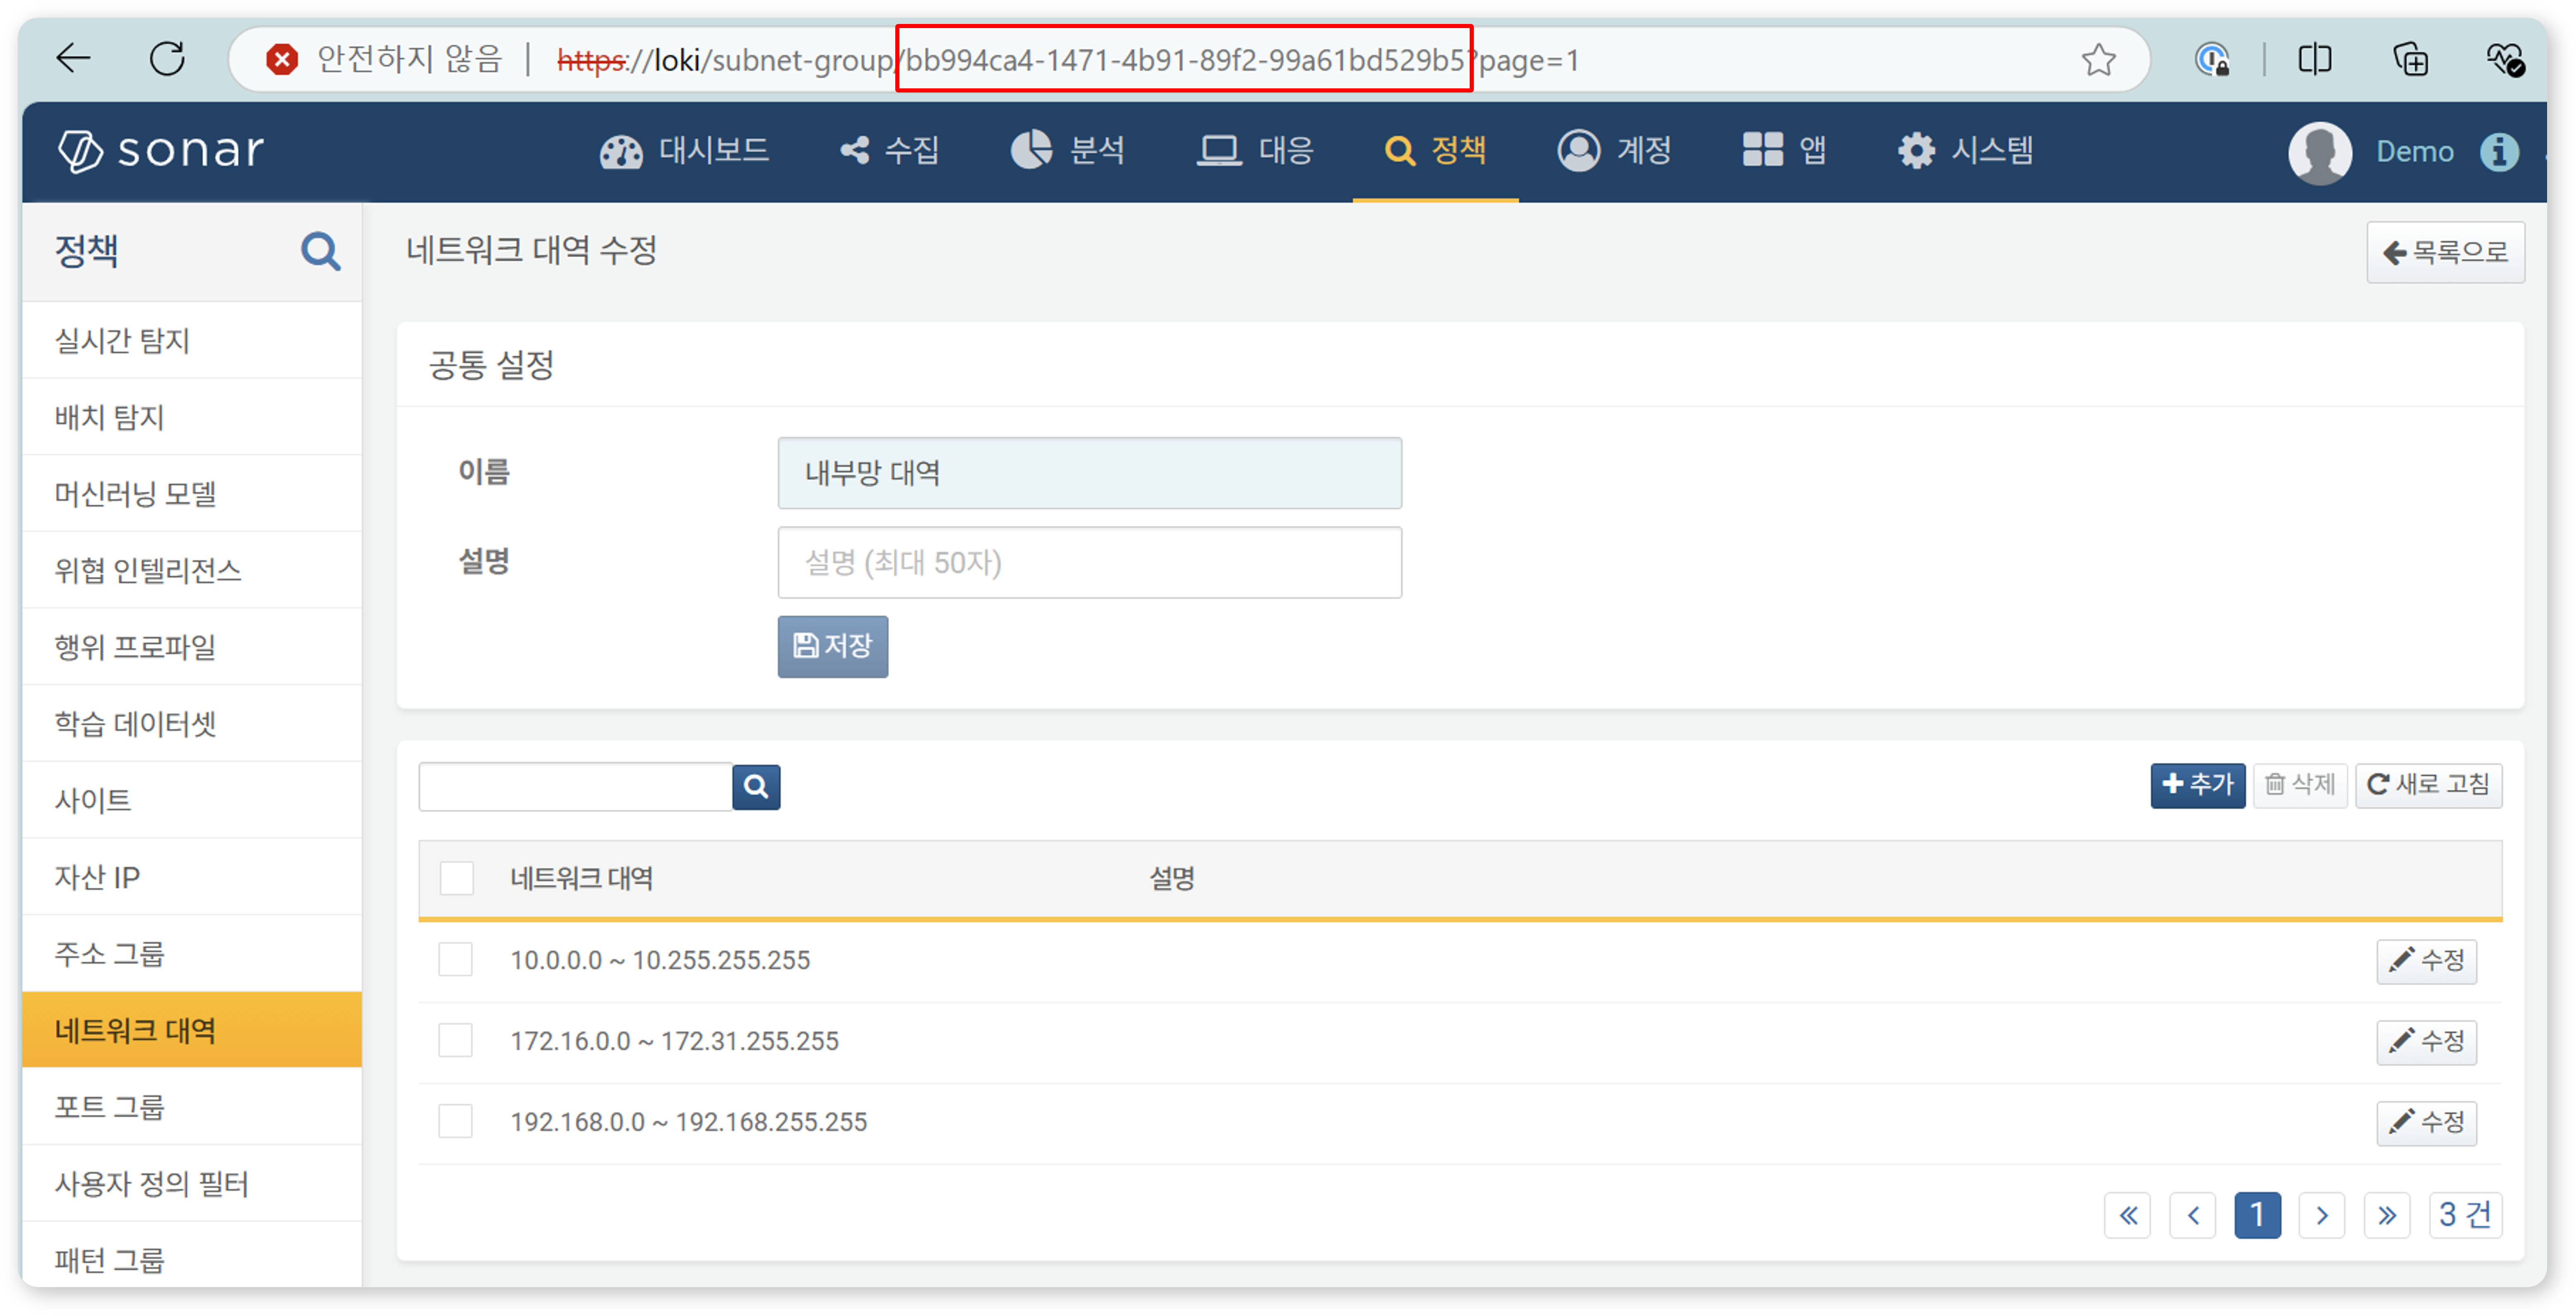
To use the matchnet command or matchnet() function, you need to know the subnet group’s GUID. The GUID can be found in the browser’s address bar.
Delete Subnet Group
To delete a subnet group:
- In the subnet group list, select the checkbox for the subnet group you want to delete.
- Click Delete in the toolbar.
- In the Delete Subnet Group dialog box, review the list of subnet groups to be deleted, then click Delete. To cancel, click Cancel.