Datasets
Overview
A dataset is used as a base data source in analytics features like pivot or dashboard widgets that require periodic data updates.
Dataset Creation
The core of a dataset is the Logpresso query used to retrieve and process data. Because datasets are typically used to retrieve time-bounded data, dataset queries often begin with the table or fulltext command using the duration option, followed by the schema command to apply a log schema.
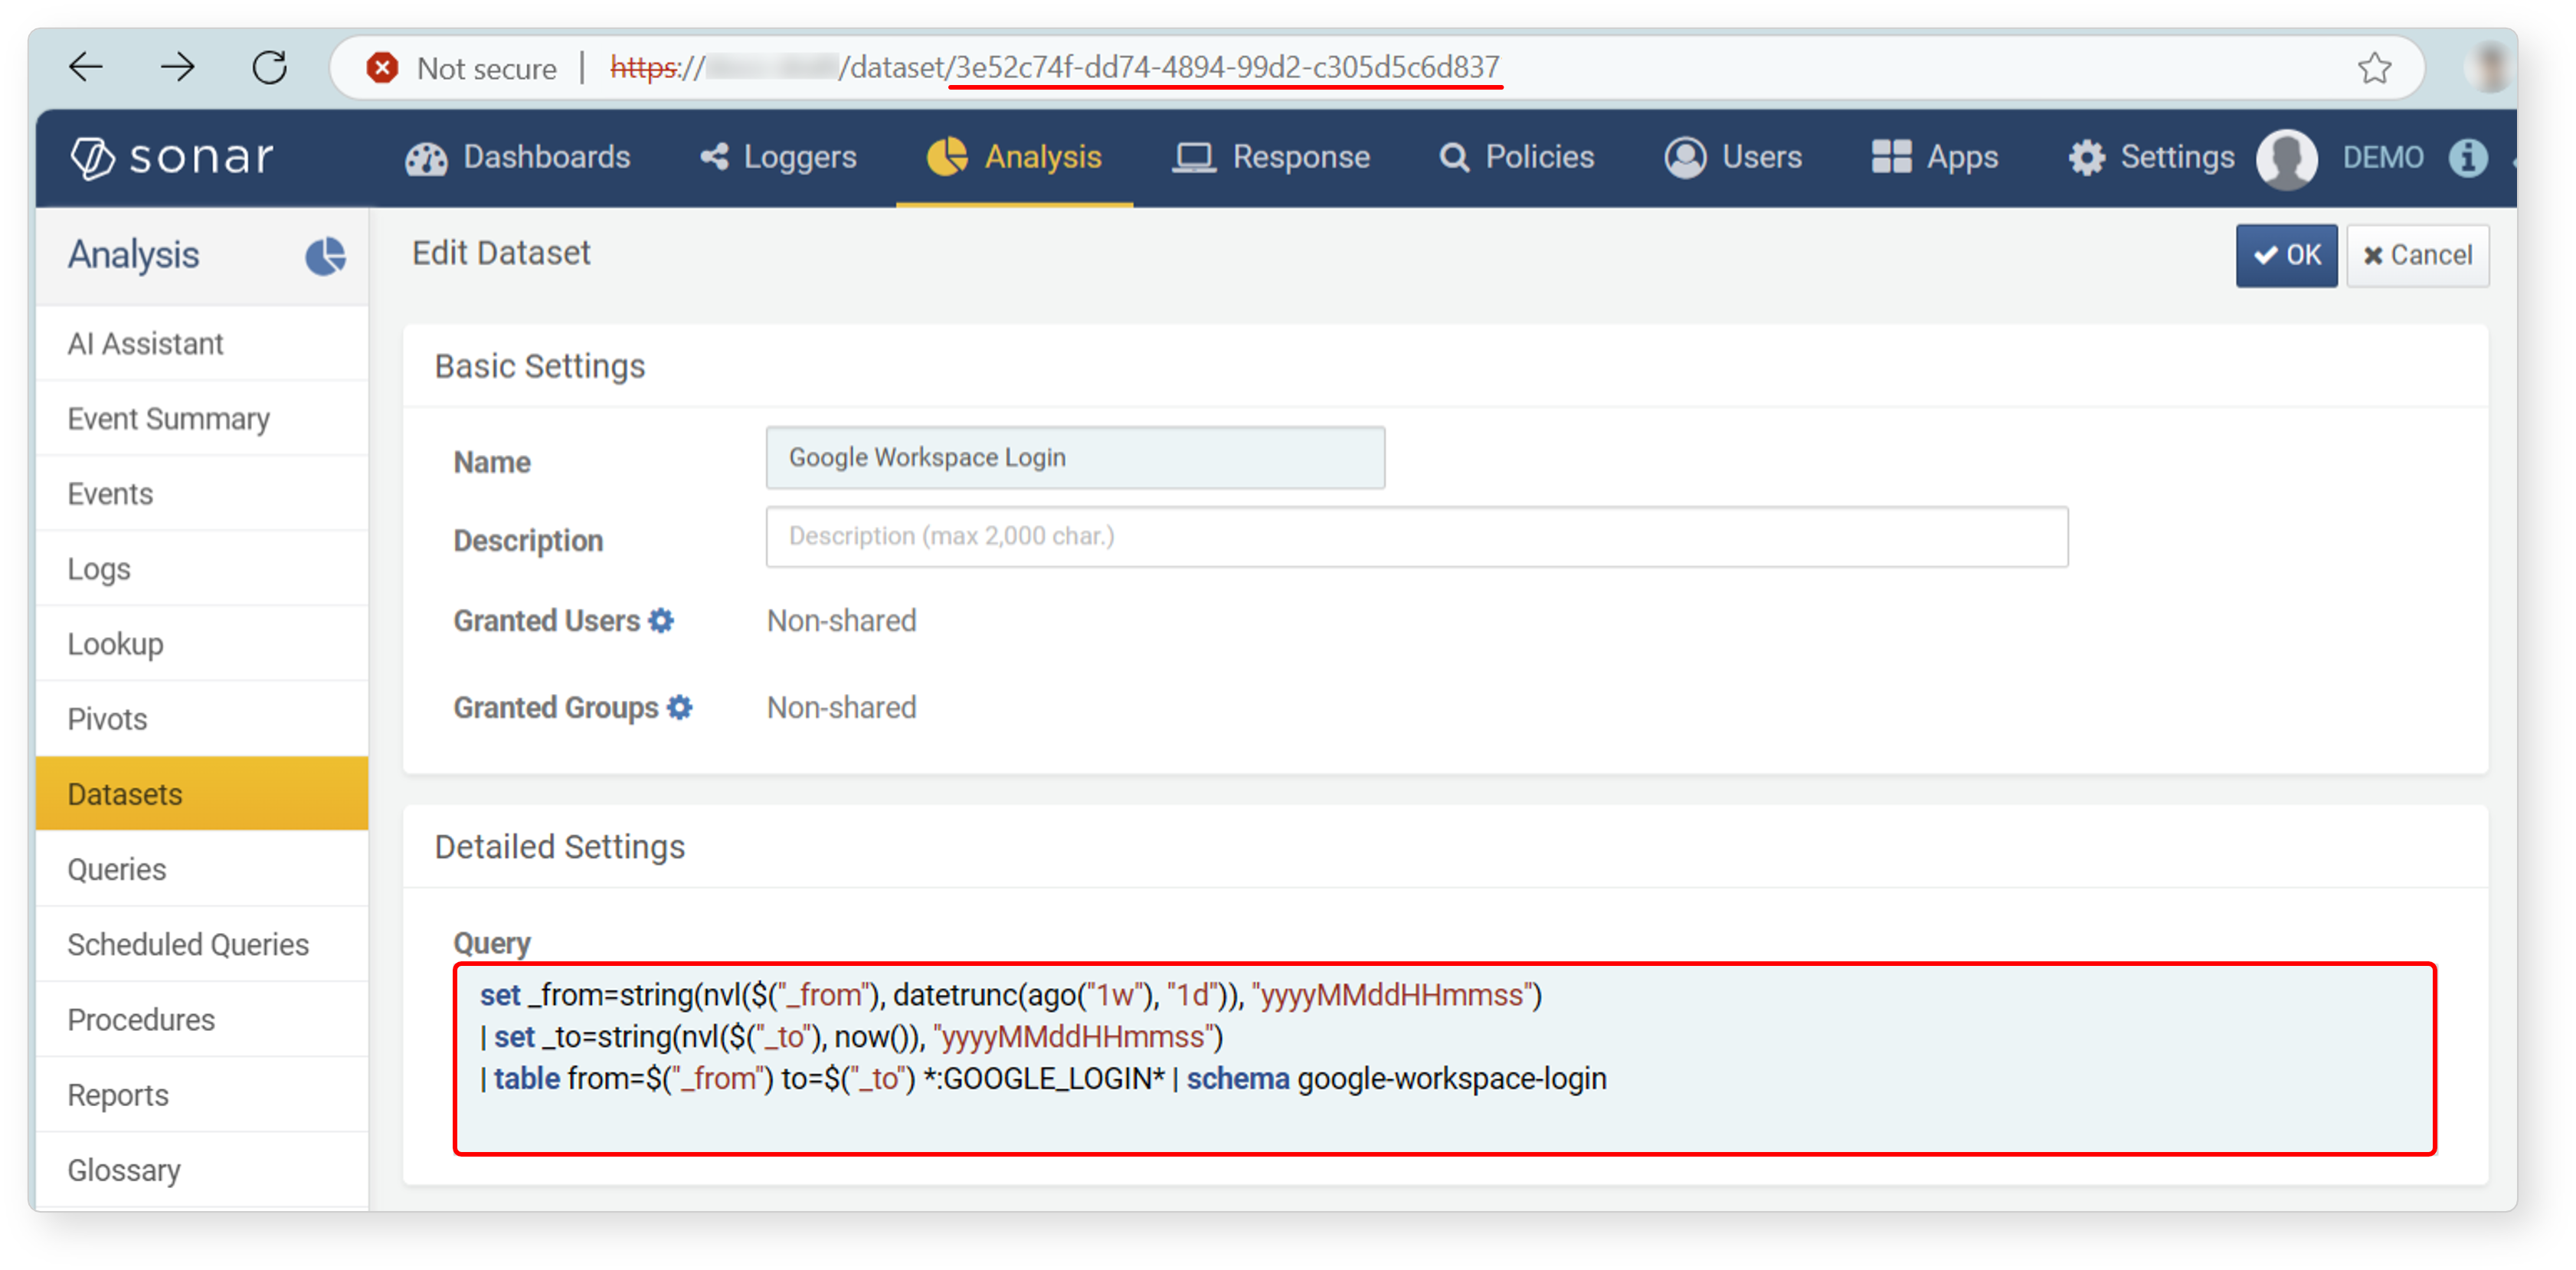
Below is the query used in the Google Workspace Login dataset, which is included with the Google Workspace app (version 1.7.2504.0):
set _from=string(nvl($("_from"), datetrunc(ago("1w"), "1d")), "yyyyMMddHHmmss")
| set _to=string(nvl($("_to"), now()), "yyyyMMddHHmmss")
| table from=$("_from") to=$("_to") *:GOOGLE_LOGIN* | schema google-workspace-login
Below is an example query from the FortiGate SSL VPN dataset included with the FortiGate app (version 1.3.2502.0):
fulltext tt=t duration=1d subtype == "vpn" and log_desc == "SSL VPN*" from *:FW_FORTIGATE*
| schema fortigate-sslvpn
Dataset Query Command
To use a saved dataset, use the dataset command. The dataset command retrieves data using the dataset's GUID, passed as the value of the guid option. This command is commonly seen in queries for dashboard widgets that use dataset output. Below is an example from the Google Workspace Login Task Statistics widget, included with the Google Workspace app:
dataset guid="3e52c74f-dd74-4894-99d2-c305d5c6d837"
| pivot count() rows Task | limit 10000
Depending on the query logic, the results may vary with each execution. For example, if a dataset is defined to calculate statistics based on logs collected within the past hour, querying the dataset at different times will yield different results, as it always reflects data from the most recent one-hour window.
User Permissions
Any user with a Logpresso account can create and use their own datasets. However, users must have access permissions to the underlying log tables in order to build meaningful datasets.
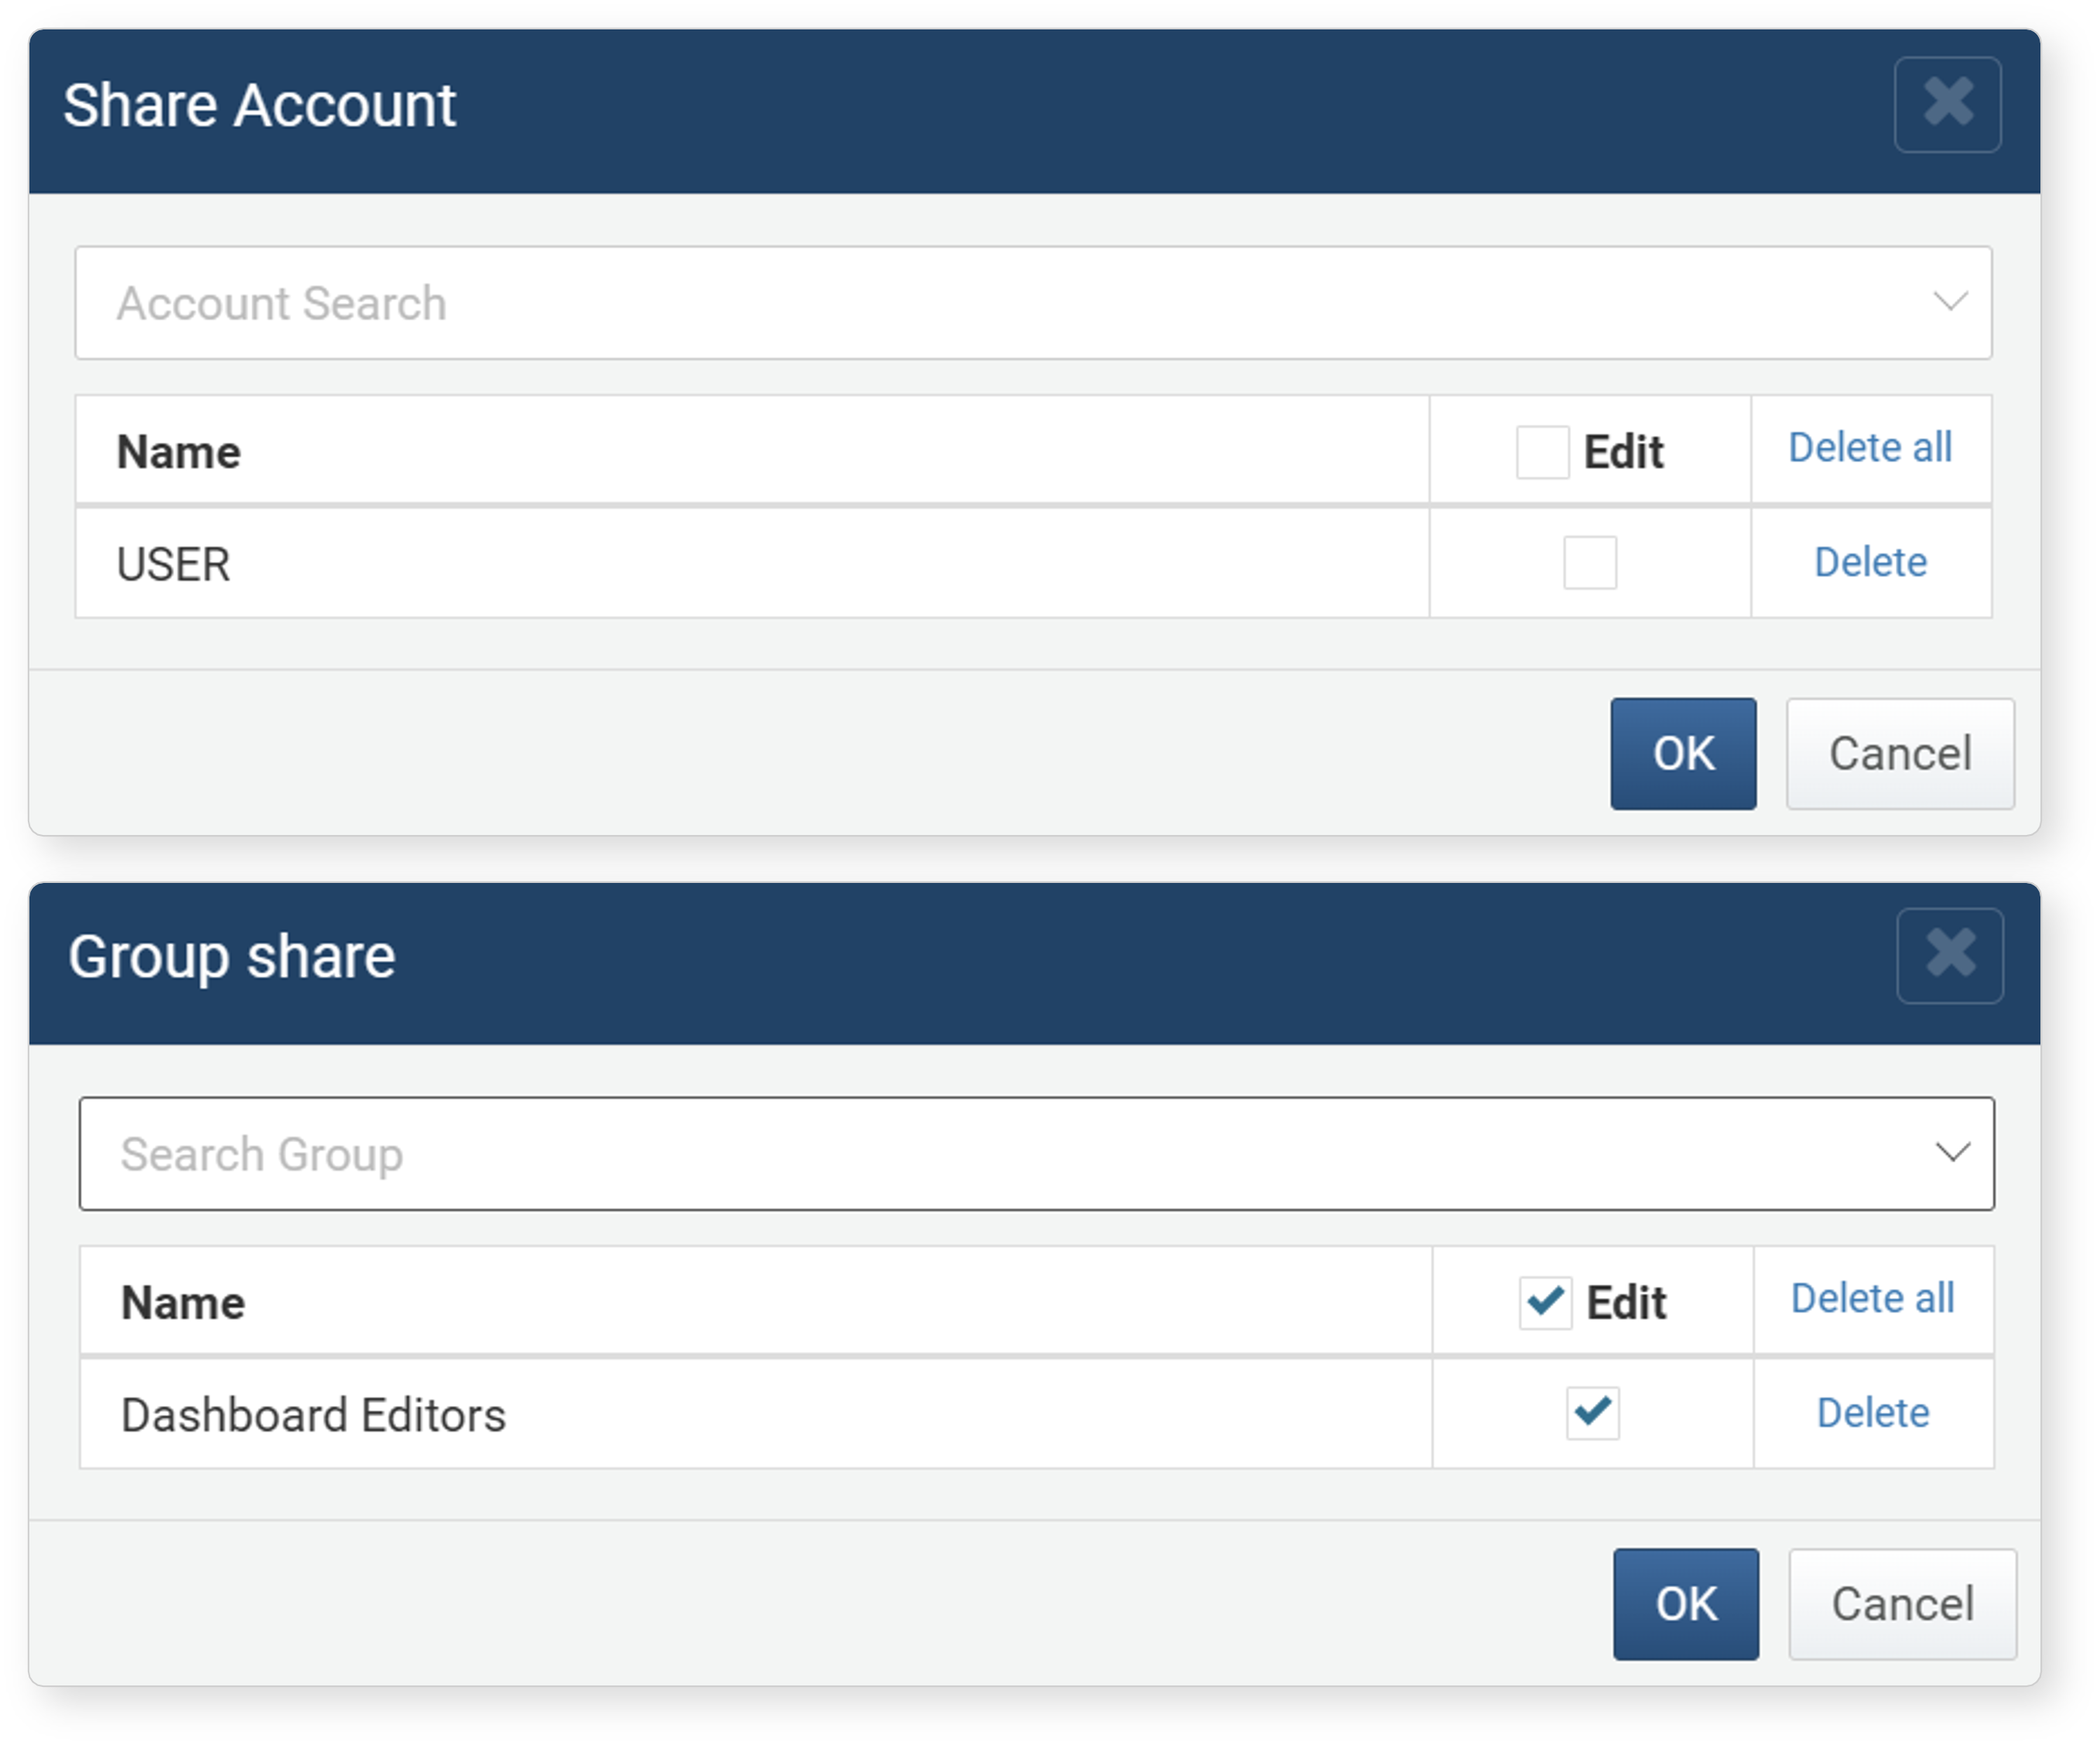
When a dashboard widget is configured to display dataset results, you can manage access permissions through the dashboard's sharing settings. Therefore, it's not necessary to assign dataset-level permissions separately.
App Datasets
When you install an app, it comes bundled with datasets required to support its dashboard widgets. These datasets are updated automatically whenever the app is reinstalled or updated.
The datasets provided during app installation are owned by the administrator account that installed the app. To allow standard user accounts to use these datasets (e.g., for creating custom widgets or utilizing the dataset in queries), you must share the dataset with the respective user or user group.
When reviewing dataset query statements provided with apps, you will often see the following table pattern:
*:TABLE_NAME*
* indicates data from all data nodes. * at the end of the table name is a wildcard that matches any suffix. The table name typically begins with a source classification such as FW (Firewall), NAC (Network Access Control), WEB (Web Server), NDR (Network Detection and Response), or EDR (Endpoint Detection and Response).
Logpresso recommends appending the app identifier and an additional suffix to the table name to indicate the data source. For example, if you have two redundant Palo Alto firewalls, you might name the tables FW_PALOALTO_ACTIVE and FW_PALOALTO_STANDBY.
Search Dataset
You can view or search the dataset list in Analysis > Datasets.
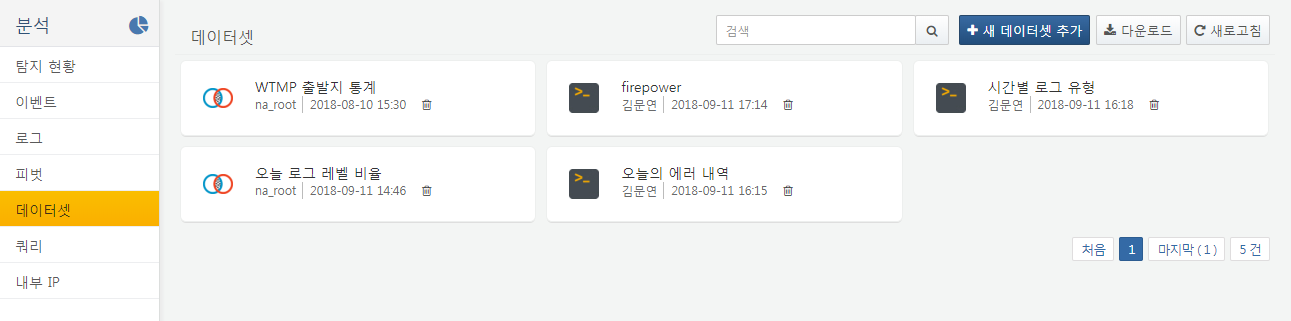
To find a specific dataset in the dataset list, use the search tool in the toolbar. The search tool finds datasets that include the entered word in their name. The search tool is not case-sensitive.
Download Dataset List
To download the dataset list:
-
Click Download in the toolbar.
-
In the Download Dataset List dialog, enter or select the dataset properties to include in the file, then click Download.
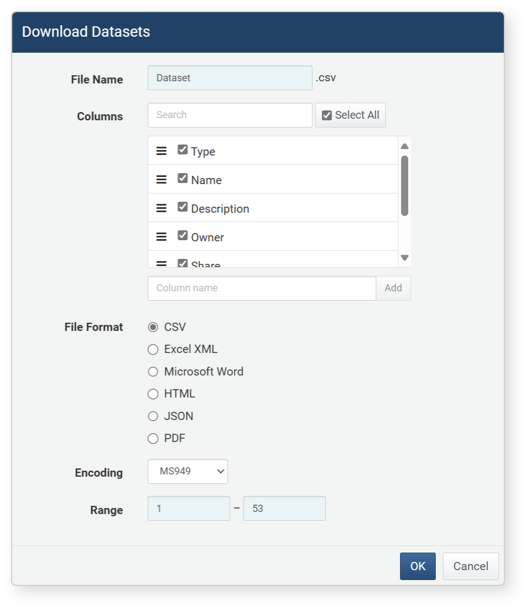
- File Name: The name of the dataset list file to be downloaded (default: Ticket)
- Columns: Dataset properties to include in the file. Click Select All to include all available properties.
- File Format: The format of the file to be downloaded (default: CSV)
- CSV: CSV file
- Excel XML: XML file viewable in Microsoft Excel
- Microsoft Word: DOCX file
- HTML: HTML file
- JSON: JSON file
- PDF: PDF file
- Encoding: File encoding (UTF-8, UTF-18 BE, MS949; default: MS949)
- Range: The number of datasets to include in the file. Only the specified number of most recently registered datasets will be included, in reverse chronological order.
Refresh Dataset List
To update the dataset list with the latest information, click Refresh in the toolbar.
Add Dataset (Query)
To add a dataset:
-
Click Add in the toolbar at the top of the dataset list.
-
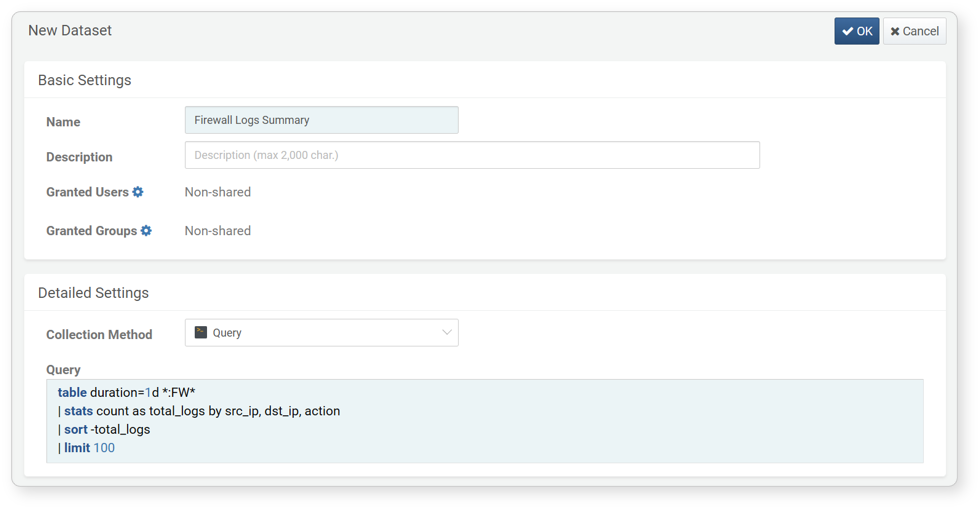
On the Add Dataset screen, configure the necessary values.
-
Name: A unique name for the dataset (up to 255 characters)
-
Description: A detailed description of the dataset (up to 2000 characters)
-
Granted Users/Granted Groups: A list of accounts or account groups to grant permissions for the dataset. Specify the users or user groups to grant dataset permissions.
-
Dataset Type: The type of dataset (default: Query)
- Query: The query to be registered as a dataset
- Correlation Analysis: a dataset used for correlation analysis. For more details, refer to Adding Dataset (Correlation Analysis).
-
-
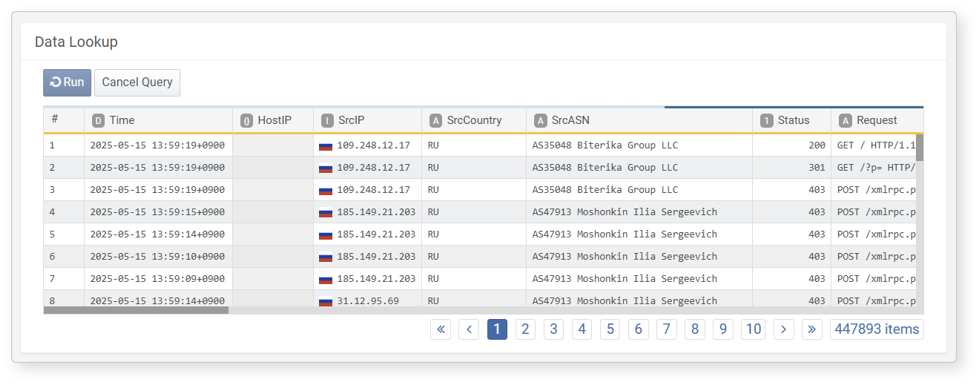
To validate the dataset query, click Run in the dataset query section at the bottom of the screen.

-
Once configuration is complete, click OK at the top of the screen.
Even if a dataset is shared, if a user-permission account does not have read/write access to the dataset’s underlying sources (e.g., tables, behavior profiles, events), they will be unable to Edit Pivot Entity and thus cannot edit the dataset. Always verify source access rights before assigning dataset sharing permissions.
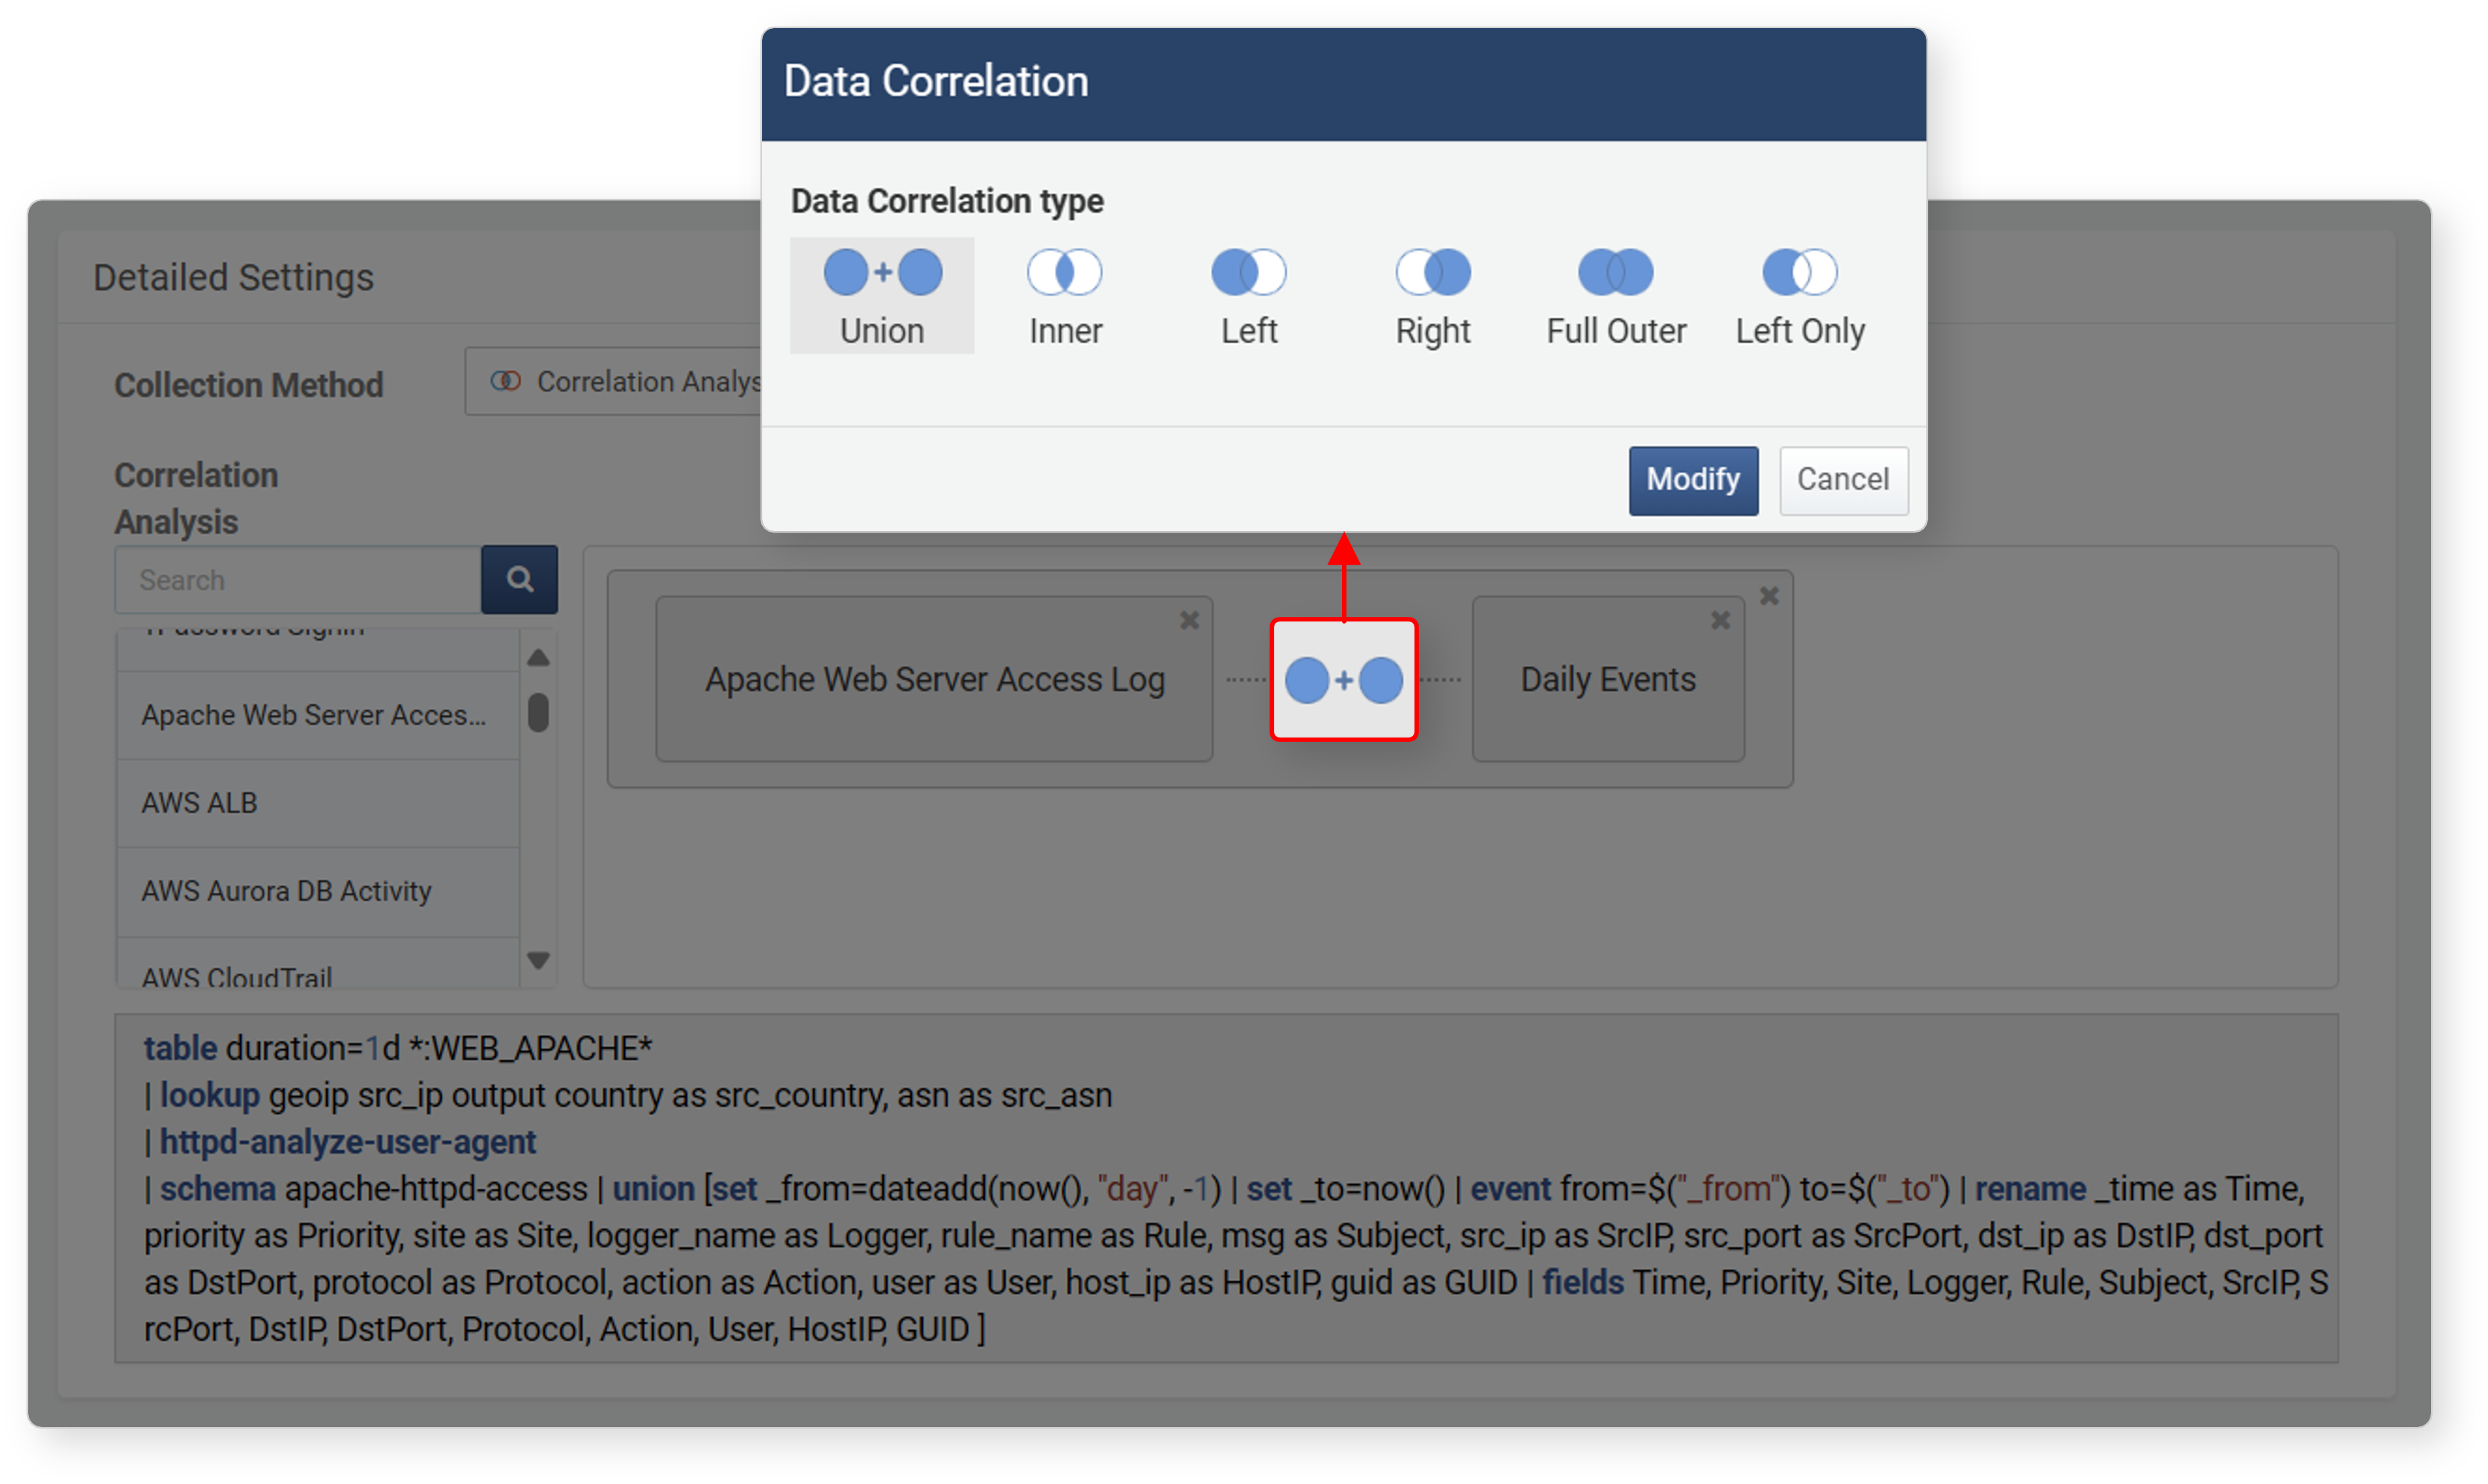
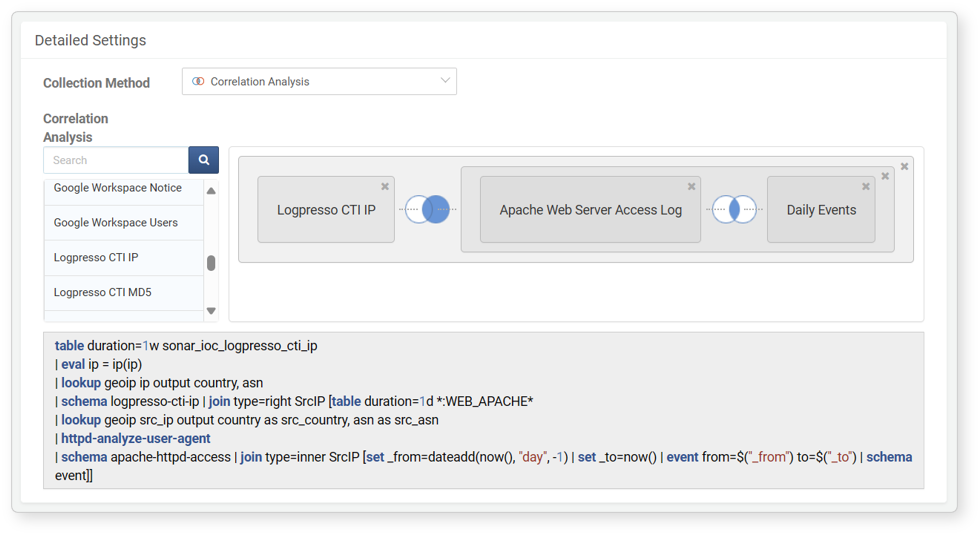
Add Dataset (Correlation Analysis)
You can create a dataset for correlation analysis using existing datasets.
-
On the Add Dataset screen, set the Dataset Type to Correlation Analysis.

-
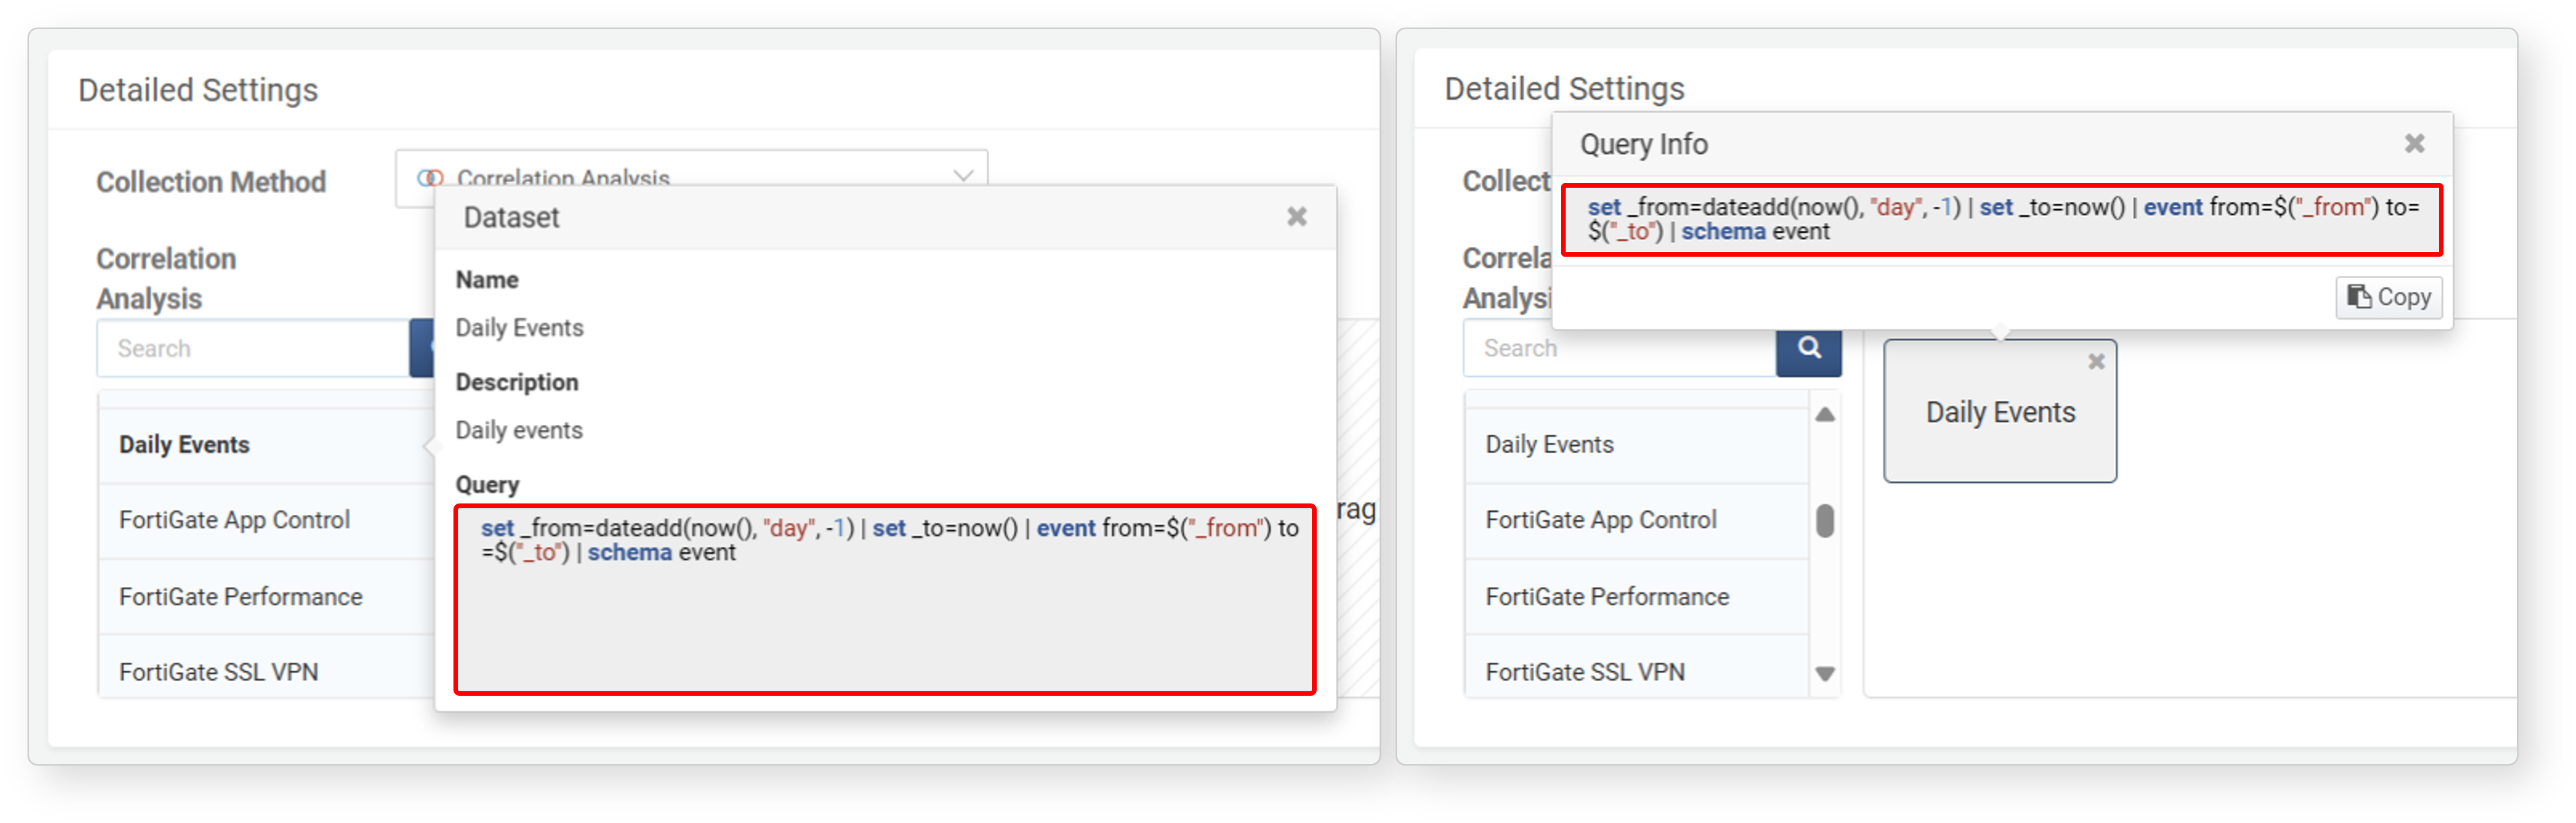
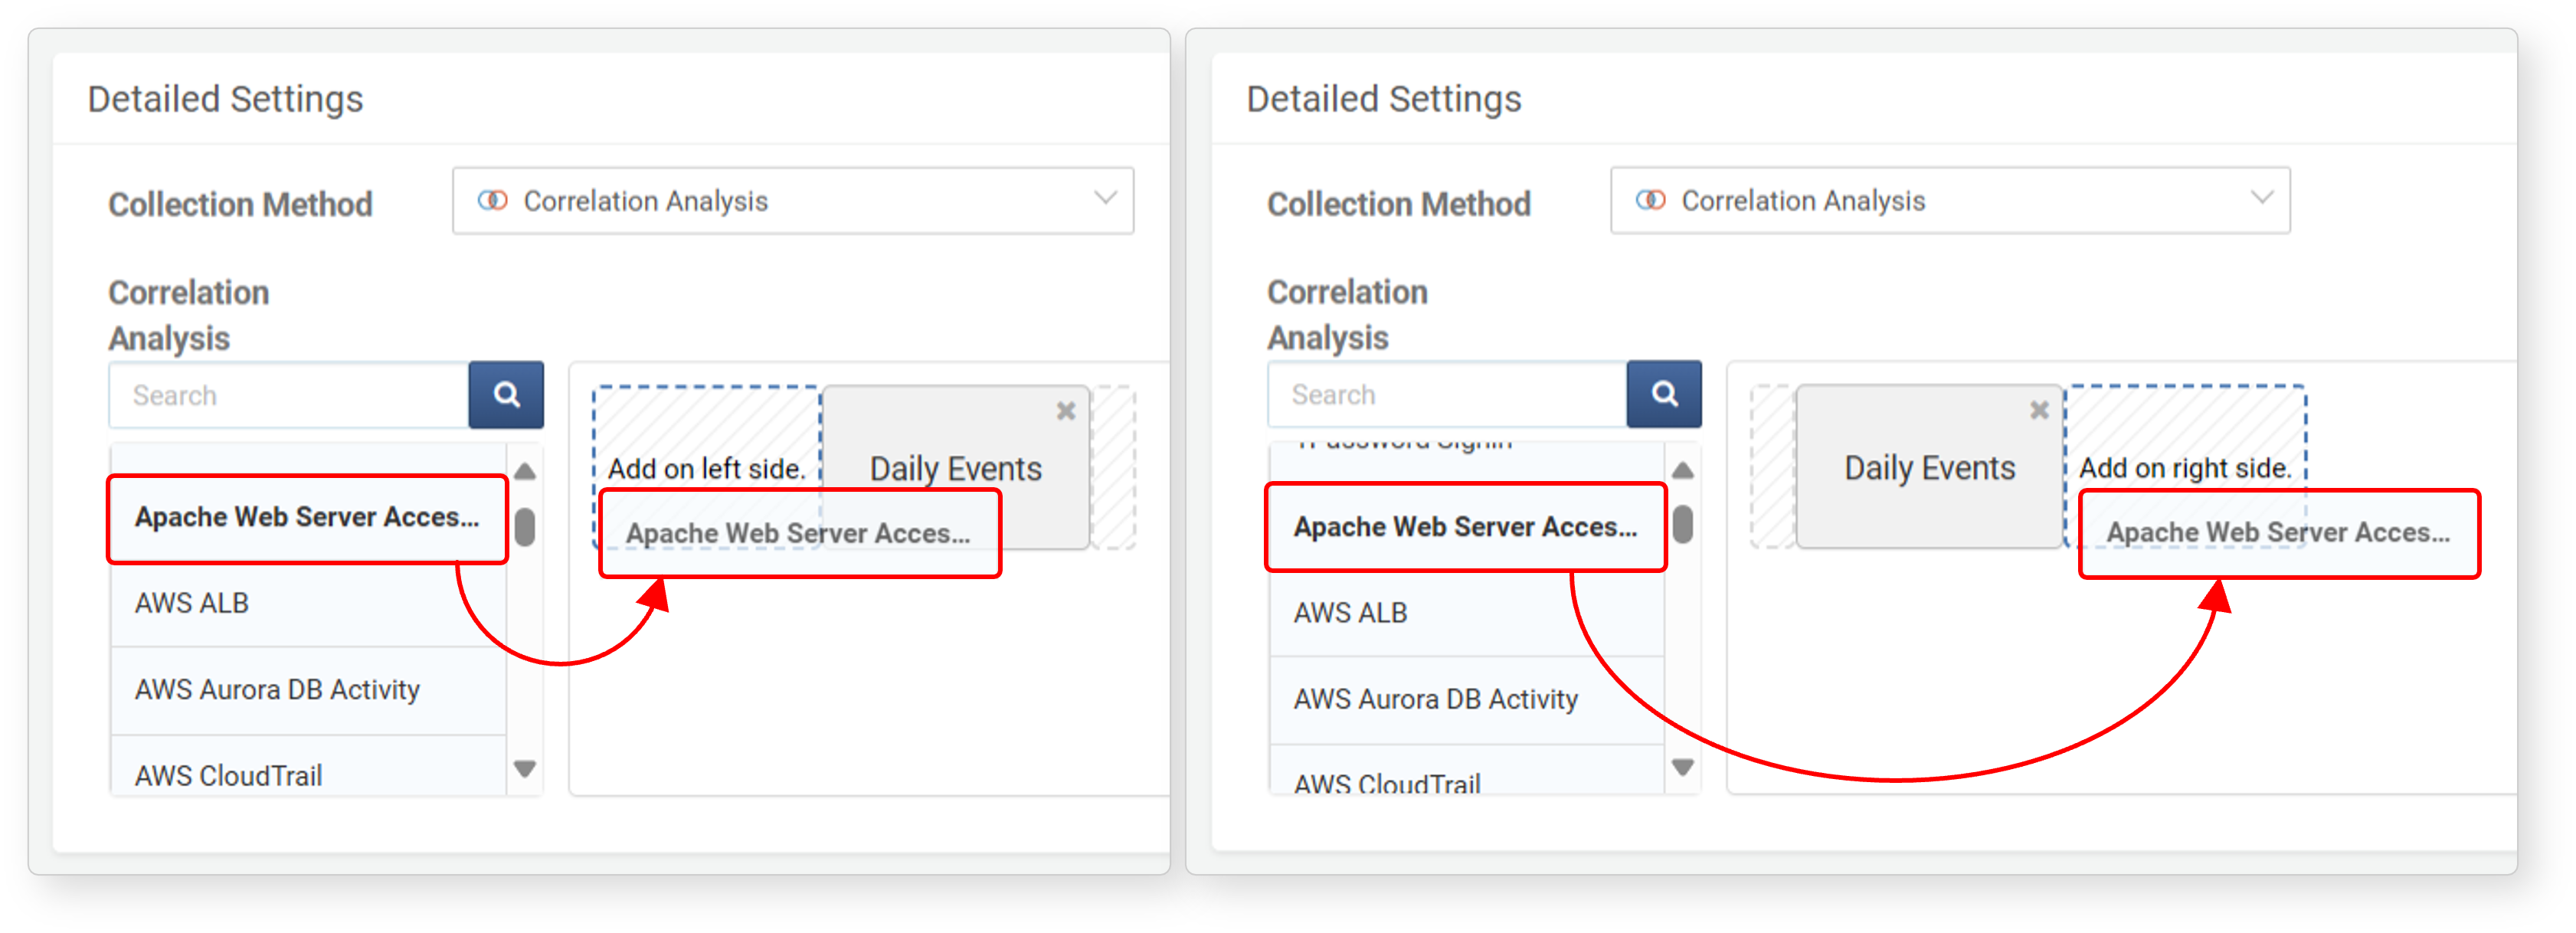
From the left panel, select a dataset and drag it into the box on the right.
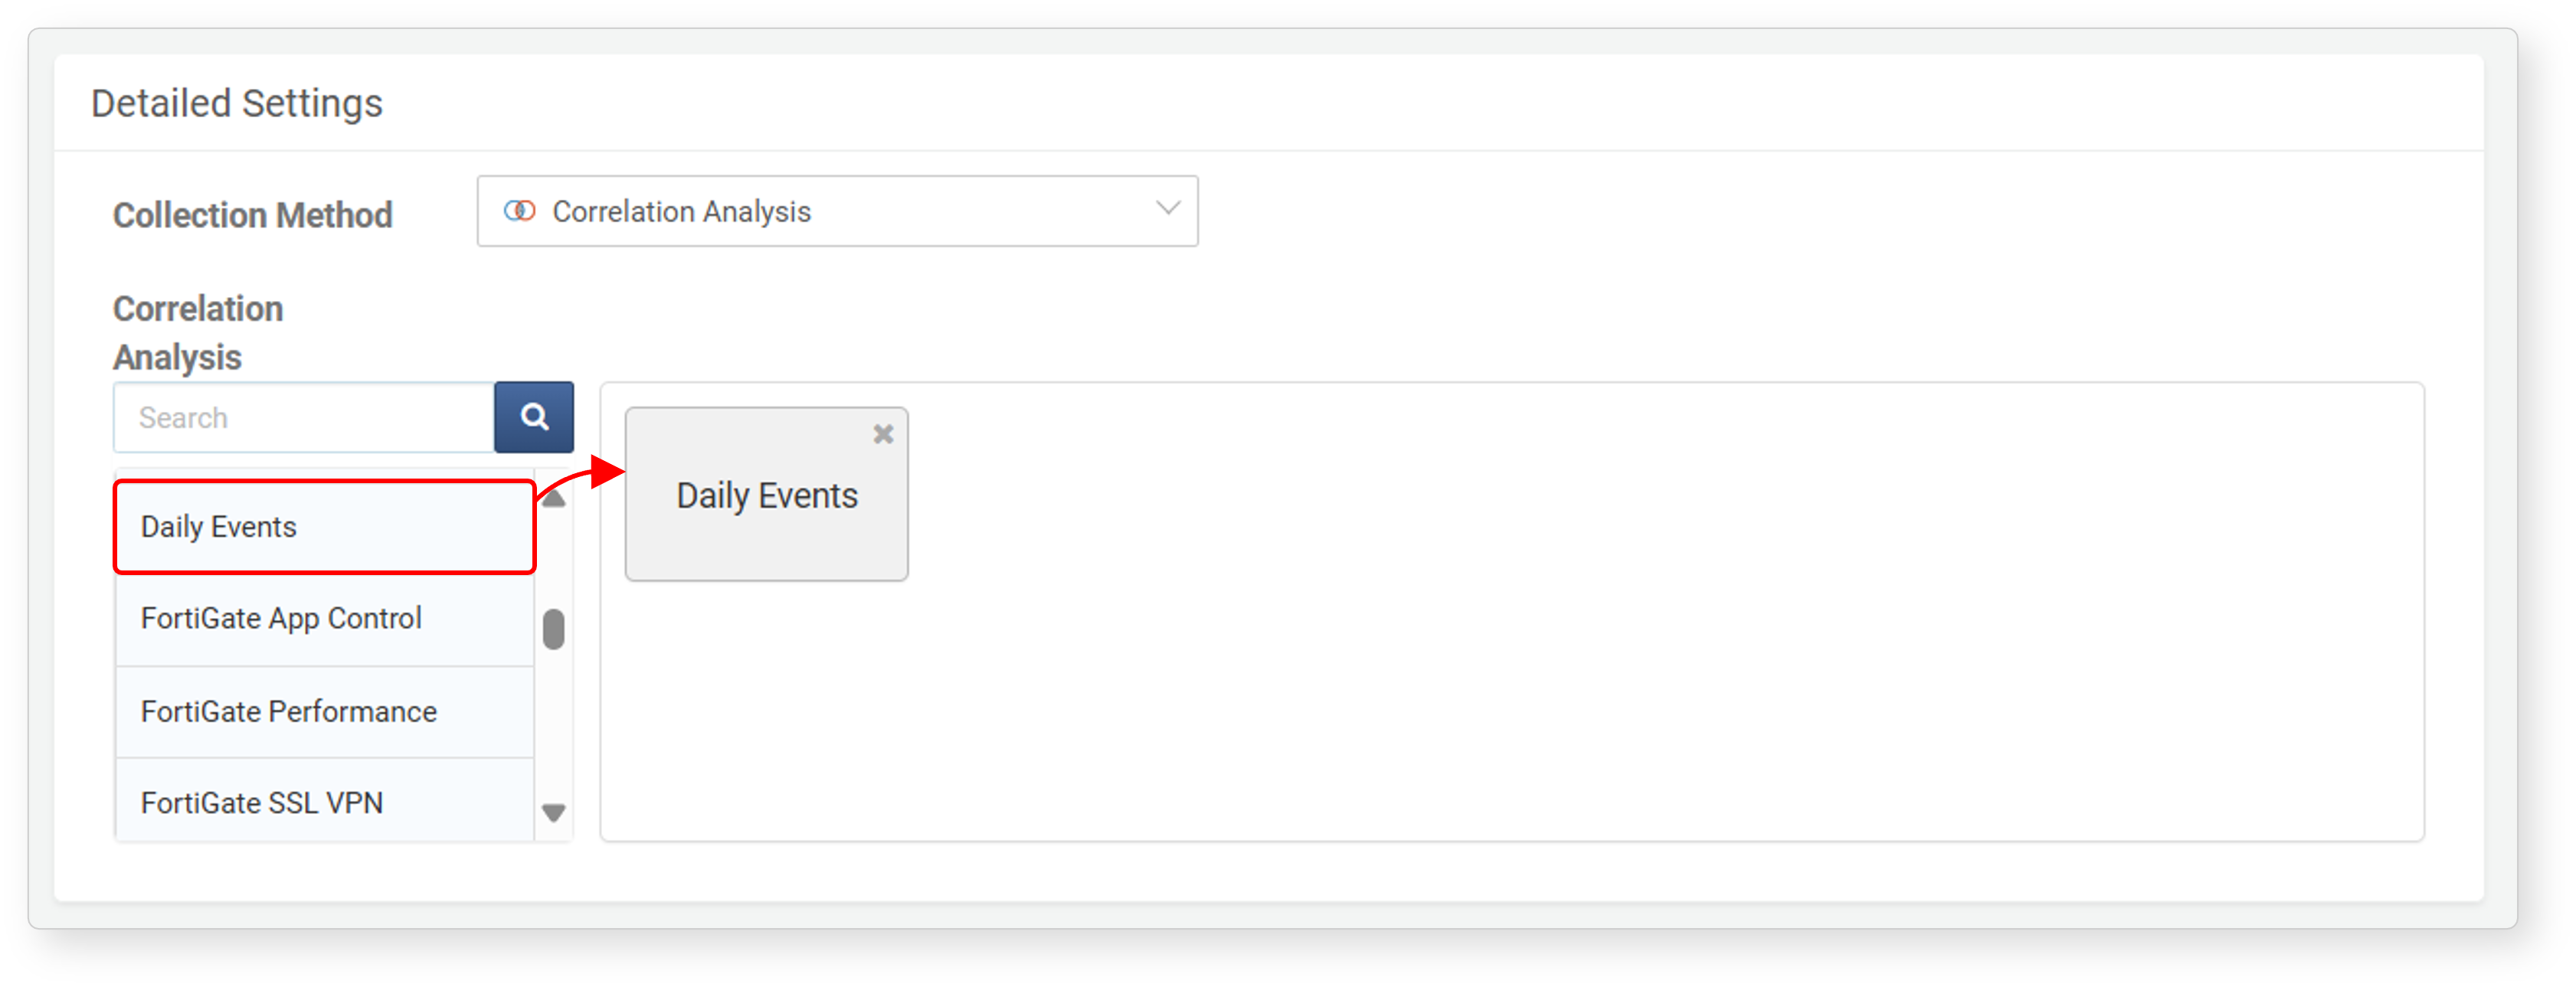
Clicking a dataset in the list displays its query for reference.
-
Drag a dataset to the left or right of an already-placed dataset. You will see a tooltip showing Add to Right or Add to Left. Drop it in the desired position to configure the correlation analysis sequence.
-
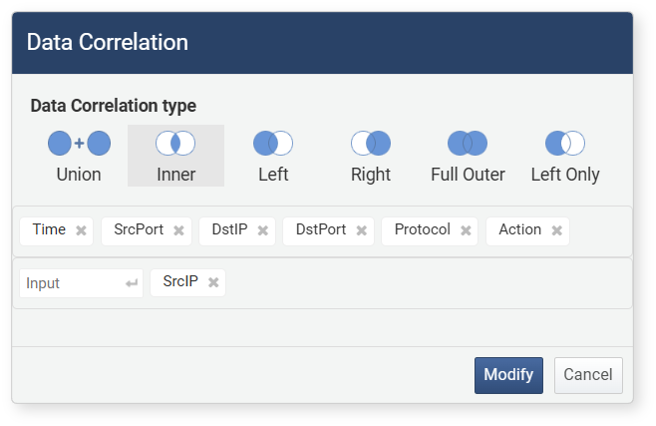
Click the correlation type label to change the Correlation type. For supported types, see the documentation on union and join commands.
-
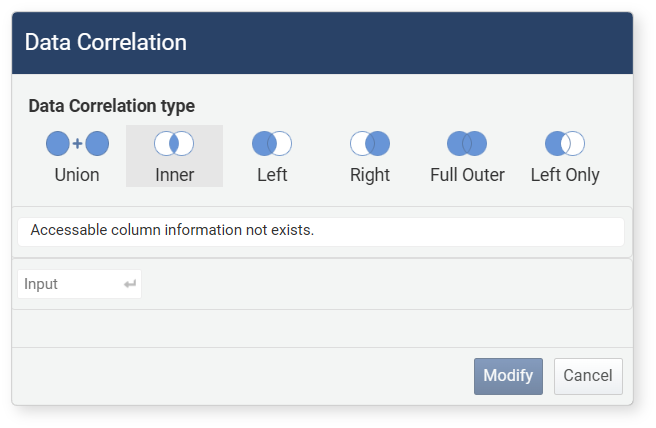
For correlation analysis types other than Union (Inner, Left, Right, Fully Outer, Left Only), you must define correlation fields that exist in both datasets
-
Click the '+' button next to a field to add it as a correlation key.
-
The correlation key must be a field shared by both datasets.
-
If there are no joinable fields, a message will appear: "No joinable column information exists."
-
-
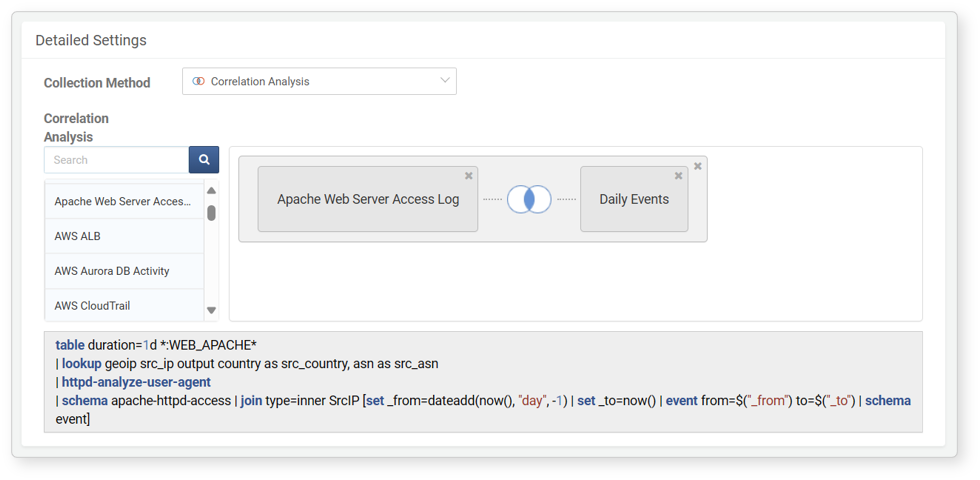
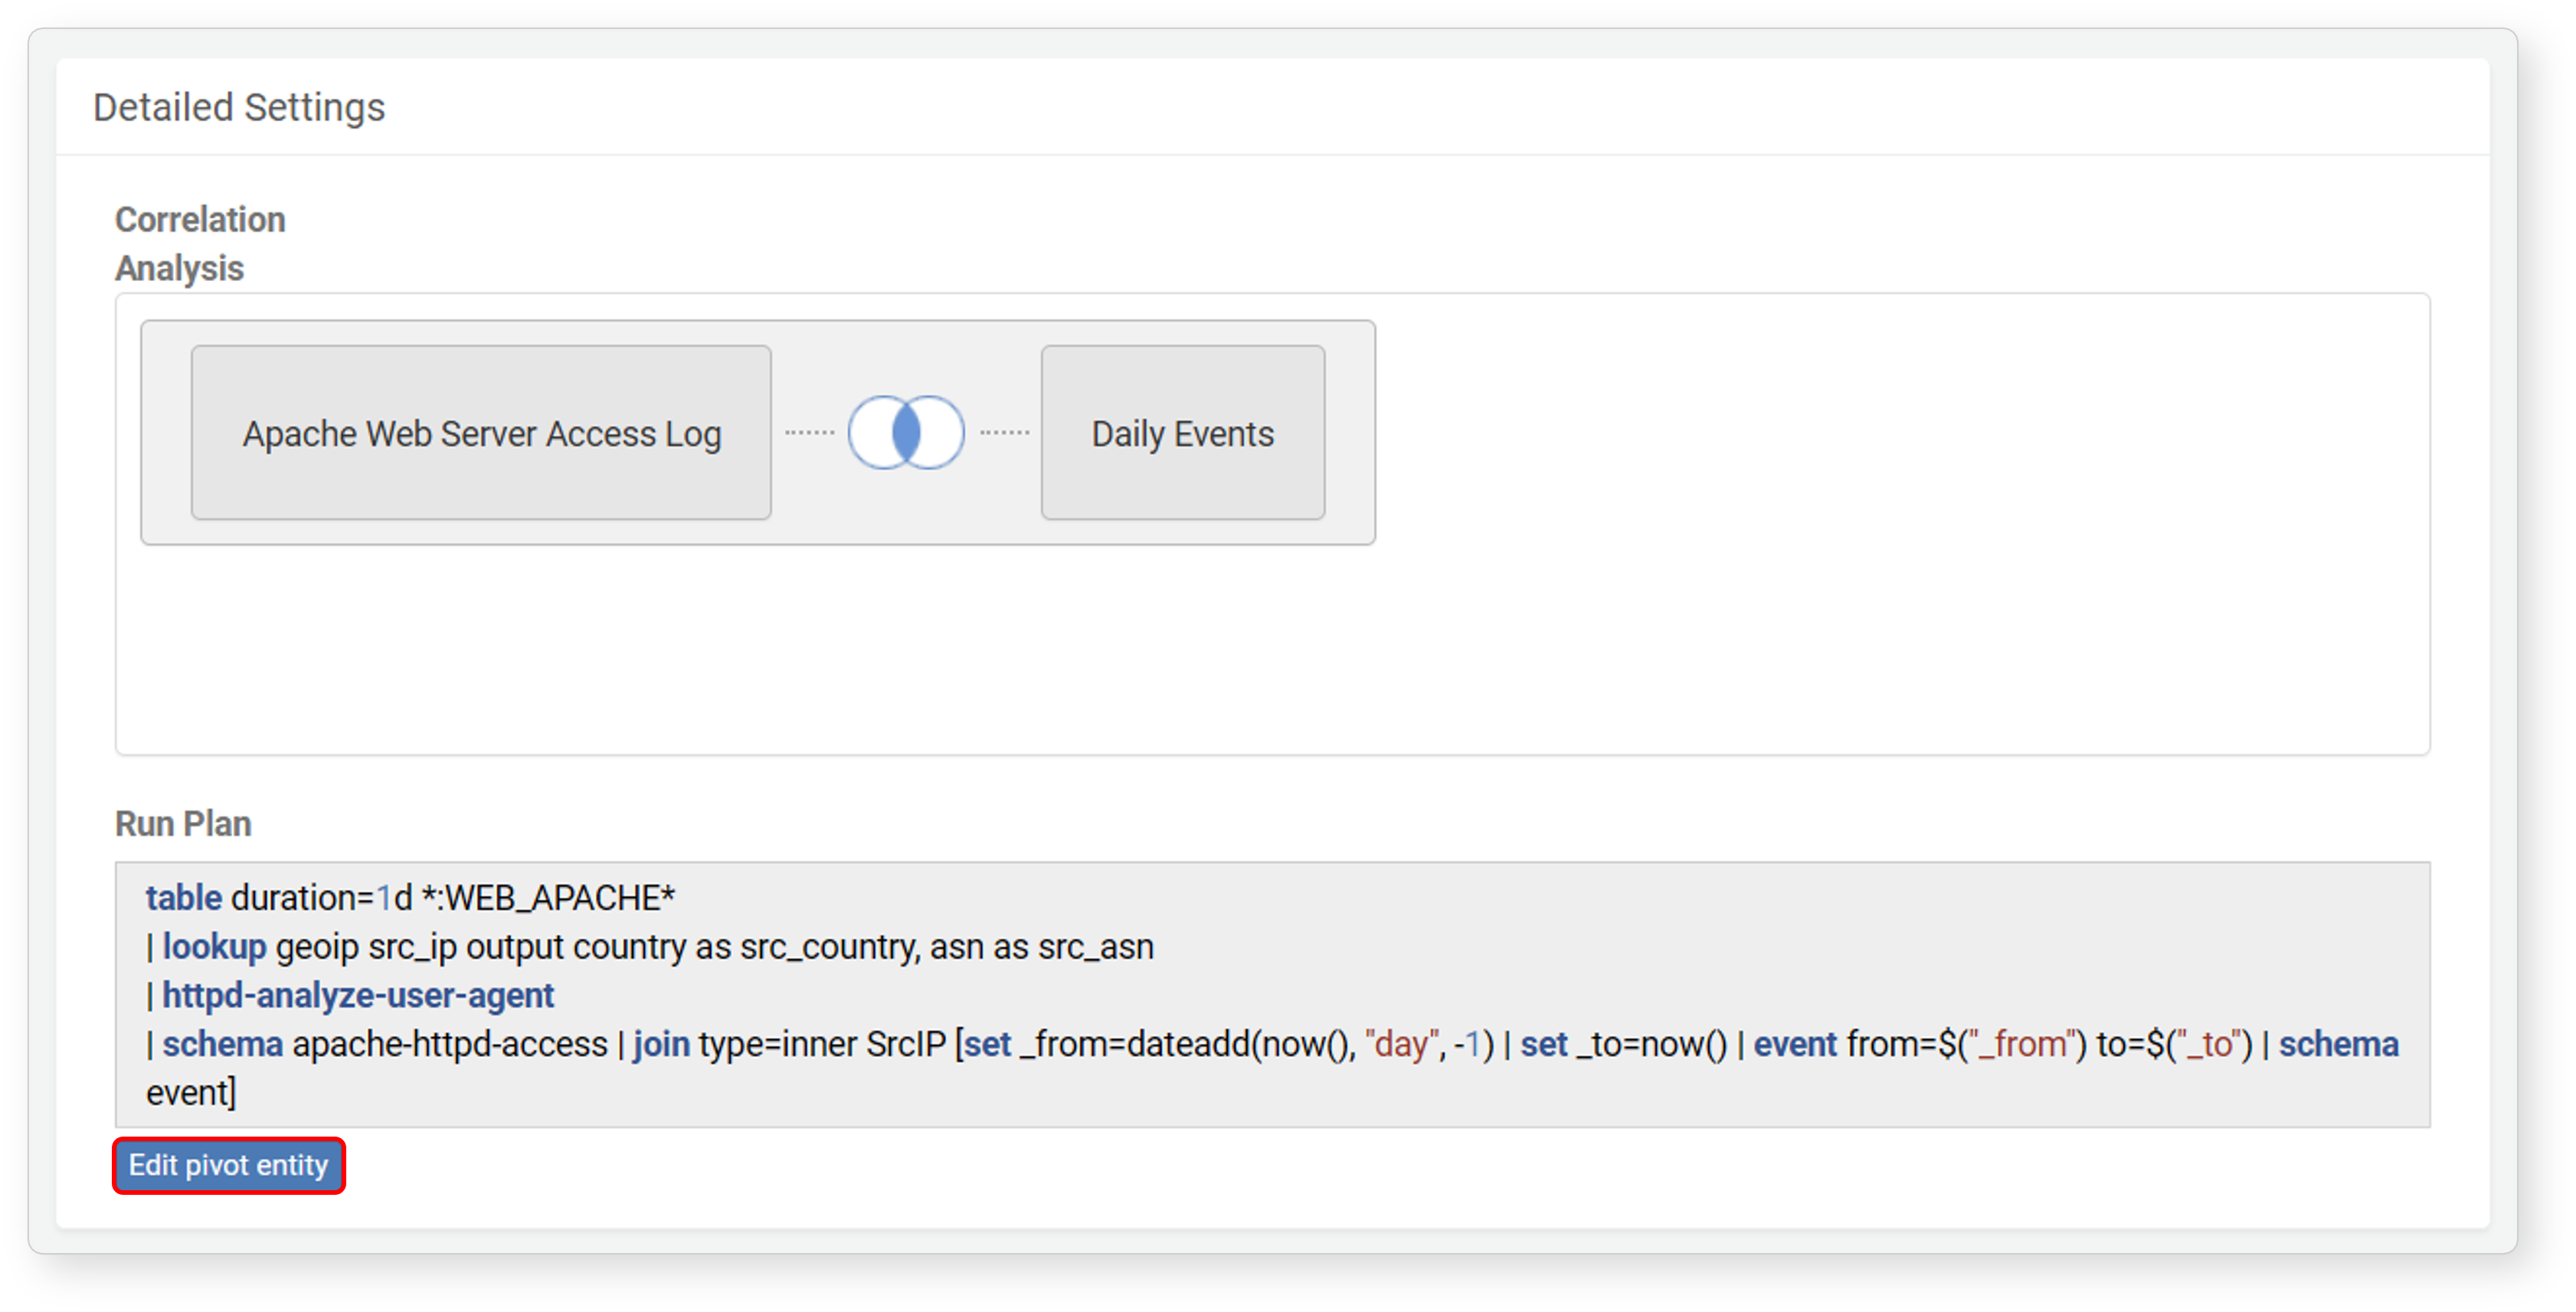
After completing the settings in the Correlation Analysis dialog, click Modify. A visual diagram and the corresponding query will appear.
Steps 2 through 5 can be repeated to correlate more than two datasets.
-
Click Run at the bottom of the screen to validate the correlation.
-
When done, click OK at the top of the screen to save the dataset.
Edit Dataset (Query)
To edit a dataset:
- Click the dataset card you wish to edit in the dataset list.
- On the Edit Dataset screen, update the dataset properties and click OK. For details on editable properties, refer to Add Dataset (Query).
- Click OK to apply the changes.
Edit Dataset (Correlation Analysis)
To edit a correlation analysis dataset:
-
Click the card of the dataset you wish to modify in the dataset list.
-
In the Edit Dataset screen, click Edit Pivot Entity at the bottom of the execution plan. This will take you to the Pivot editing screen for the dataset.
-
On the pivot screen, modify the analysis conditions as needed, then click Save Dataset in the toolbar.
-
In the Save Dataset dialog:
- Click Save to overwrite the existing dataset.
- Click Save As to save it under a new name.
- Click Cancel if you do not wish to save.
Delete Dataset
To delete a dataset:
- Click the
 icon on the card of the dataset you wish to delete.
 - In the Delete Dataset dialog, confirm the name of the dataset to be deleted and click Delete. Click Cancel if you do not wish to delete.
Dataset Usage
Datasets can be utilized in the following features:
- Apply registered datasets when creating a correlation analysis dataset
- Use datasets in the analysis logic of Batch Rule scenarios.
- Load and apply dataset records in Pivot, Query, or Dashboard via the Load function.
- Use the dataset command to reference datasets in query statements.