Users
Overview
You can register and manage users in the Users page. All users can access the web console and the REST API within the scope of the data granted by their assigned roles and access rights.
User roles
The user roles are as follows:
- Cluster Administrator
- The default administrator account provided upon installation of Logpresso Sonar. It has full configuration permissions, including server cluster settings.
- Administrator
- Has all configuration, data, and account management permissions, excluding those of the Cluster Administrator.
- User
- Has the right to view only the data that the (Cluster) Administrator has permitted access to.
- Dashboard Publisher
- Has the right to view only the data necessary for sharing Logpresso Sonar dashboards externally.
MFA
You can apply MFA when logging into an account to enhance security. Both Email and OTP methods are supported. For OTP, any OTP app that complies with Google Authenticator or RFC 6238 can be used.
API key
An API key is required to use the Logpresso REST API. API keys are generated on a per-account basis and have permissions based on the roles assigned to the account.
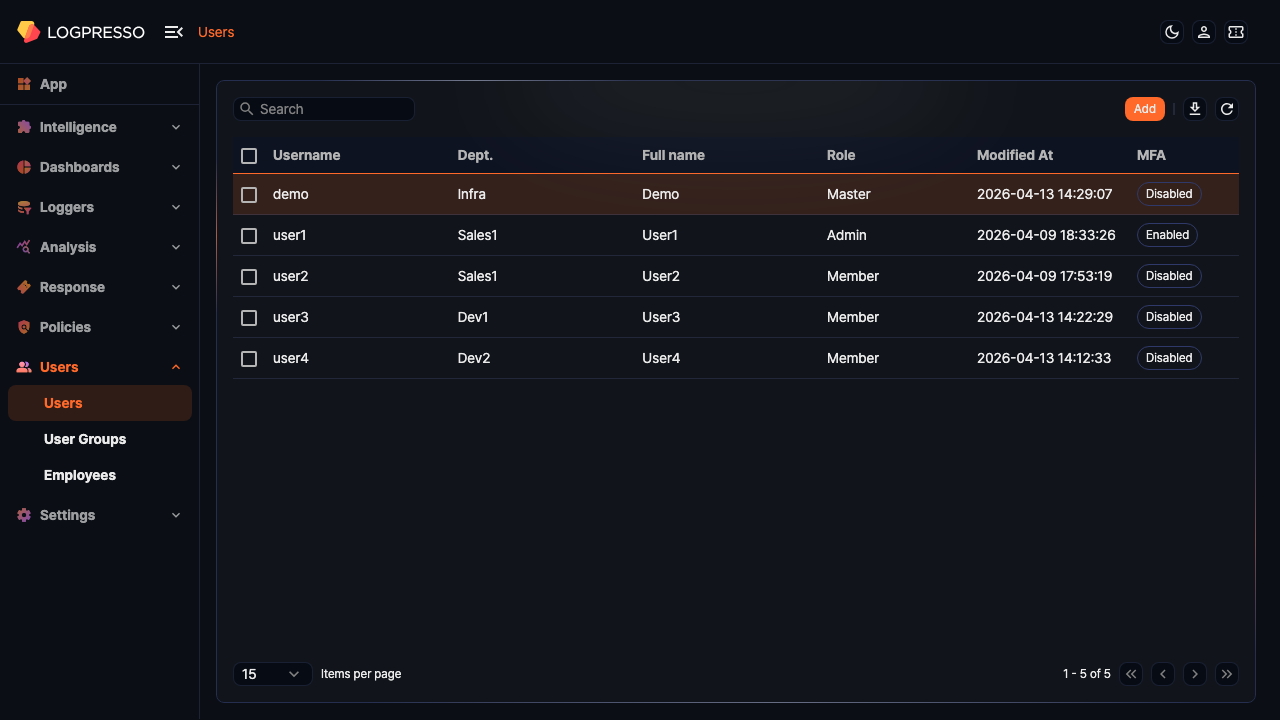
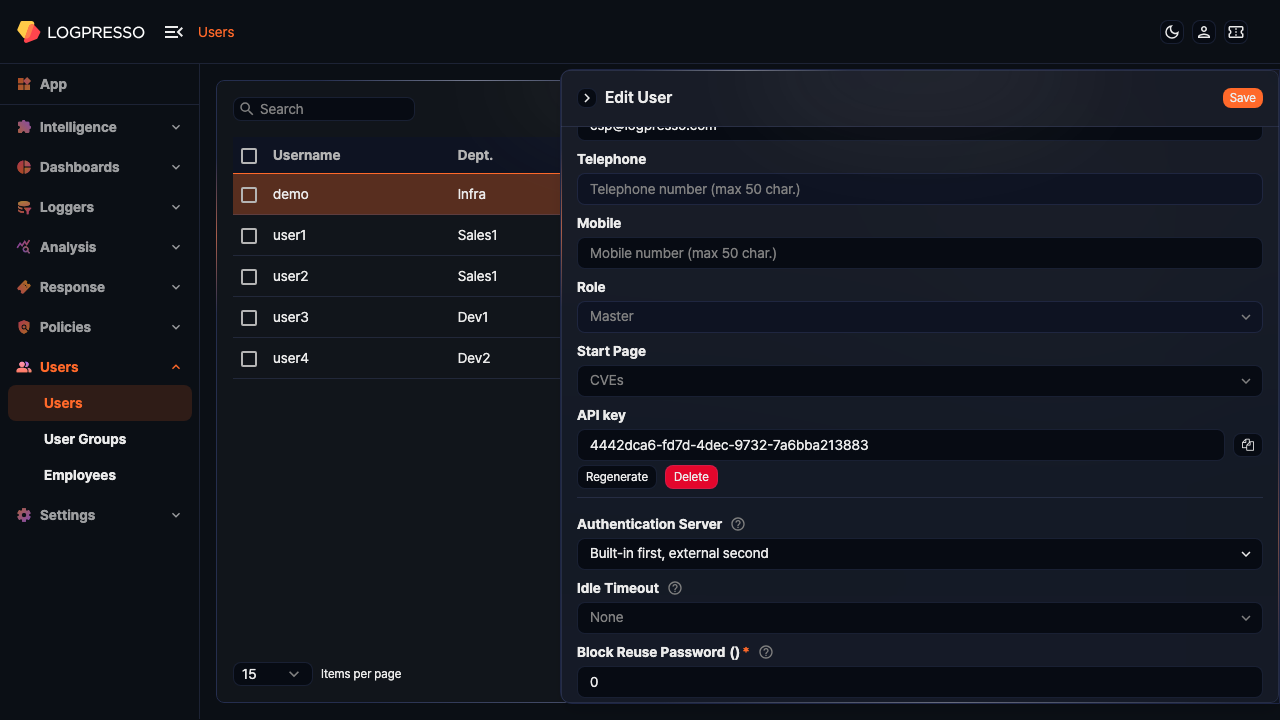
Search users
Cluster Administrators and Administrators can view the user list on the Users > Users page. User-level accounts cannot view the user list.
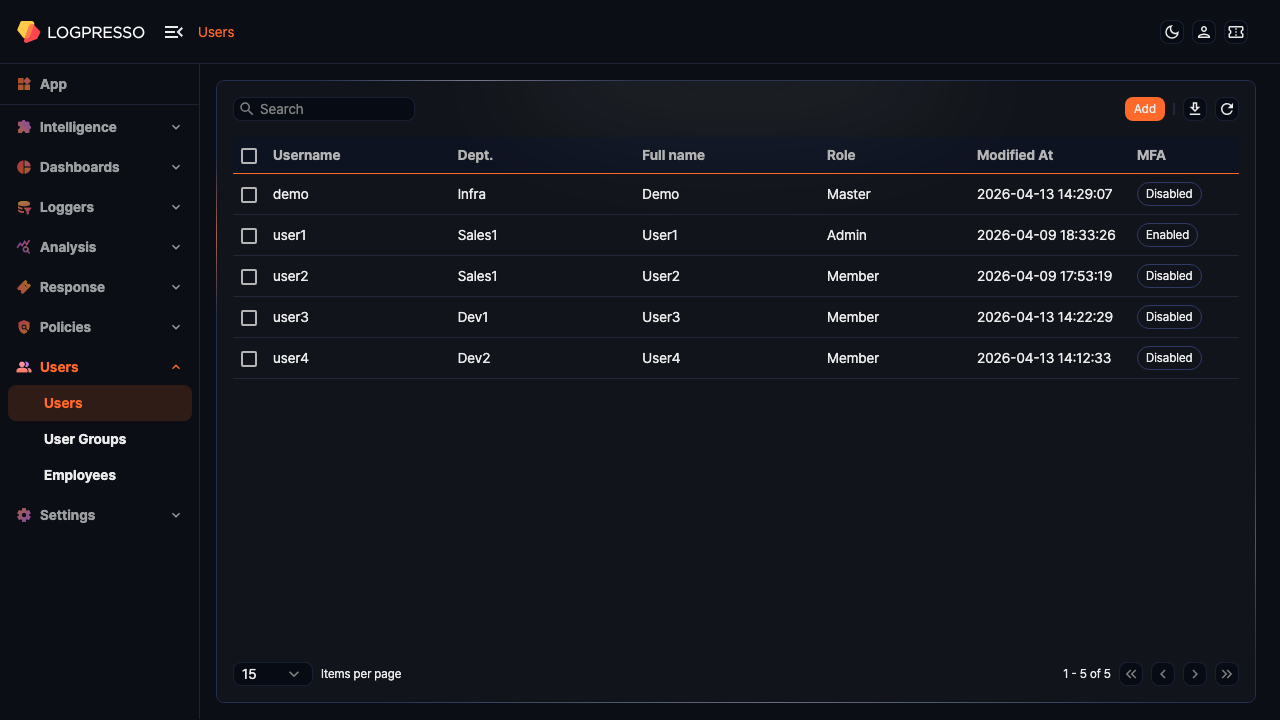
The columns in the user list are as follows:
- Username: The ID used to log into Logpresso Sonar
- Department: The department to which the user belongs
- Full Name: The actual name of the user
- Role: The role assigned to the account (Cluster Administrator, Administrator, User, or Dashboard Publisher)
- Modified: The date and time the account was last modified (yyyy-MM-dd HH:mm:ss format)
- MFA: Whether MFA is enabled. Displayed as an Enabled or Disabled badge.
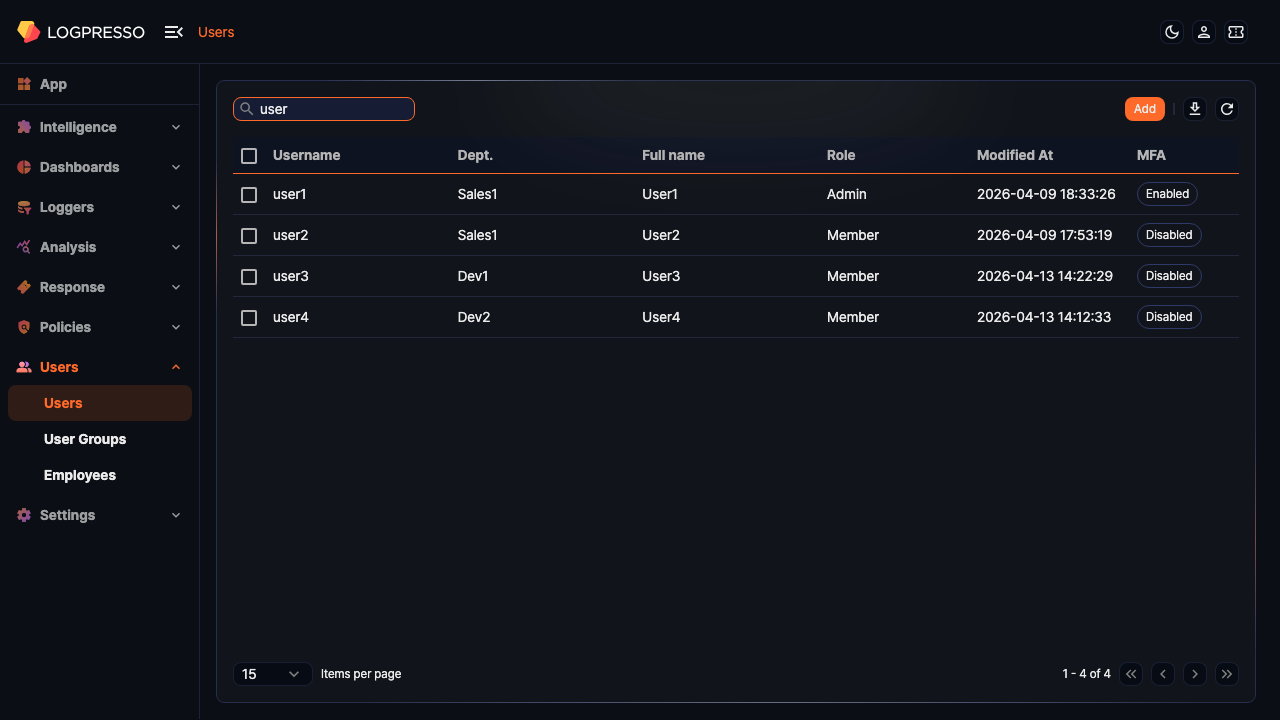
To find a specific account in the list, use the search tool in the toolbar. The search tool displays accounts that contain the entered words in Username, Department, or Full Name. The search tool is case-sensitive.
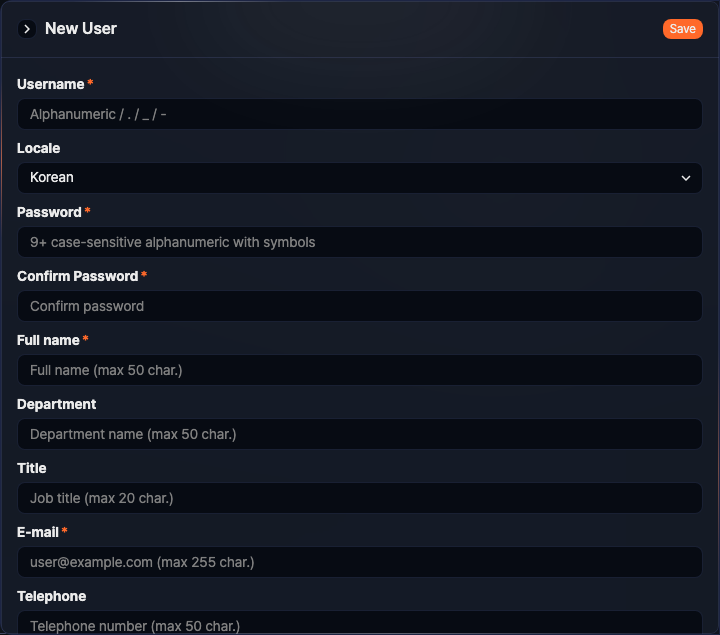
Add user
To add a user:
-
Click Add in the toolbar on the Users > Users page.

-
In the Add User panel, enter or select properties for Basic Settings, Security Settings, Groups, and Permissions. Fields marked with * are required.
-
Review the entered or selected properties and click Save in the upper right corner.
The following sections describe the settings available when adding a user.
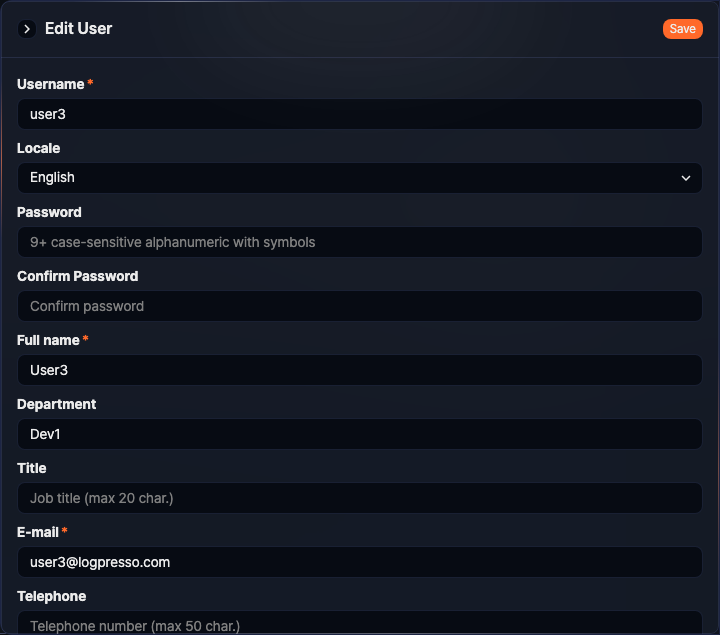
Basic settings
General settings for the user account.

- Username
- The ID used to log into Logpresso Sonar. You can only use English letters (uppercase and lowercase), numbers, periods (
.), and underscores (_). (Required, maximum 255 characters)CautionYou cannot use admin, administrator, manager, root, logpresso, sonar, siem, maestro, or xdr as a username. These names are case-insensitive.
- Locale
- The language to apply in the web console after logging into Logpresso Sonar. Choose between Korean and English.
- Password, Confirm Password
- The password used for authentication when logging in. Enter the same value in both the Password and Confirm Password fields. The password must satisfy the Password policy configured on the system. By default, it must be at least 9 characters long, include letters, numbers, and special characters, and must not repeat the same character three times in a row. (Required when creating a new account)
- Full Name
- The actual name of the user. (Required, maximum 50 characters)
- Department
- The department to which the user belongs. (Maximum 50 characters)
- Title
- The user's job title. (Maximum 20 characters)
- The email address to receive emails sent by Logpresso Sonar. (Required, maximum 255 characters)
- Telephone
- The user's phone number. (Maximum 50 characters)
- Mobile
- The user's mobile phone number. If Logpresso Sonar is configured to send SMS to users, the registered mobile phone number will be used. (Maximum 50 characters)
- Role
- The role for the account. Choose from Cluster Administrator, Administrator, User, or Dashboard Publisher. (Default: User)
- Start page
- The screen to use as the start page in the web console session for the logged-in account. (Default: Dashboards)
Security settings
Security settings for the account. Security settings can only be edited by users with Administrator or higher privileges.
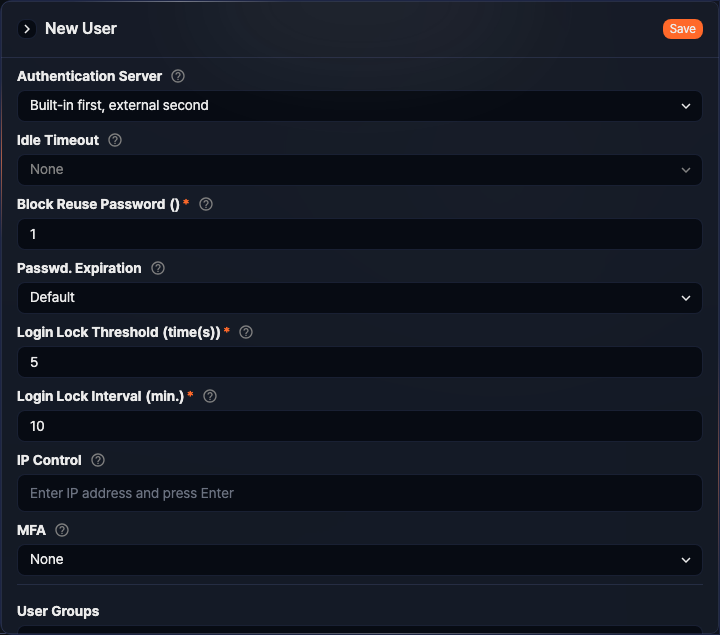
- Authentication server
-
The server to use for account authentication. (Default: Built-in first, external second)
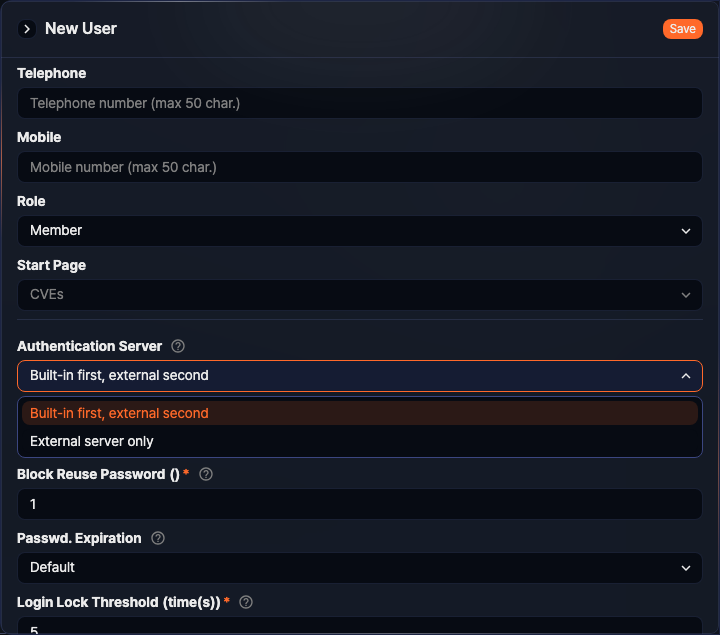
- Built-in first, external second: Attempts to authenticate the account matching the username from all authentication servers configured on the server. It first tries local account authentication, then external authentication servers. The usernames for local accounts and external authentication servers must be identical.
- External server only: Authenticates the account using the authentication information provided by an external authentication server.
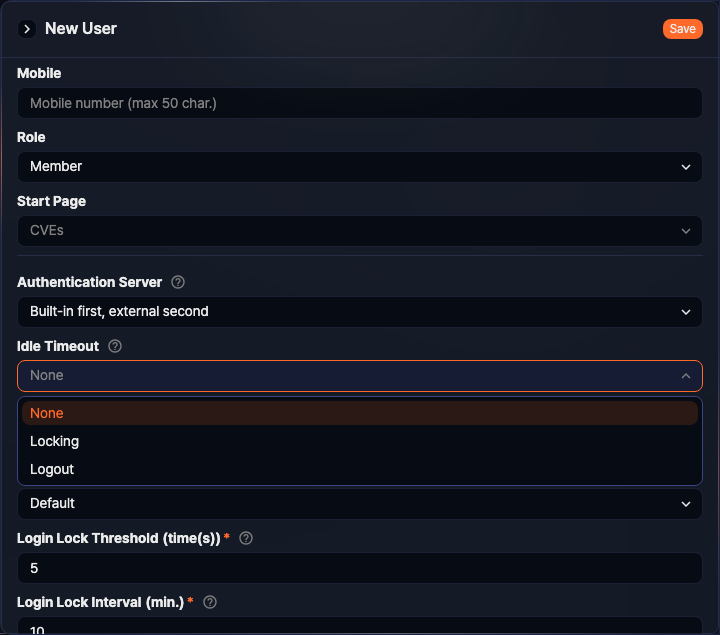
- Idle timeout
-
The policy applied to a user session when there is no activity for a specified period. Choose from None, Lock, or Logout. (Default: None) When Lock or Logout is selected, the default idle time is 60 seconds. You can configure the idle timeout between 60 and 604,800 seconds (7 days).
- Block password reuse
-
A policy that prevents users from reusing previous passwords when changing their login password. The server remembers the hash values of previously used passwords for the specified count and blocks reuse. (Default: 1, valid range: 0–23)
- Password expiration
-
The period during which the password can be used after being set. Choose from Default (365 days), Custom, or Indefinite. Starting 7 days before expiration, the server displays a password change popup at login and when unlocking a session. This option is not displayed when the authentication server is set to External server only.
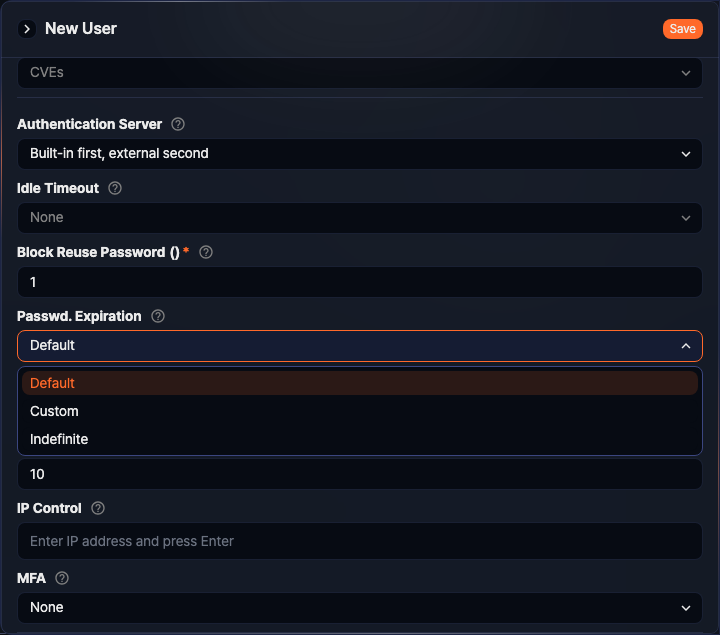
- Default: 365 days.
- Custom: Defaults to 7 days. You can set a value between 7 and 3,650 days.
- Indefinite: No expiration period is applied to the password.
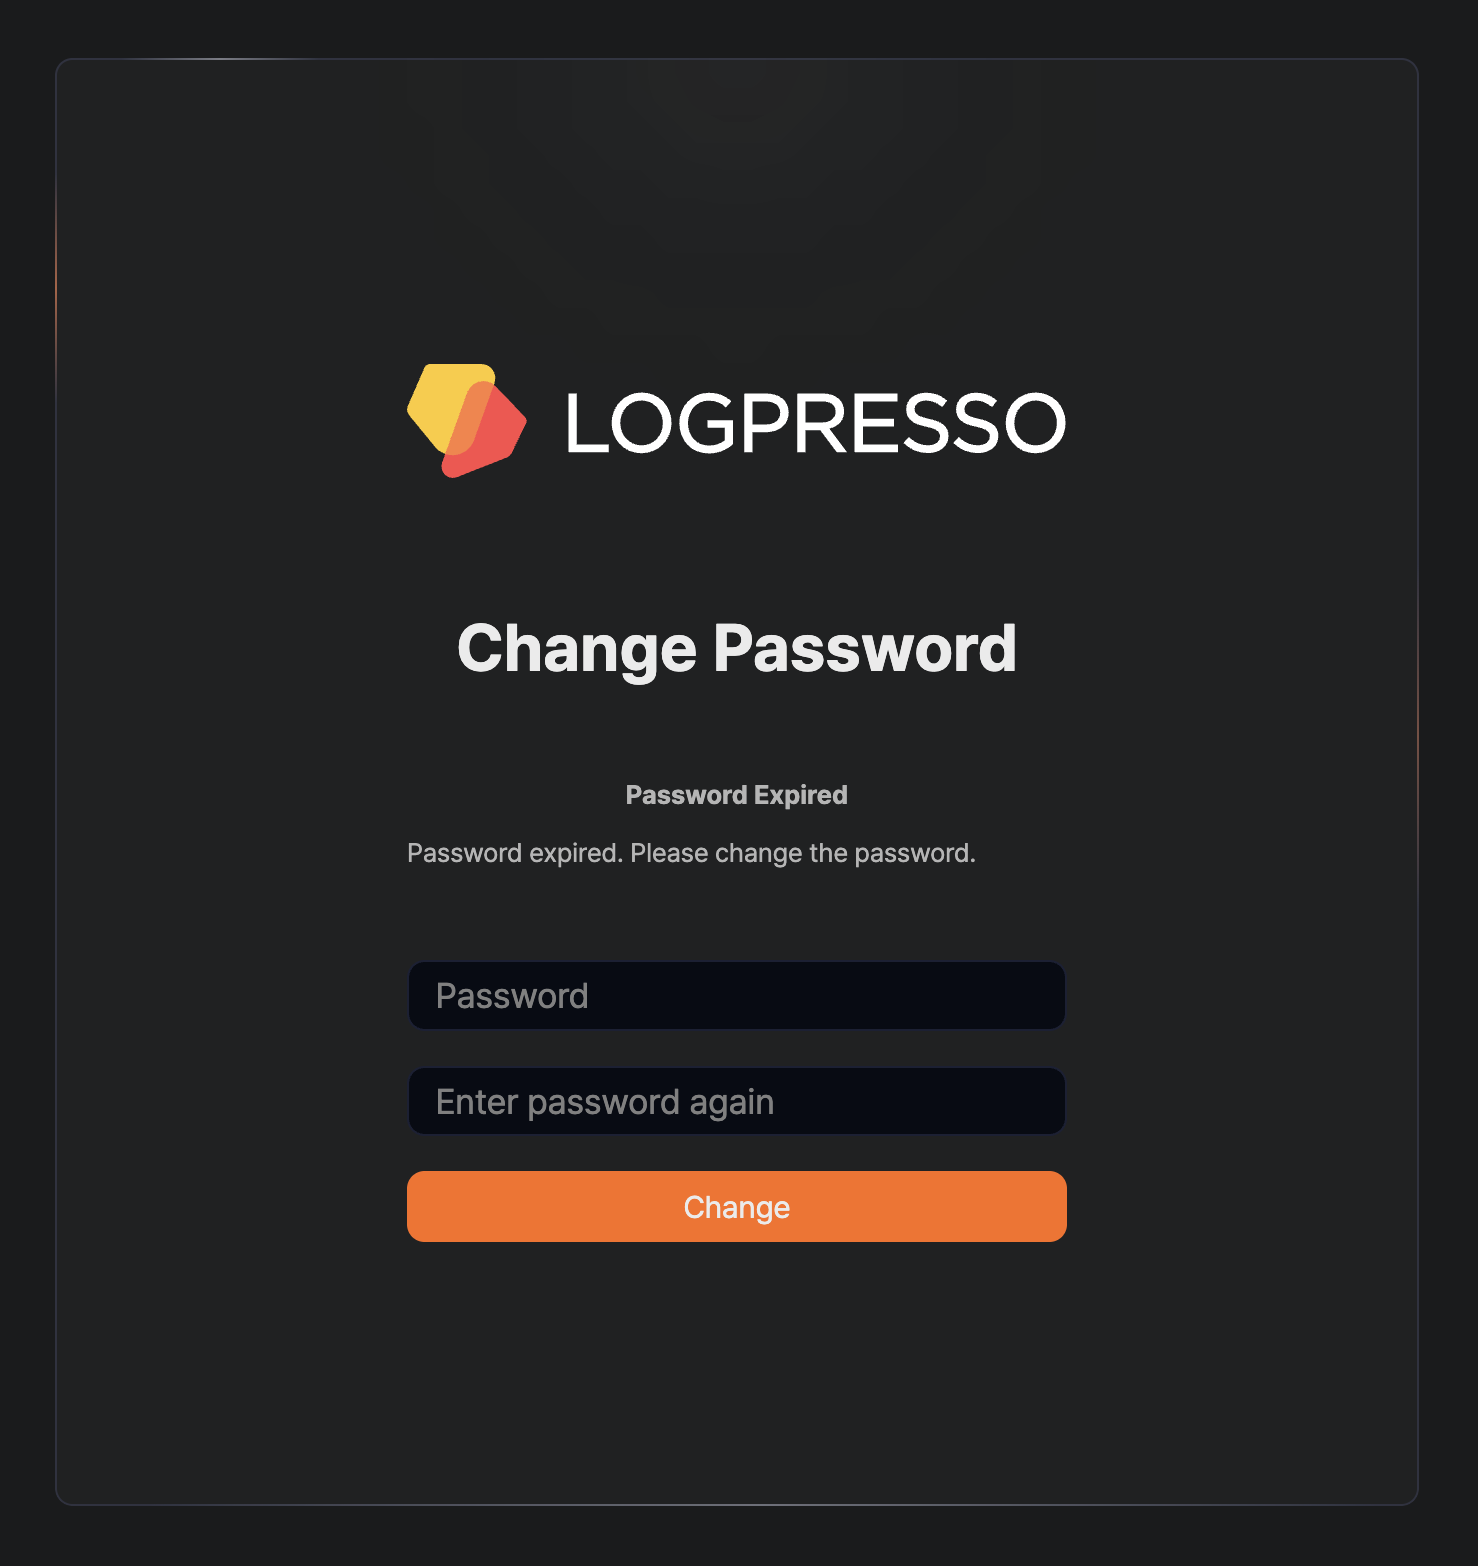
-
If a user attempts to log in with an expired password, the password change window appears as shown below.
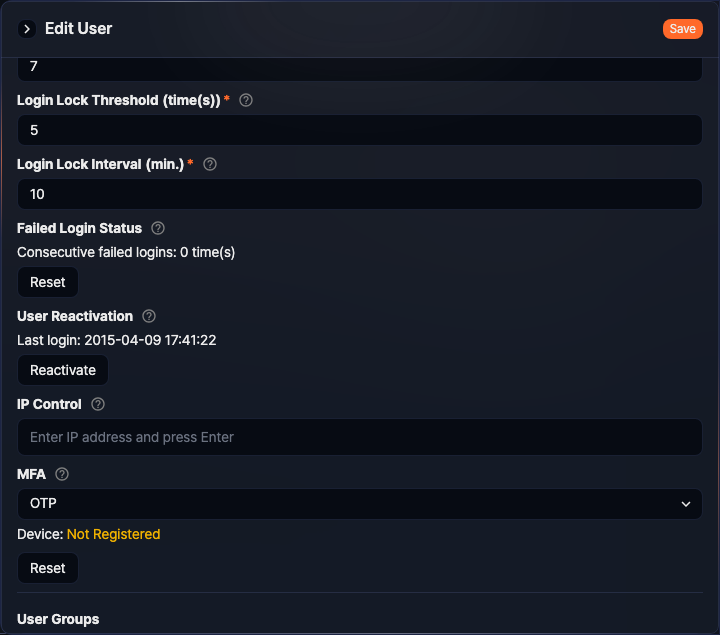
- Login lockout threshold
-
The number of consecutive failed login attempts before locking the account. When the specified number of failures is reached, the account is locked and login is blocked. (Default: 5, valid range: 0–5) Setting this to
0disables account locking. - Account lockout duration
-
The duration for which the account lockout is applied. The default is 10 minutes. (Valid range: 1–100,000,000 minutes)
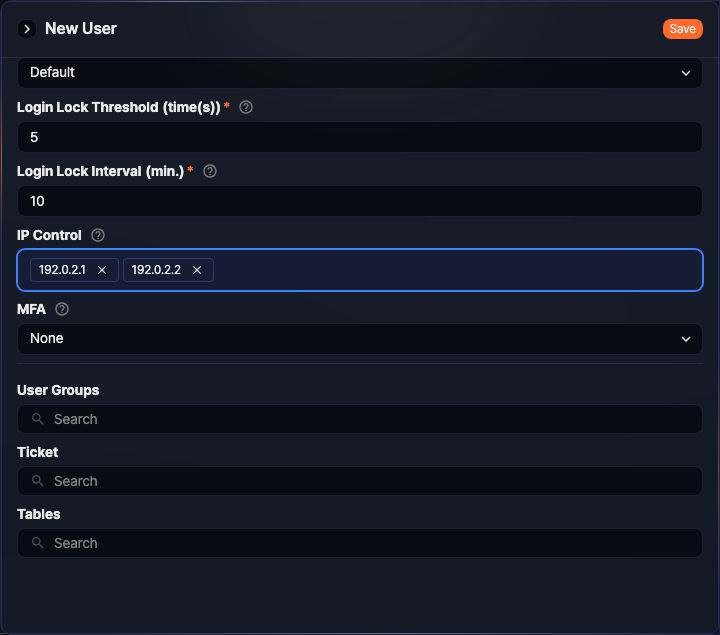
- Trusted IPs
-
Used to restrict the IP addresses from which the account can log in. Enter values in IP address or CIDR format. The maximum number of entries depends on the server configuration; the default maximum is 2. Leaving this field empty disables IP restriction.
- MFA
-
The MFA method to apply. (Default: None) Choose from None, Email, or OTP.
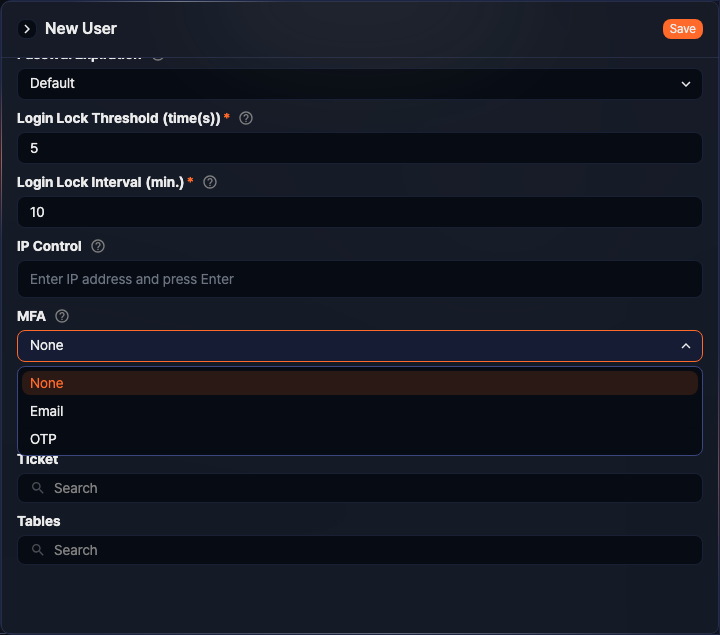
- None: MFA is not used.
- Email: Sends a verification code by email for two-factor authentication. An email server must be configured to use this option.
- OTP: Uses Google Authenticator or any OTP app that complies with RFC 6238.
-
For information on how users log in using MFA, refer to here.
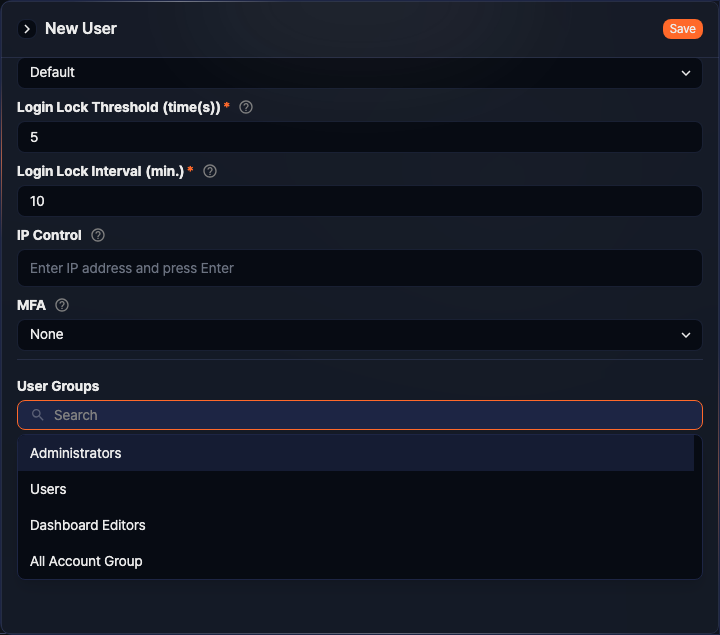
Groups
In the Groups section, you can assign the account to user groups.

To assign the account to a group:
-
Enter part of the user group name in the input field. A list of matching user groups appears; click the group to assign the account to it.
-
To assign the account to multiple groups, repeat the steps above.
-
To remove the account from an assigned group, click × next to the group name.
Permissions
Permissions define the Ticket Repositories and Tables that the account can access. When the role assigned to the account is User or Dashboard Publisher, access is granted only to the specified ticket repositories and tables. Cluster Administrators and Administrators have access to all tickets and tables.
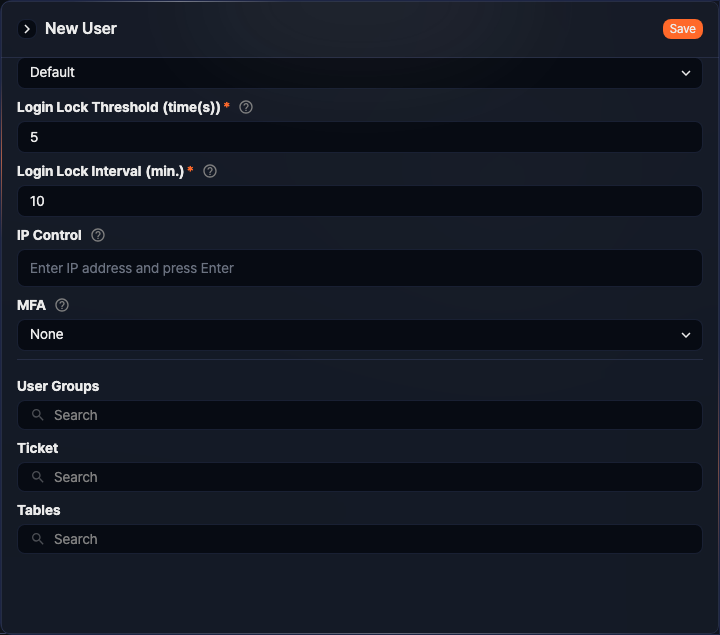
- Ticket repositories
- The ticket repositories accessible with this account. No ticket repositories are selected by default. Select only the repositories you want to grant access to.
- Tables
- The tables accessible with this account. No tables are selected by default. Select only the tables you want to grant access to.
Edit user
To modify user properties such as the password, or to unlock a locked account:
-
Click the Username of the account in the list.
-
In the Edit User panel, modify the information and click Save. For descriptions of each property, refer to Add user.
The following sections describe actions you can perform in the Edit User panel.
Per-user search volume control
In the Security Settings of the user edit panel, an administrator can set per-user limits on the number of concurrent queries and the query result row count. Both items appear only on the user edit screen and require Administrator or higher privileges to edit.
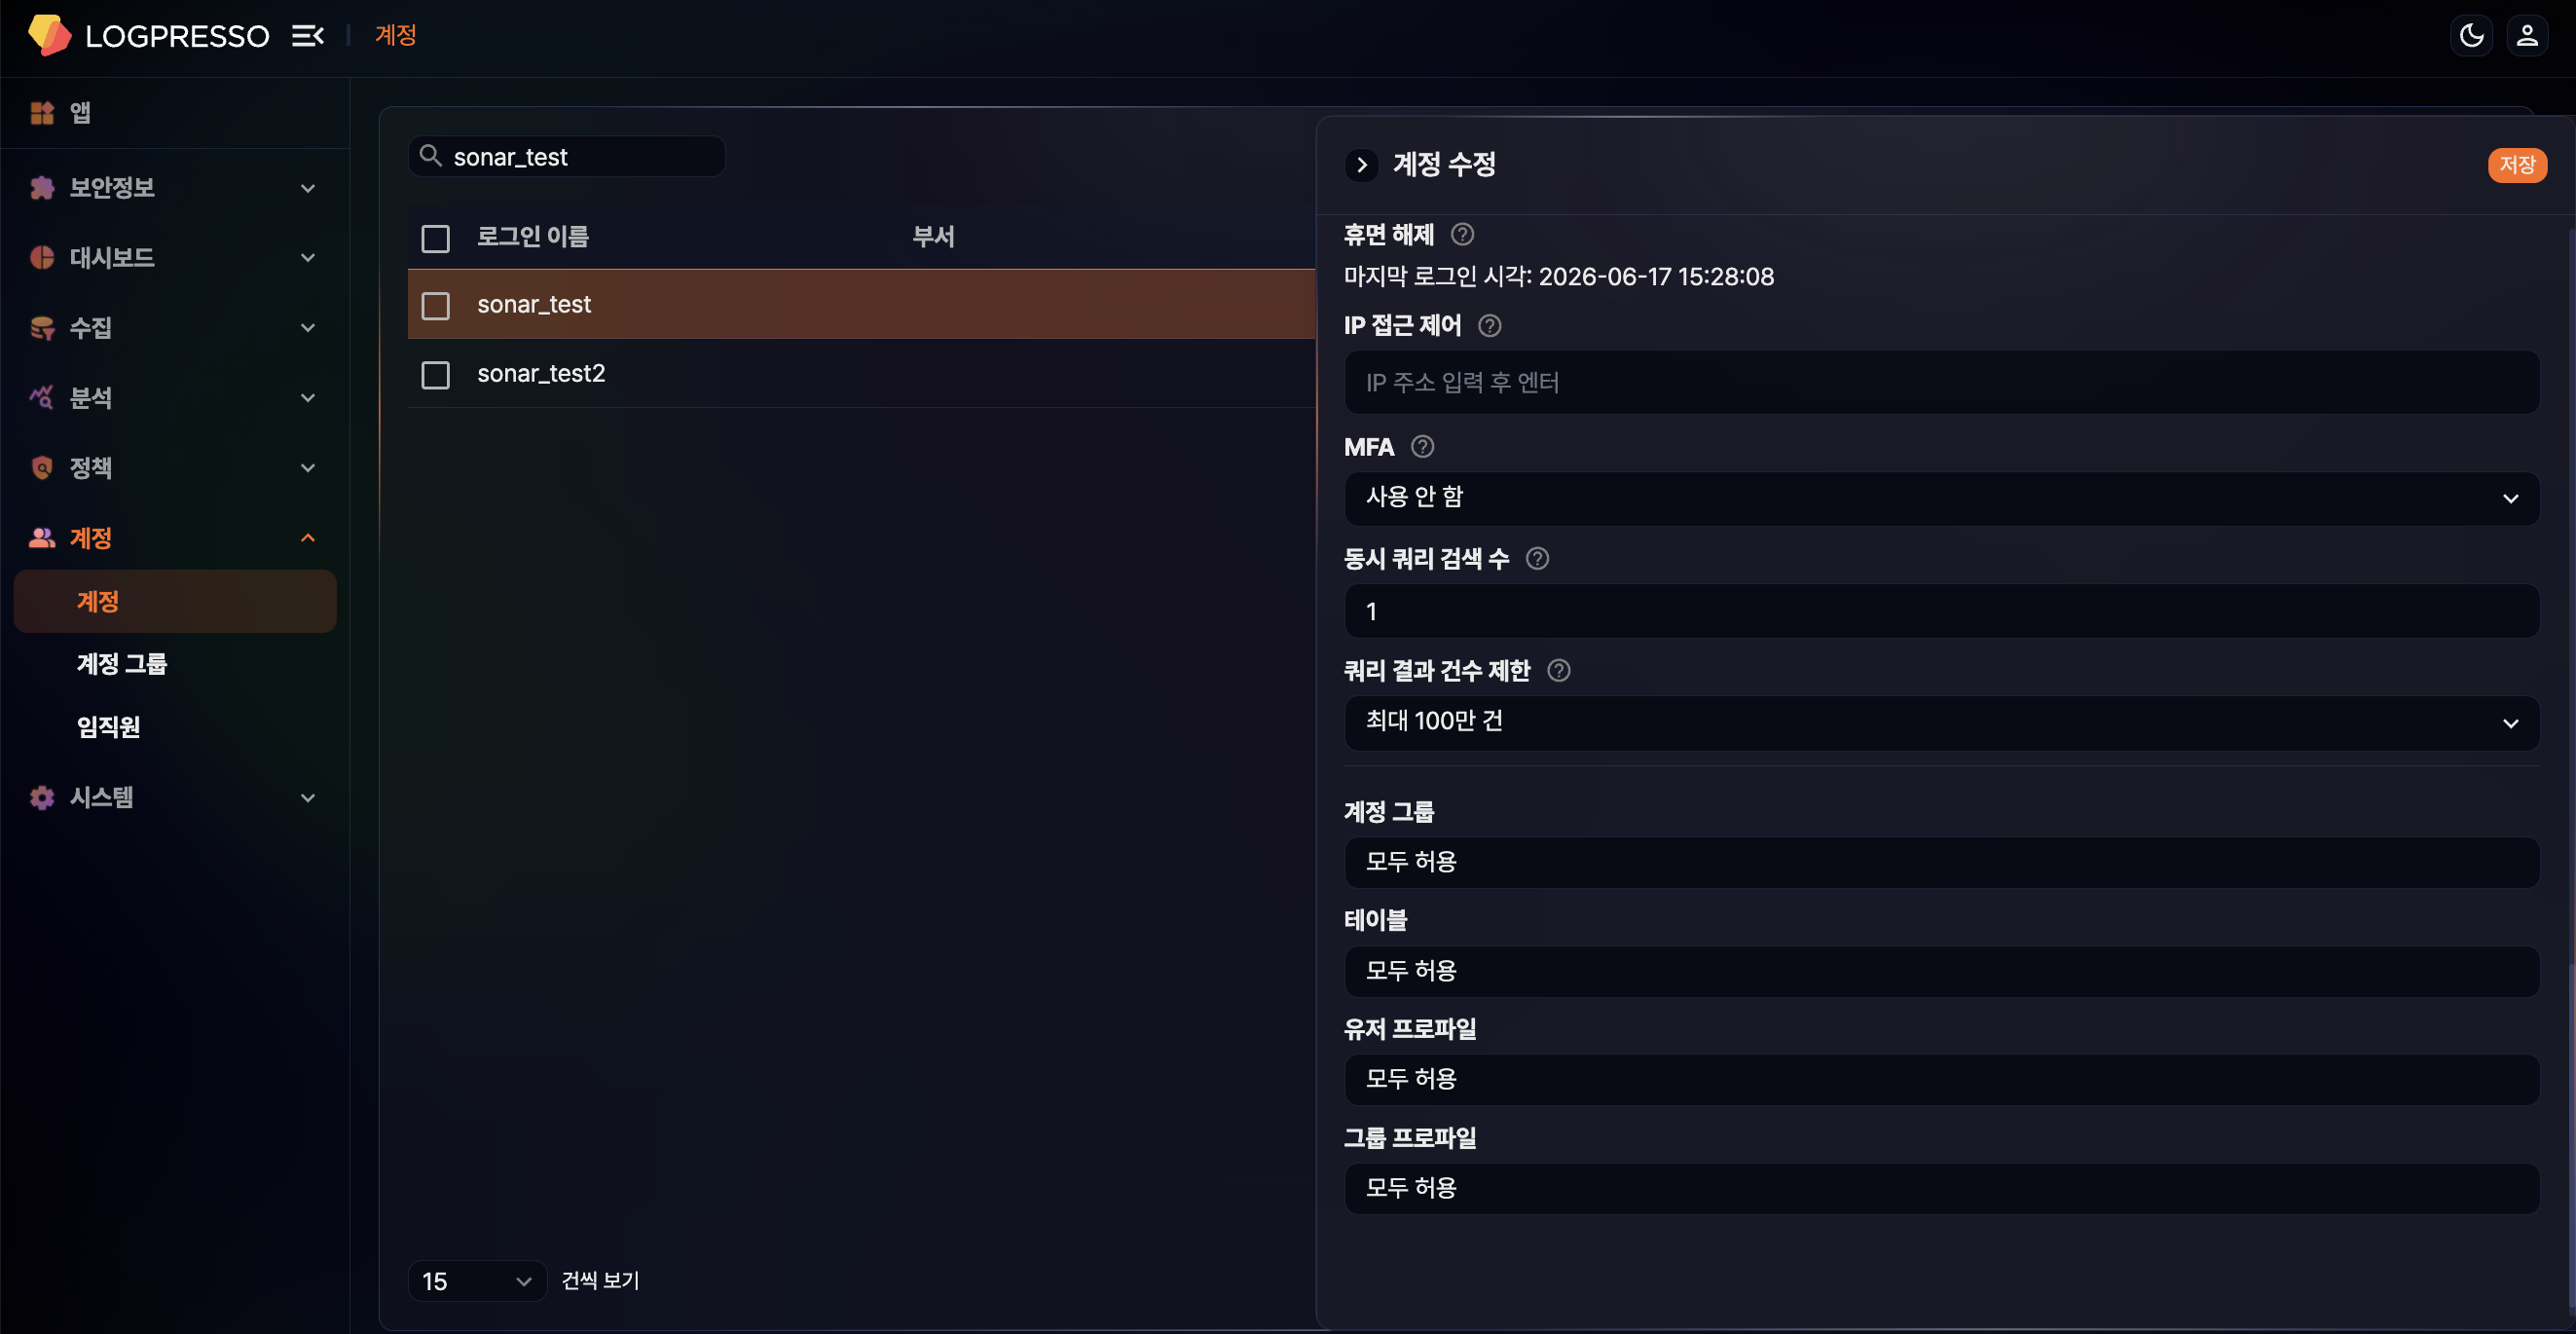
- Max concurrent queries
- The maximum number of queries a user can run at the same time (valid range: 1–999). Leave it empty to apply no limit on concurrent execution.
- Max query row limit
- The maximum result row count the user can select in the query menu. Choose from Unlimited, Max 10,000, Max 100,000, or Max 1,000,000 (default: Unlimited).
When a user with limits runs a query in the query menu, the server compares the number of currently running queries against the limit and, if exceeded, shows a message and blocks execution.
Reset MFA
For accounts that have previously configured MFA, you can view the MFA setup information in Security Settings as shown below. For information on how users configure their MFA device and log in, refer to here.
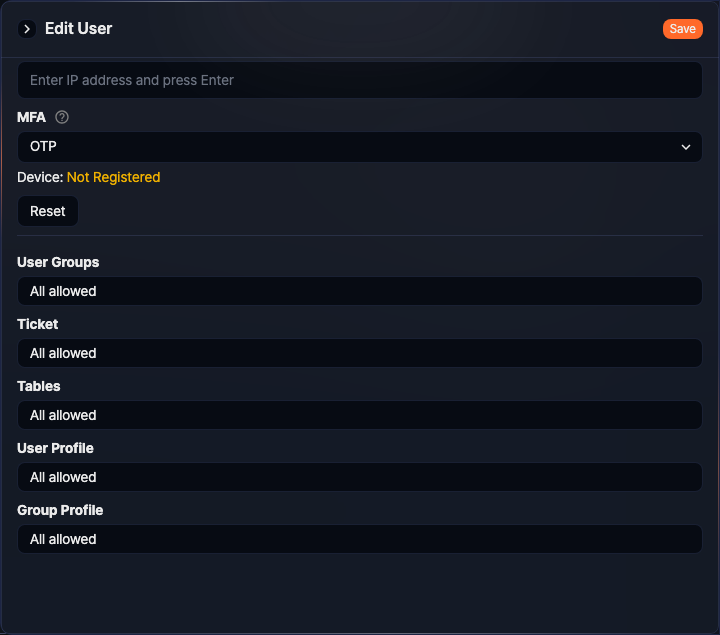
- MFA device
-
Indicates whether an MFA device is registered. Disabled indicates that the user has not yet set up MFA. If the user attempts to log in in this state, they are redirected to the MFA setup screen.
-
Enabled (green) indicates that a device is registered and the user is ready to authenticate using MFA.
- Reset
-
If a user has lost their MFA device or needs to change it, they can request an MFA reset from the administrator on the login screen. The reset request is sent to the administrator's registered email address. To remove the registered MFA device information, click Reset.
Issue or delete API key
An API key is required to use the Logpresso REST API. To issue an API key, click Issue in the API Key section under Basic Settings.
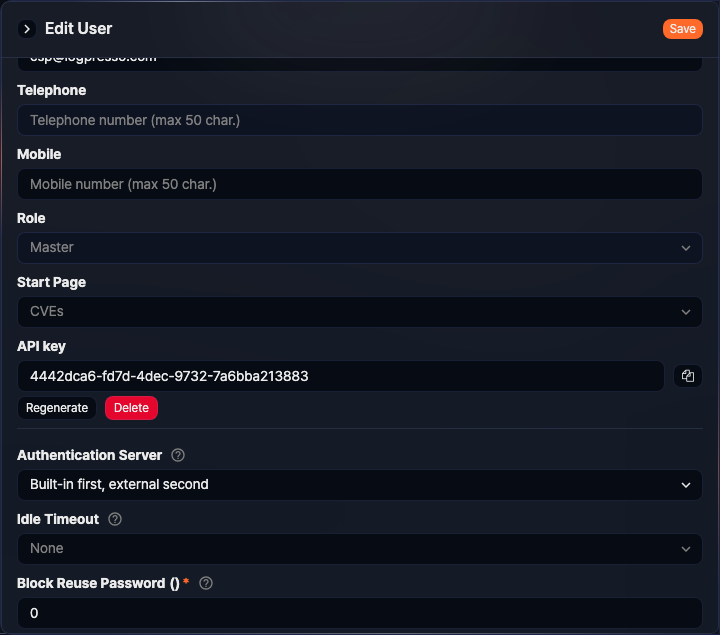
The following image shows the screen after an API key has been generated.
- Copy to clipboard
- Click the icon next to the generated API key to copy it to the clipboard.
- Regenerate
- Click to regenerate the API key.
- Delete
- Click to delete the issued API key.
Reset login failure count and unlock account
If a user fails to log in consecutively, the number of failed login attempts is displayed as shown below.

If the number of consecutive failures exceeds the login lockout threshold, the unlock time is also displayed.
To reset the login failure count or unlock the account, click Reset in the Login failure section.
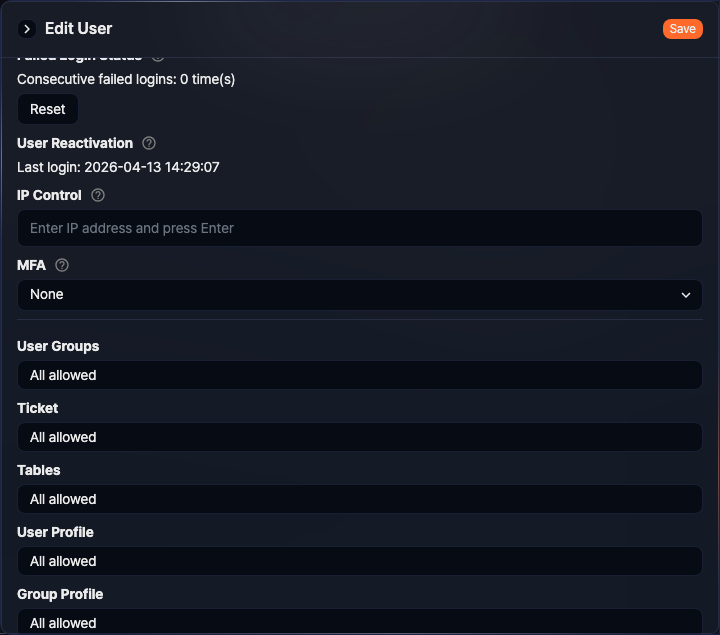
Reactivate dormant account
Depending on the server configuration, accounts that have not logged in for a certain period may be set to dormant status. You can check the last login date in the Edit User panel. If the account is dormant, a Reactivate button is displayed. Click Reactivate to lift the dormant status.
View and edit permissions
In addition to ticket repositories and tables, you can check the connect profiles available to the account.
Ticket repositories and Tables permissions can be changed in this panel, but User Profiles and Group Profiles can only be changed in Connect Profiles.
- User Profile
- If the account is included in the account sharing settings of a connect profile, the profile name is listed here.
- Group Profile
- If a user group to which the account belongs is included in the group sharing settings of a connect profile, the profile name is listed here.
Configure MFA in bulk
To enable, disable, or change the MFA method for one or more accounts at once:
-
Select the checkbox for each account row you want to configure.
-
Select the action in the toolbar.
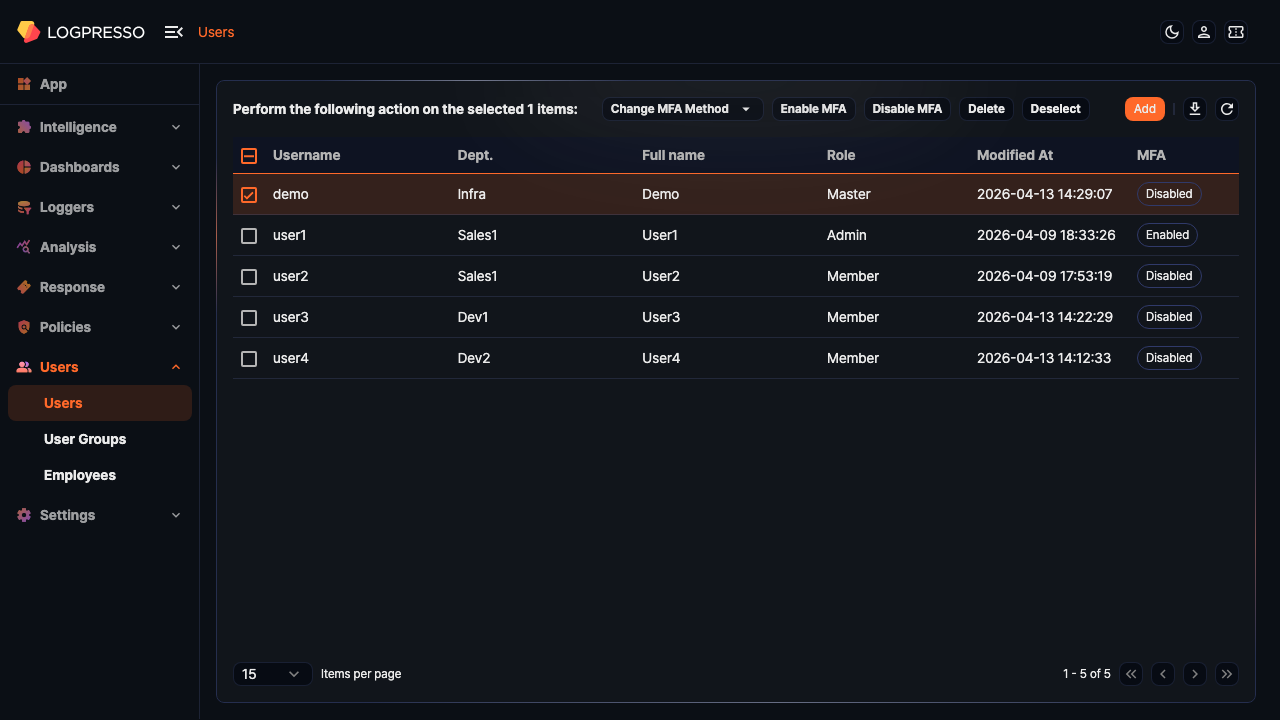
- Change MFA method: Changes the MFA method for the selected accounts. Select Email or OTP from the dropdown to enable MFA with that method.
- Enable MFA: Enables MFA for the selected accounts.
- Disable MFA: Disables MFA for the selected accounts.
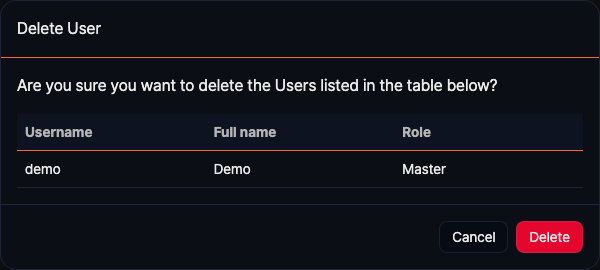
Delete user
To delete a user:
-
Select the checkbox for the row containing the account you want to delete.
-
Click Delete in the toolbar.

-
In the Delete User dialog, review the list of accounts to be deleted and click Delete. Click Cancel to abort.
When a user account is deleted, only the account itself is removed; related data is retained.
Resources owned by the deleted account, such as dashboards, datasets, detection rules, behavior profiles, and report groups and templates, are not deleted. Their ownership is transferred to an administrator account so that they remain manageable.
For historical data whose ownership is not transferred, such as tickets, the former owner's information is preserved for later reference and auditing.
A user cannot be deleted when no other administrator account remains to receive ownership.
Password policy
The password policy defines the length and complexity rules that a local account's password must satisfy, and it applies to all accounts. The server checks the policy when you create an account or change or reset a password. It does not apply when a local password is not used, such as for accounts that authenticate only through an external provider.
Even if you do not configure it, the following default policy applies:
- At least 9 characters
- Includes at least one letter, one number, and one special character
- Does not repeat the same character three times in a row
- Cannot contain the username
An administrator can change the policy from the Logpresso shell using the following global options.
| Option | Description | Default | Valid range |
|---|---|---|---|
| min_password_len | Minimum password length | 9 | 3-100 characters |
| max_password_len | Maximum password length | 100 | Above the minimum length, up to 100 |
| password_complexity | Complexity rules (comma-separated) | digit,special,no_repeat=3 | See the rules below |
You can specify the following rules for password_complexity:
upper: Includes at least one uppercase letterdigit: Includes at least one numberspecial: Includes at least one special characterno_repeat=N: Does not repeat the same character N times in a row (N is 2-5, default 3)
Regardless of the complexity rules, a password must always include at least one letter.
For example, to enforce a policy of at least 12 characters, at most 20 characters, mandatory uppercase letters, numbers, and special characters, and no same character repeated four times in a row, configure it as follows:
sonar.setGlobalOption min_password_len 12
sonar.setGlobalOption max_password_len 20
sonar.setGlobalOption password_complexity upper,digit,special,no_repeat=4
To unset an option you have configured, run sonar.unsetGlobalOption [option name]. If you specify an invalid value or a value outside the allowed range for an option, the server adjusts it to the valid range or uses the default value.