Node
For an overview of clusters and nodes, refer to here. In Settings > Cluster > Node (tab), you can view the registered node pairs that make up the Logpresso cluster and add or modify the node pairs used for cluster configuration. In this screen, redundant nodes are managed as a node pair.
View Node Pair List
You can view the registered node pair list in Settings > Cluster > Node (tab).
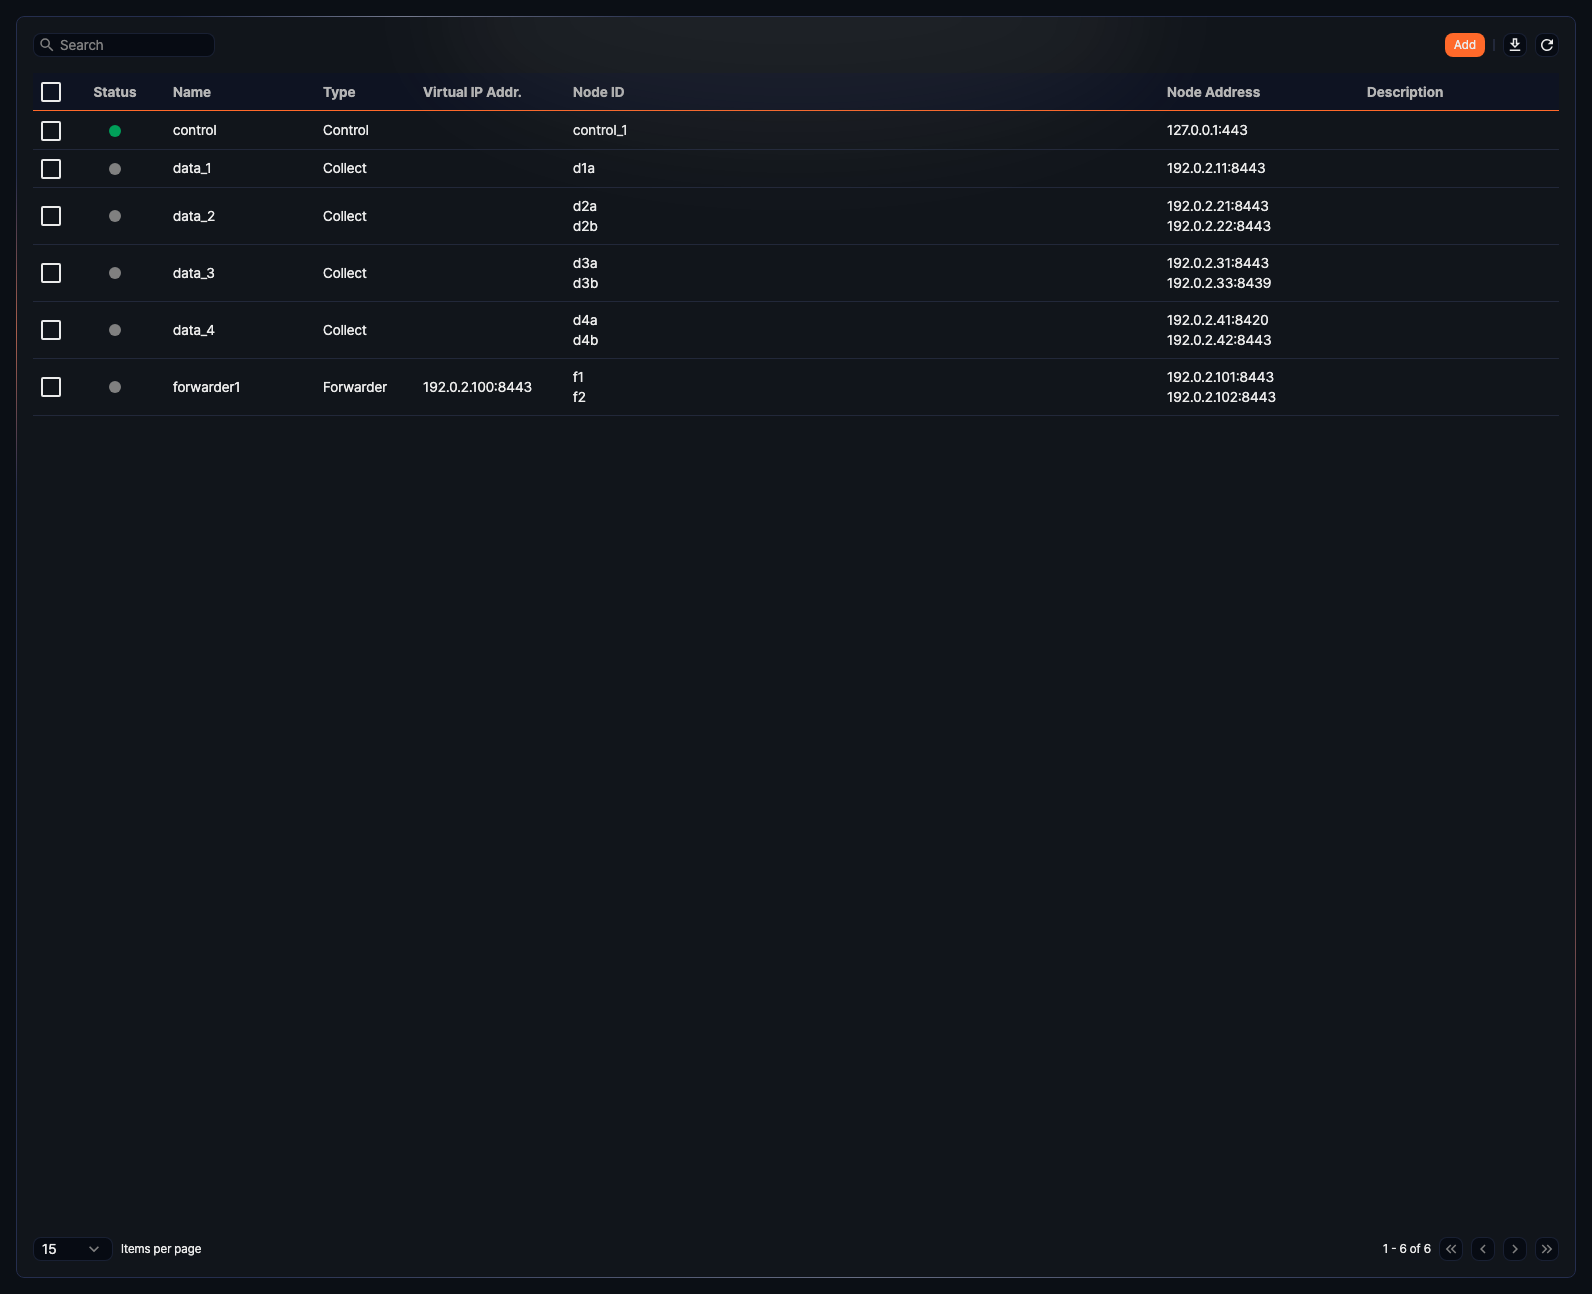
The node pair list shows the following information:
- Status: Connection state of the node pair (green: connected, gray: not connected)
- Name: Unique name of the node pair
- Type: Role of the node pair (Control, Collect, or Forwarder)
- Virtual IP Address: Virtual IP address and port shared by Node A and Node B
- Node ID: Node A ID and Node B ID, displayed on separate lines
- Node Address: Node A address and Node B address, displayed on separate lines
- Description: Description of the node pair
To narrow the node pair list, use the search box in the toolbar.
Download Node List
To save the node pair list to your local PC, click Download in the toolbar and choose a file format.
Refresh Node List
To refresh the node pair list with the latest information, click Refresh in the toolbar.
Add Node Pair
A node pair is the basic unit used to configure a cluster. You can register only Node A first and add Node B later if needed.
To add a node pair:
-
In Settings > Cluster > Node (tab), click Add in the toolbar.
-
In the Add Cluster Node screen, configure the general settings.
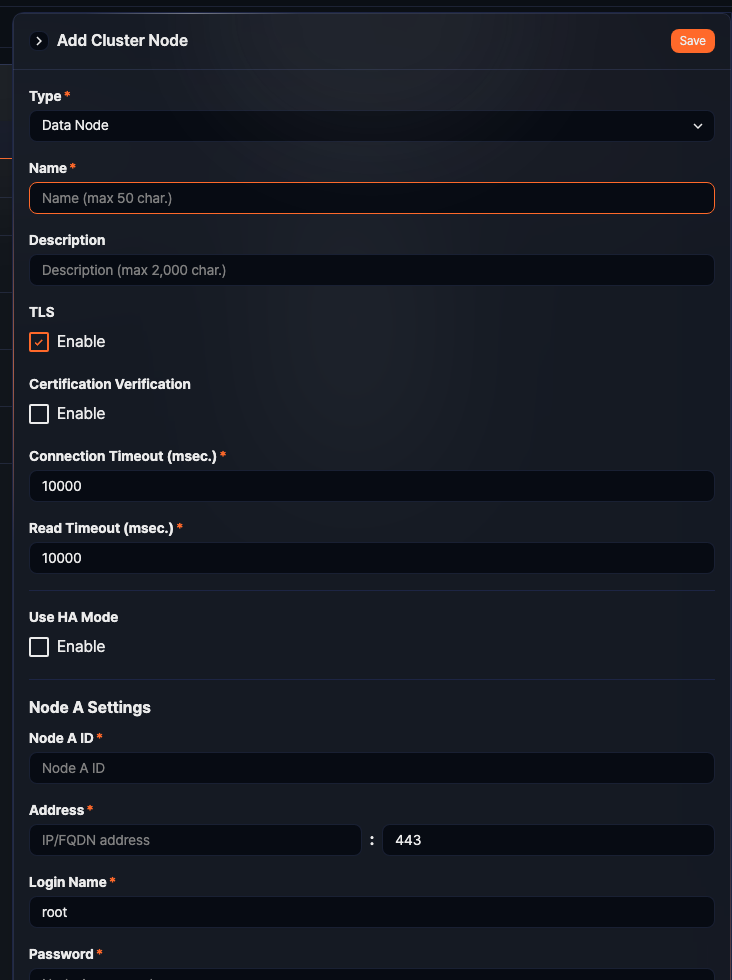
- Type: Role of the node pair (Data Node, Control Node, or Forwarder Node; default: Data Node)
- Name: Unique name that identifies the node pair (required, up to 50 characters)
- Description: Description of the node pair (up to 2,000 characters)
- TLS: Whether to use TLS for REST API communication between nodes (default: enabled)
- Certification Verification: Whether to verify certificates during TLS communication (default: disabled)
- Connection Timeout: Maximum time to wait for a connection, in milliseconds (default: 10,000; range: 0 to 3,600,000)
- Read Timeout: Maximum time to wait for a response, in milliseconds (default: 10,000; range: 0 to 3,600,000)
- Use HA Mode: Whether to enable high-availability redundancy. When enabled, Virtual IP and Node B Settings become available.
- Virtual IP: Virtual IP address and port shared by Node A and Node B. This field is required when Use HA Mode is enabled.
NoteThe virtual IP must not overlap with the address of Node A or Node B.
-
In Node A Settings and, if needed, Node B Settings, enter the node-specific properties. Node B Settings are available only when Use HA Mode is enabled.
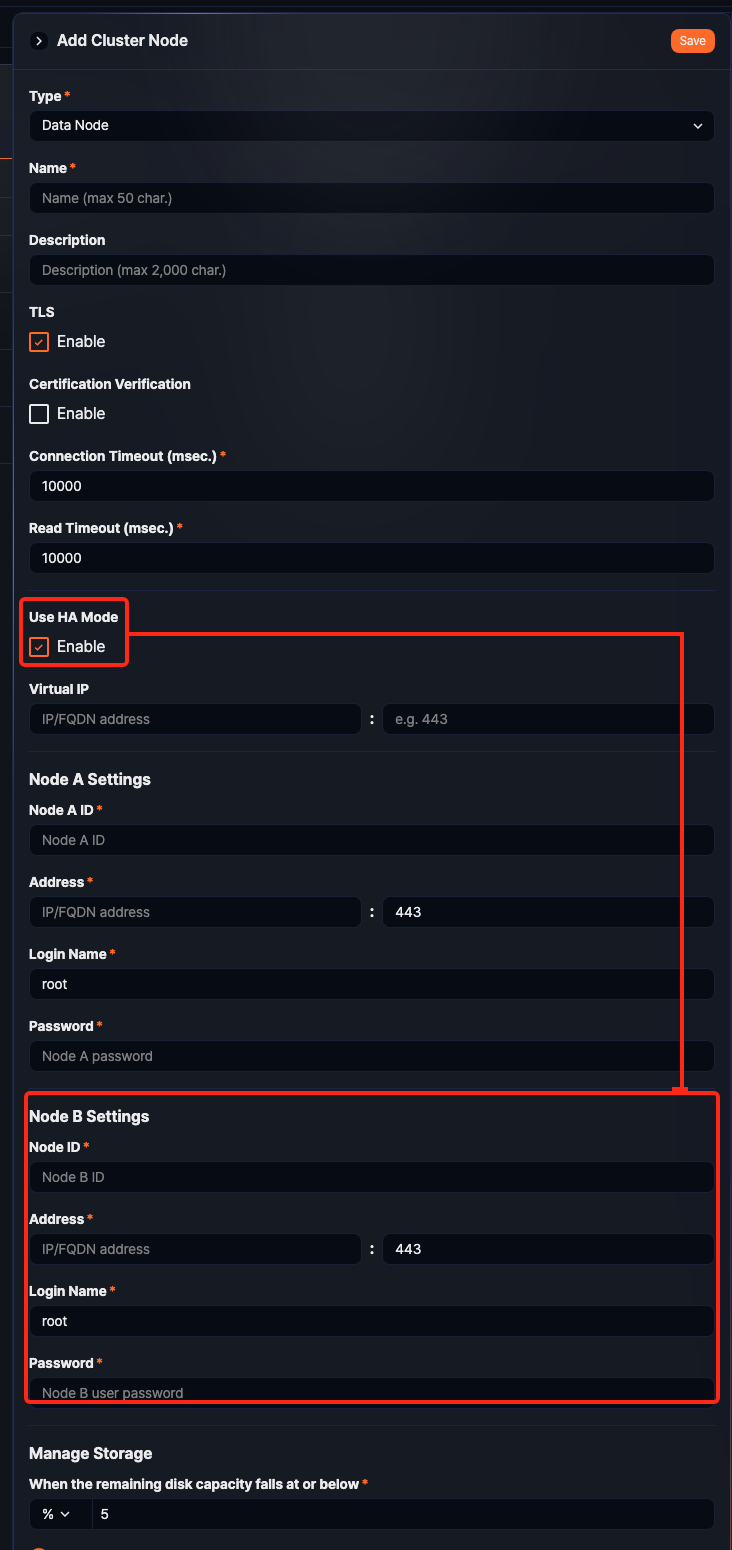
- GUID: GUID of the node. This value is displayed after the node pair is created.
- Node ID: Unique identifier of the node (required, up to 255 characters)
- Address: Actual IP address or domain address of the node and its port (required; port range: 0 to 65535; default: 443)
- Login Name: Account ID used for node communication (required, up to 50 characters; default:
root) - Password: Password for the node communication account (required when creating the node pair, up to 50 characters)
-
Review the settings and click Save. To cancel, click the back button and close the side panel.
Edit Node Pair
To modify a node pair, add Node B to an existing node pair, or remove the standby configuration:
-
In the node pair list, click the Name of the node pair that you want to edit.
-
In the Edit Cluster Node screen, change the required properties. For the fields to configure, refer to Add Node Pair.
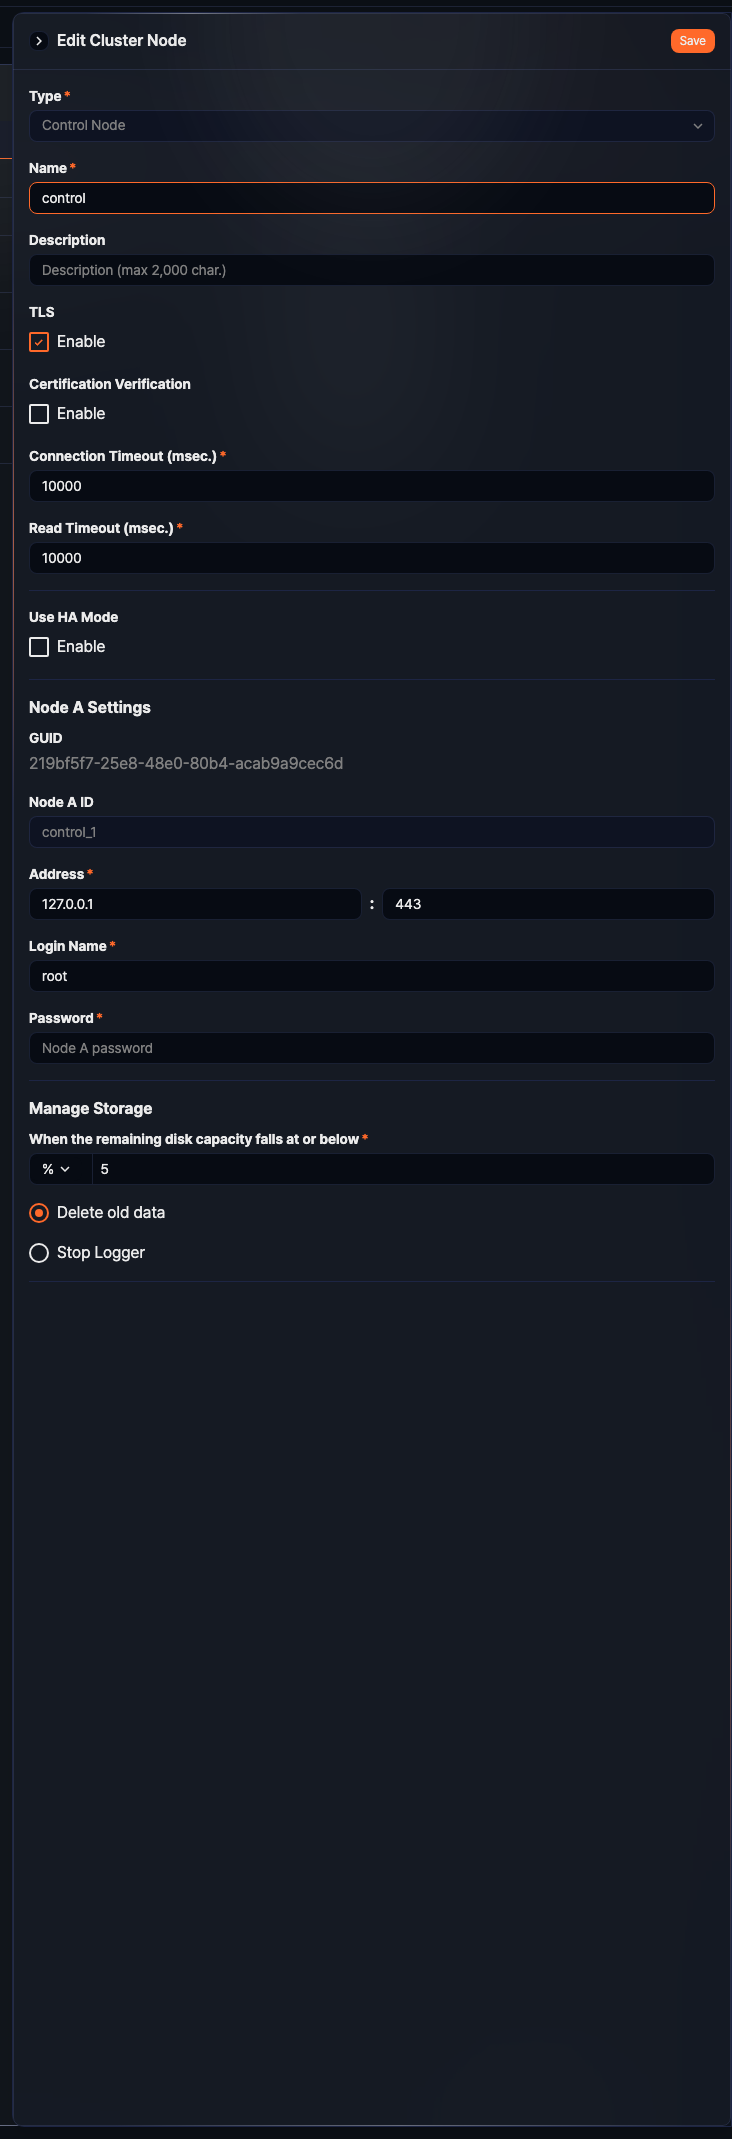
- The Type and the existing Node ID values are read-only after the node pair is created.
- Existing GUID values for Node A and Node B are displayed only in the edit screen.
- To stop using Node B, clear Use HA Mode.
-
Review the updated settings and click Save.
Delete Node Pair
To delete a node pair:
-
Check whether any loggers depend on the node pair that you want to remove.
-
Select the checkbox for the node pair and click Delete in the toolbar.
-
In the Delete Cluster Node dialog, review the node pair and click Delete. To keep the node pair, click Cancel.
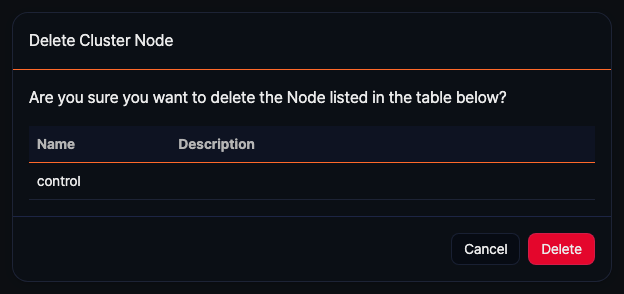
If one or more selected node pairs cannot be removed, the screen shows a failure dialog with the node name and the reason for the failure.
Storage Management
When you add or edit a node pair, configure the Manage Storage section to define how the node pair responds when available disk space becomes low.
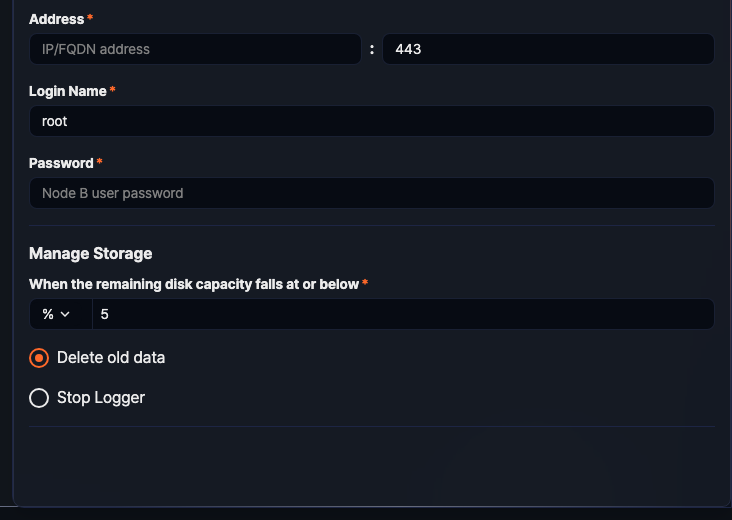
- Define the threshold for minimum free disk space.
- When the unit is %, the default is 5 and the valid range is 1 to 50.
- When the unit is MB, the default is 100 and the valid range is 100 to 9,999,999,999.
- Select the action to perform when the remaining disk capacity falls at or below the configured threshold.
- Delete old data: Deletes older data first to recover free space (default)
- Stop Logger: Stops logging on the node pair