
Sites
Overview
Sites are reference data that separate assets by operating location or organizational unit. Under Policies > Sites, define sites and then link them when registering assets, so you can distinguish assets by operating location or organizational unit even when they share the same IP range. In practice, you organize the locations or operating entities the assets belong to — such as headquarters, a branch office, a data center, a disaster recovery center, or a research center — as sites.
A site has two separate values: an Identifier and a Name. The identifier is unique within the company and is the value other screens use to refer to the site. The name is the display name shown on screen, and you can store a different one for each console language. Both values appear together on screen only in the site list and in the site panels. The Site column and the site filter on the asset and ticket lists, and the site selection list on the asset panels, all show the identifier. The only exception is the selection list you use when you add a Detection-based Ticket or edit its content, which shows the name. Because most screens refer to a site by its identifier, choose identifiers that operators can recognize on those screens.
Logpresso Sonar ships with no sites. Right after installation the site list is empty and shows only Nothing to show, so you have to add the sites your operation needs.
Accounts with the Cluster Administrator, Administrator, or User role can all view the site list and site information and download the list. You need the Cluster Administrator or Administrator role to add, edit, or delete a site. Accounts with the User role do not see the Add button, the row checkboxes, or the Save button in the panels. Accounts with the Guest role do not see the Policies > Sites menu at all. See Account permissions for the permissions of each role.
View/search the site list
You can view or search the site list under Policies > Sites. The list is always sorted by Identifier in ascending order, and you cannot change the sort order from the column headers. Each page shows 15 sites by default, and you can change the page size in the selector below the list.
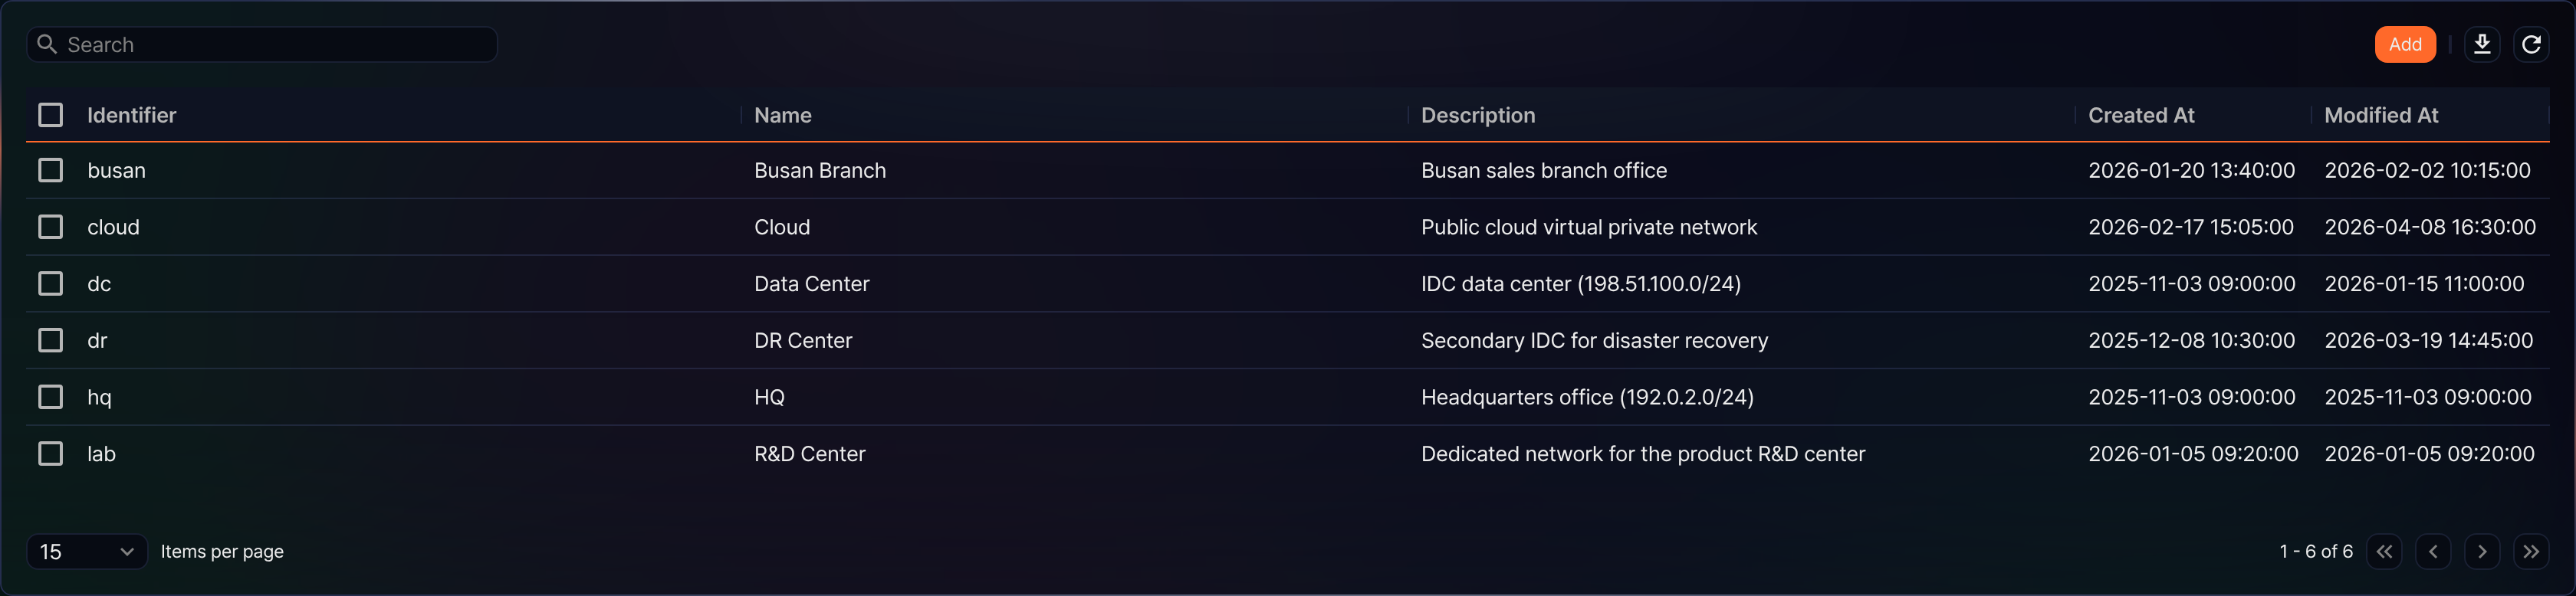
- Identifier: The value that identifies the site within the company. This is the value shown on the other screens that refer to the site.
- Name: The site name shown in the current console language. If no display name is registered for that language, the default name is shown.
- Description: The description of the site. It is not stored per language, so the same value is shown regardless of the console language.
- Created At: The date and time the site was added.
- Modified At: The date and time the site was last modified.
To find a specific site in the list, enter a keyword in the search box in the toolbar and press Enter. The search matches partial text against three targets — Identifier, Description, and the site name (the default name and the display name of every language) — and a site stays in the list when any one of them matches. If you enter several words separated by spaces, one target must contain all of them. For example, enter idc to list only the sites whose description mentions IDC.

The search also covers the display names of languages that the current console does not show. A site whose Korean display name is 데이터센터, for example, still matches the keyword 데이터 in the English console, where its name appears as Data Center. When a result does not visibly contain the keyword, check its display names in the other language.
Download the list
To save the site list to your local PC, click  in the toolbar, set the items in the Download Site List dialog box, and then click Download. The download icon is disabled when the list has no sites to show.
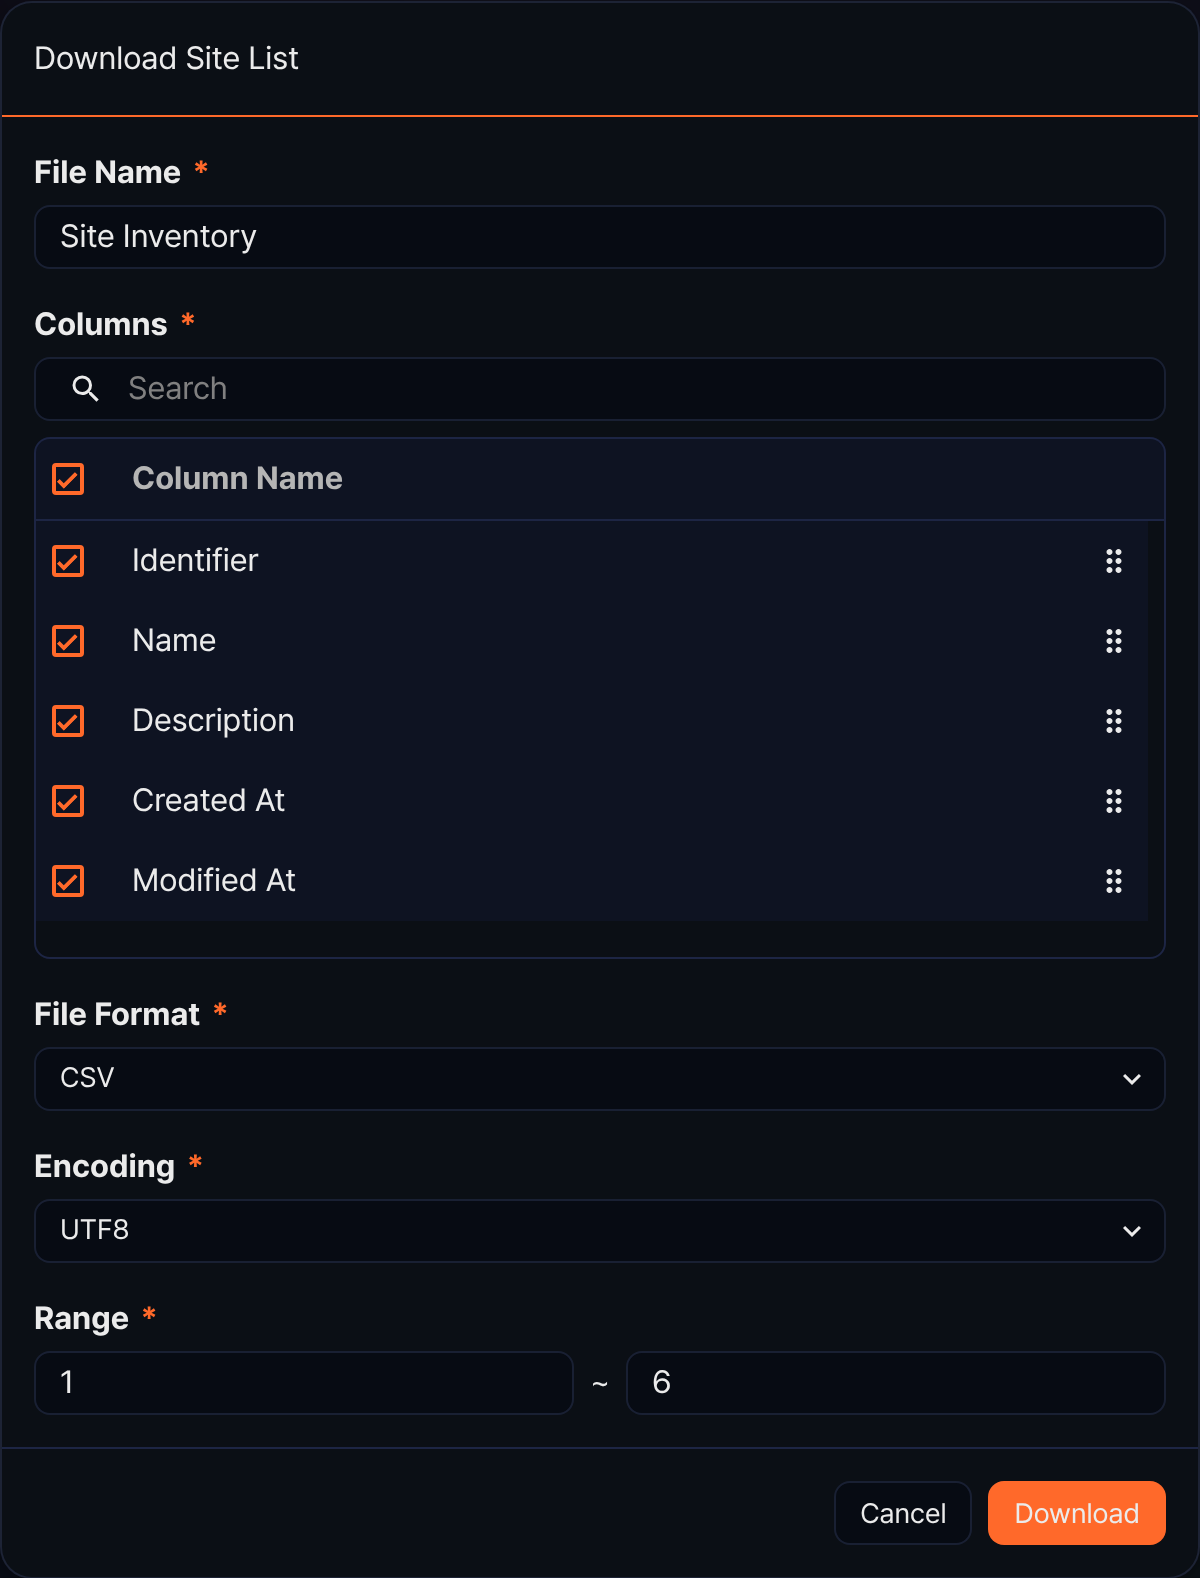
- File Name: The name of the file to download (required, up to 200 characters). The default is
Site Inventory. - Columns: The columns to include in the file. The same five columns as the list (Identifier, Name, Description, Created At, and Modified At) are offered and all of them are selected at first. Clear a checkbox to leave a column out, or drag the handle at the right end to change the order.
- File Format: One of CSV, XML, Microsoft Word, HTML, JSON, and PDF (CSV by default).
- Encoding: Shown only when File Format is CSV or JSON. The available options depend on the console language. In the English console you can choose UTF8, UTF16, or Latin 1, and the default is UTF8.
- Range: The first and last row numbers to download. By default the range runs from the first row of the current page to the total number of rows that match the search.
Refresh the list
To reload the site list with the latest information, click  in the toolbar.
Add a site
Add a site first to manage assets by operating location or organizational unit.
-
Under Policies > Sites, click Add in the toolbar.
-
Enter the values you need in the New Site panel.
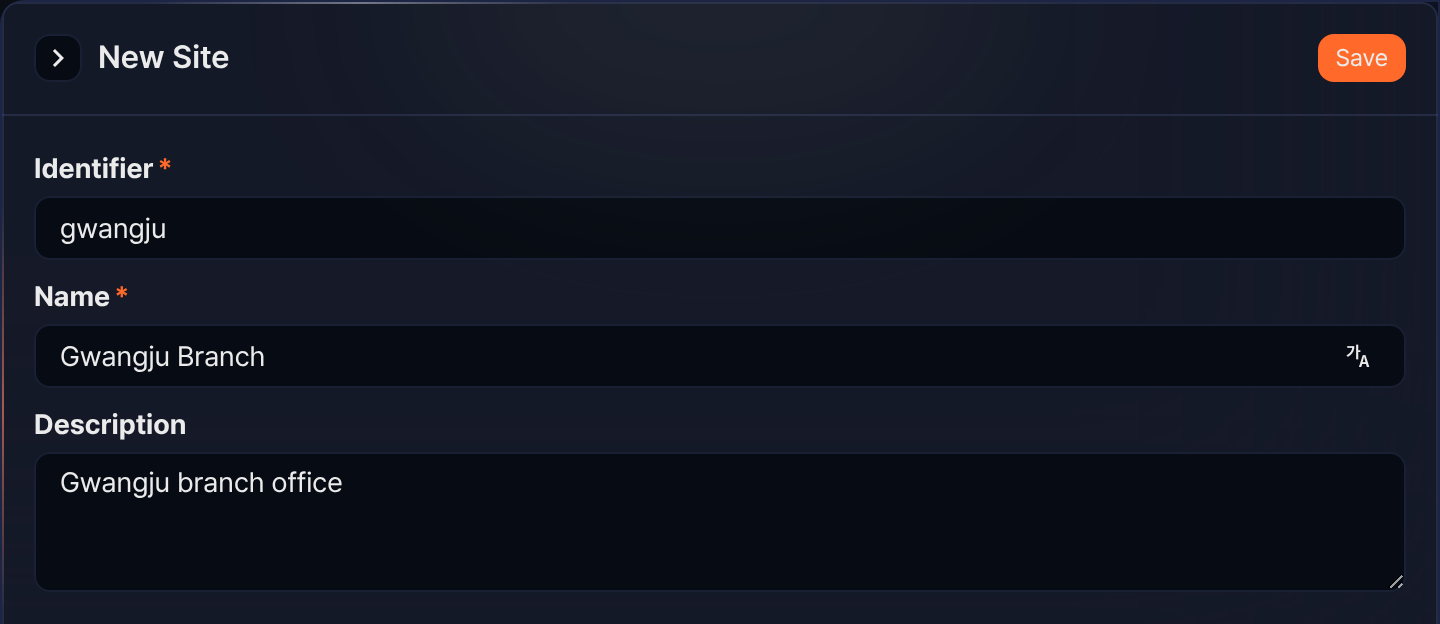
- Identifier: The value that identifies the site within the company (required, up to 50 characters). This value appears as it is on the asset and ticket screens, so keep it short and use lowercase letters and digits without spaces.
- Name: The default name of the site (required, up to 50 characters). The site panels show this value, and so does the Name column of the list in a console language that has no display name registered.
- Description: What the site covers or what it is used for (up to 2,000 characters).
-
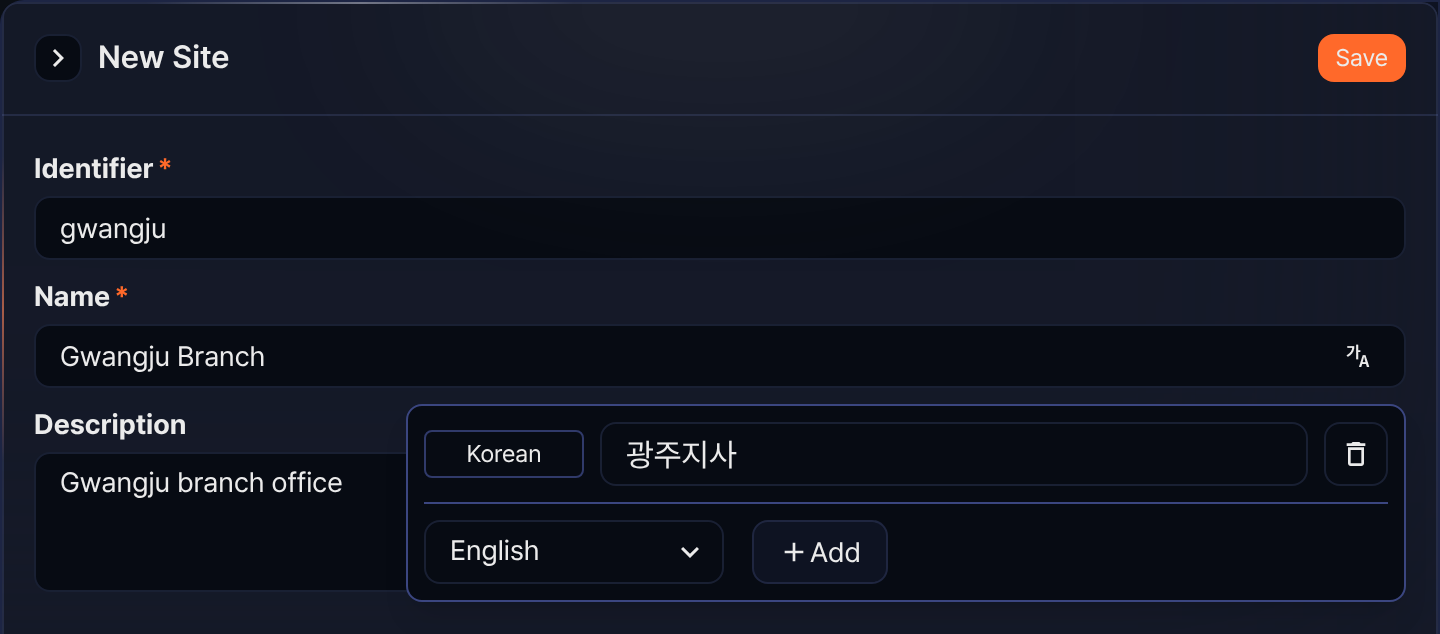
To show a different name depending on the console language, click the language icon at the right end of the Name box and register a display name per language. Choose the language, click Add, and then type the name in the box on the right. You can choose between Korean and English, and a language you already registered drops out of the list. Once you register both languages, the language list and Add are disabled. Remove a registered row with the delete icon at its right end.
-
Click Save.
When the site is saved, the Site created. toast appears and the panel closes. If a site with the same identifier already exists, the Failed to create site. A duplicate code exists. toast appears and nothing is saved. To close the panel without saving, click  on the left of the header or press Esc. If you already entered values, the Confirm Changes dialog box appears; click Confirm to discard them and close the panel.
Edit a site
To change the identifier, name, or description of a site,
-
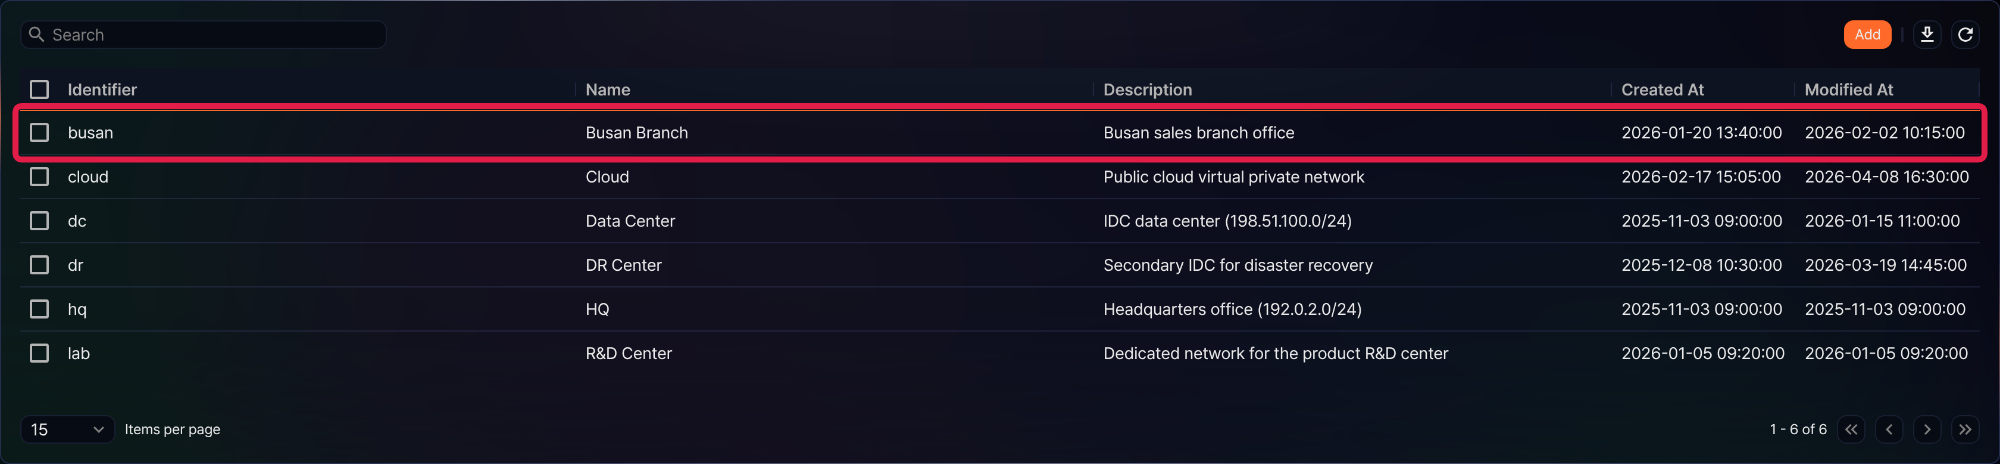
Click the row of the site you want to edit in the site list. Click anywhere on the row other than the checkbox to open the Edit Site panel.
-
Change the values in the Edit Site panel, then click Save. The panel has the same fields as the New Site panel. Click the language icon at the right end of the Name box to review and change the display names you registered.
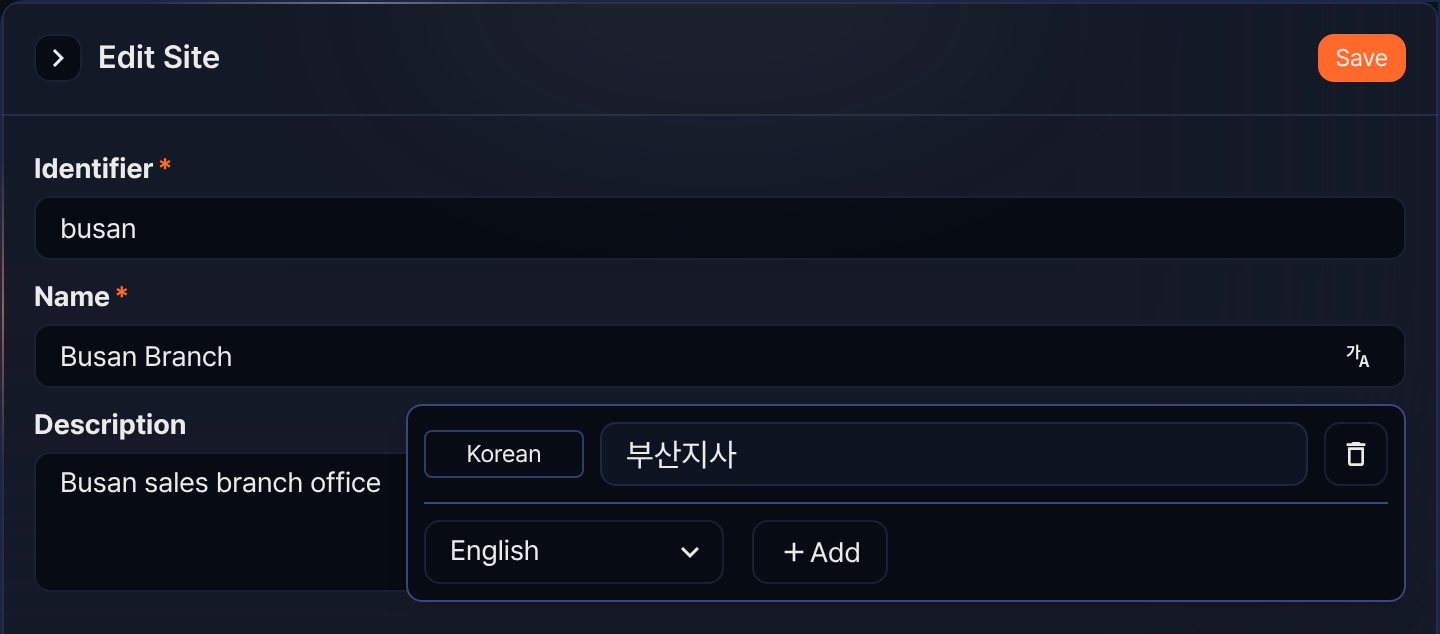
When the site is saved, the Site edited. toast appears and the panel closes. When you change the identifier, the asset and ticket screens that refer to the site show the new identifier. If you change it to an identifier another site already uses, the Failed to edit site. A duplicate code exists. toast appears and nothing is saved. If you try to close the panel after changing a value without saving, the Confirm Changes dialog box appears. Click Confirm to discard your changes and close the panel, or Cancel to go back to it.
Delete a site
To clean up a site you no longer use,
-
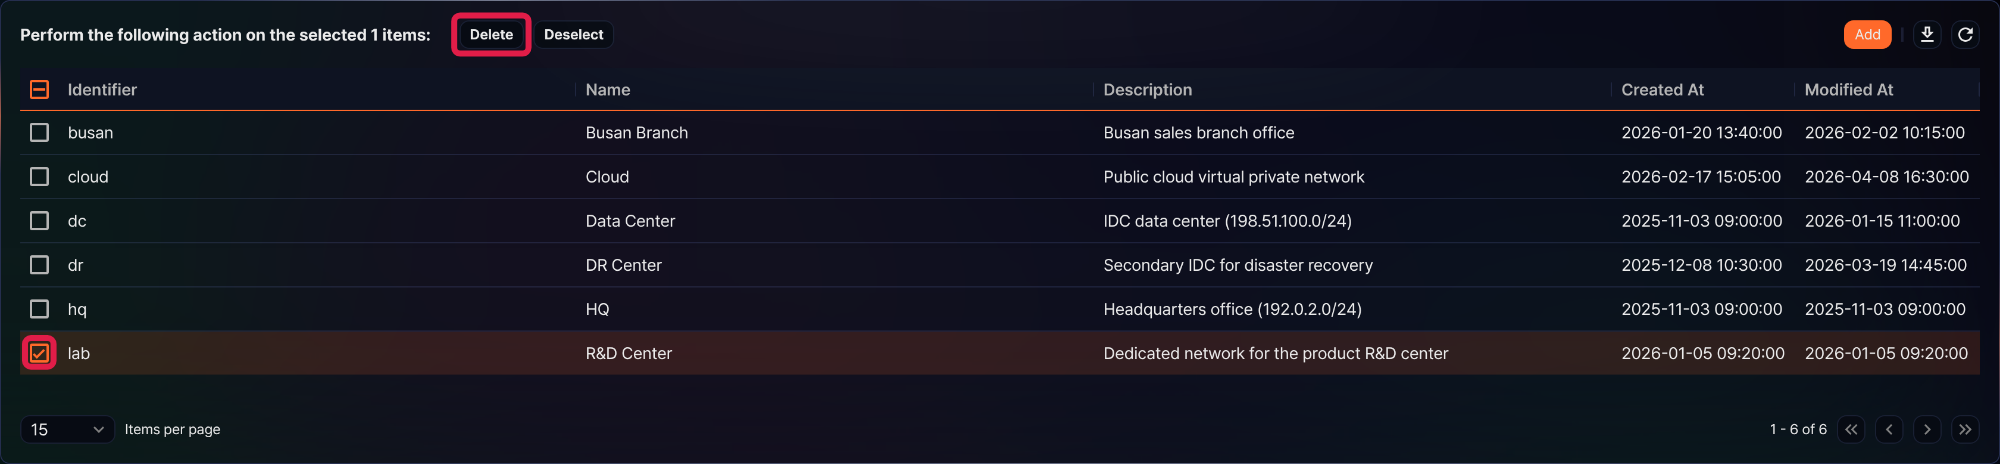
Select the checkbox on the row of the site you want to delete. As soon as you select a checkbox, the search box on the left of the toolbar is replaced by the selected-item action row, which shows the number of selected items along with Delete and Deselect. Select the checkbox in the header to select every site on the current page, and click Deselect to clear the selection.
-
Click Delete in the selected-item action row.
-
Review the identifiers of the sites to delete in the Delete Site dialog box, then click Delete. To cancel, click Cancel. The dialog box shows only the identifier column, so check the name and description in the list first if you need them.
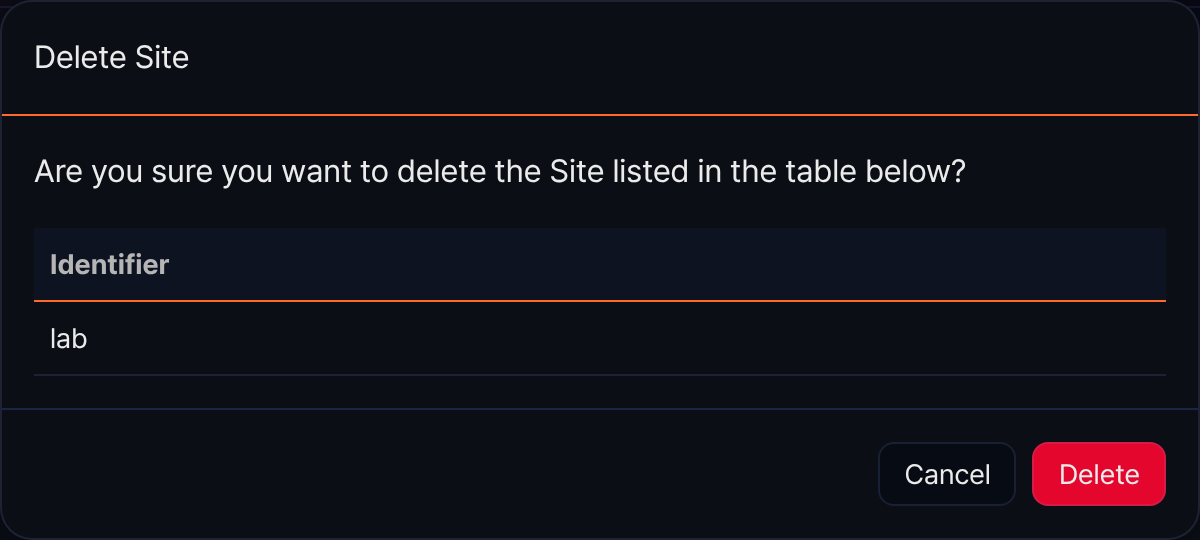
When the sites are deleted, the Site(s) deleted. toast appears, the selection is cleared, and the list is reloaded.
If some of the selected sites cannot be deleted — for example, when a site was already removed in another session — the Failed to Delete Site dialog box opens and lists the identifier and the reason. Click OK to close it. The selection is cleared and the list is reloaded as soon as the dialog box opens, so you do not have to refresh the list — select the sites again and delete them.
Using sites
Assets
You set a site in the Site field when you register or edit an asset under Policies > Assets. The selection list of the Site field shows site identifiers rather than display names, and you can narrow it down by typing part of an identifier in the search box above the list. Choose Select at the top of the list to clear the site you assigned.
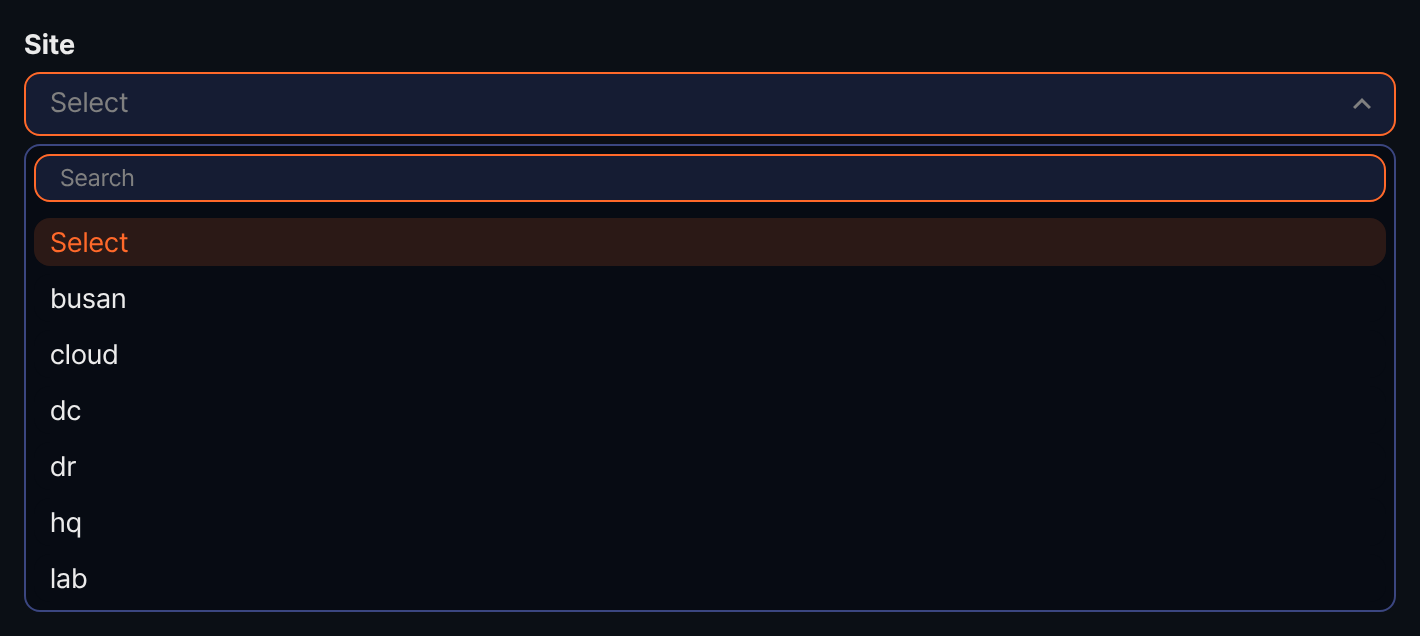
The asset list also has a Site column and a site filter, so you can narrow assets down by site or include the site in a downloaded list. These also show the site identifier.
Tickets
The ticket list has a Site column and a site filter that collect the tickets of a specific site. As on the asset screens, the value shown is the site identifier. When you add a ticket manually, you set a Site only if you register it through Add > Detection-based Ticket, and the same field appears when you edit the content of a detection-based ticket you registered yourself. That selection list is the one place that shows the same value as the Name column in the site list instead of the identifier — the display name for the current console language, or the default name when none is registered.