Sentries
Overview
Sentry is an agent that connects remote hosts to Logpresso Sonar for log collection. In Settings > Sentries, you can register the target host OS and the server that the Sentry will connect to, then copy the installation command generated by the web console and run it on the target host.
After deployment, you can monitor connection status together with CPU, memory, disk, and network usage from the list. If a Sentry is connected, you can click its Sentry ID to open remote actions such as process lookup, network connection lookup, routing table lookup, ARP cache lookup, thread dumps, bundle lookup, and restart.
Supported environments
This document describes how to deploy a Sentry in Linux and Windows environments.
To deploy a Sentry in a Unix environment, contact Logpresso. The supported Unix environments are listed in the following table.
| OS | Installable | Recommended JDK version |
|---|---|---|
| AIX 5.3 TL9+ | O | Java 7 (only option) |
| AIX 6.1–7.1 | O | JDK 8 recommended |
| AIX 7.2–7.3 | O | JDK 8 or Semeru 11+ |
| HP-UX 11i v3 Itanium | O | JDK 8 recommended |
| HP-UX 11i v1/v2, PA-RISC | X | Not installable (supports up to Java 6) |
| Solaris 10u9+/11 | O | JDK 8 recommended |
| Solaris 8/9 | X | Not installable (supports up to Java 6) |
Prerequisites
Before you deploy a Sentry, prepare the following on the control node:
- Open the network ports that the Sentry and the Logpresso server use to communicate.
- Upload the JRE/JDK required to run the Sentry.
- Register the Sentry package used for installation.
Once preparation is complete, running the installation command generated by the web console on the target host automatically downloads and installs both the Sentry and the Java runtime.
Network ports
Sentry installation, data reception, and remote management use the following ports. To install a Sentry and receive the data it sends, you must allow access to these ports in the node's local firewall. Port numbers may vary depending on your environment.
| Port | Service owner | Description |
|---|---|---|
| 7140/tcp | Forwarder or data node (varies by tier configuration) | Receives the data sent by the Sentry (TLS channel) |
| 44300/tcp | Control node | Distributes the Sentry package and certificate (TLS channel) |
Upload JRE/JDK
A Sentry runs on a Java runtime (JRE or JDK) that the Logpresso server distributes together with the Sentry installation files. Download a trusted OpenJDK distribution from one of the following official sources and upload it to the control node.
Before uploading, rename the file and adjust its extension to the following rules so the Logpresso server can recognize it.
- The file name must start with
jdk-orjre-. - The text from the prefix up to the first dot (
.) must be a numeric-only major version.- Recognized examples:
jre-21.0.1.tar.gz(detailed version),jdk-21.zip(short version) - Unrecognized example:
jre-8u151-linux-x64.tar.gz(the version contains non-numeric characters)
- Recognized examples:
- The extension must be
.tar.gzfor Linux and.zipfor Windows.
Copy the prepared file to the distribution directory on the Logpresso server.
# Adjust the paths for your environment.
# PKGDIR: the directory where the Logpresso server is installed
PKGDIR="/opt/logpresso"

# Create the distribution directories for Linux and Windows
sudo -u logpresso mkdir -p ${PKGDIR}/download/{linux,win}/x64

# Copy the JRE/JDK files
sudo -u logpresso cp <linux_JRE_or_JDK.tar.gz> ${PKGDIR}/download/linux/x64
sudo -u logpresso cp <windows_JRE_or_JDK.zip> ${PKGDIR}/download/win/x64
Register the Sentry package
In Settings > Packages, register the package to use for Sentry installation. For how to register a package, see Packages.
Add a Sentry
Before you deploy Sentry to a new server, create a Sentry registration entry first.
-
In Settings > Sentries, click Add.
-
In the Add Sentry panel, configure the following fields and click Save.
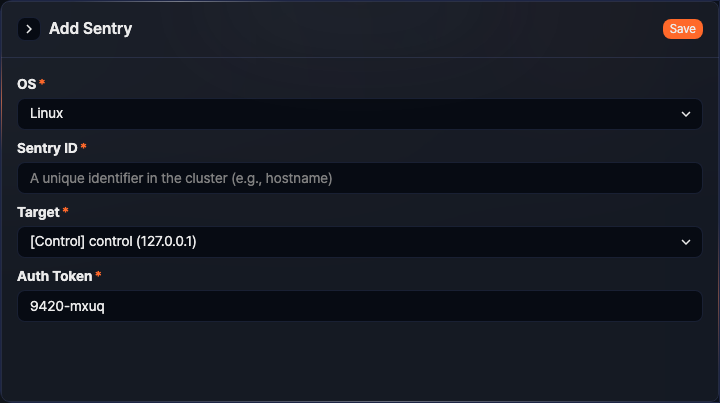
- OS: Select the operating system of the target host. Depending on the environment, only supported options are shown from Linux and Windows.
- Sentry ID: Enter the unique identifier for the Sentry in the cluster (required, up to 62 characters). The value must be in a valid domain name or hostname format.
- Target: Select the cluster node that the Sentry will connect to (required). The list shows the node type together with the VIP or host address.
- Auth Token: Enter the token to use during installation (required). A random value is generated by default, and it must follow the
1234-abcdformat with four digits, a hyphen, and four lowercase letters.
-
After the Sentry is created, the installation command dialog opens.
View the installation command
After you create a Sentry, the Sentry Installation dialog displays the command that you must run on the target host.
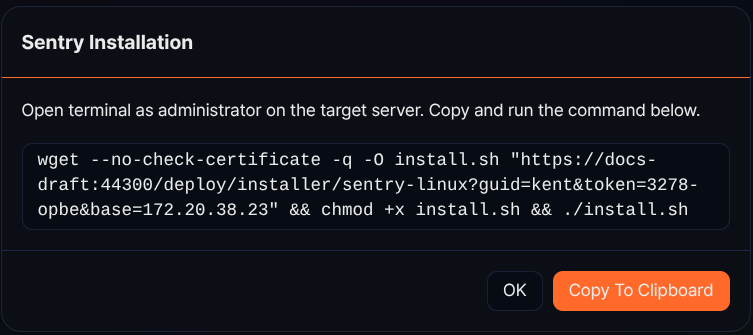
- The dialog instructs you to open a terminal as an administrator on the target server and run the displayed command.
- Click Copy To Clipboard to copy the installation command.
- Click OK to close the dialog and return to the Sentry list.
The installation command is generated from the selected OS, Sentry ID, target server, and auth token, and its format differs by operating system.
On Linux, the command downloads the installation script with wget and runs it.
wget --no-check-certificate -q -O install.sh "https://<control_node_address>:44300/deploy/installer/sentry-linux?guid=<sentry_id>&token=<auth_token>&base=<target_server>" && chmod +x install.sh && ./install.sh
On Windows, a PowerShell command is generated. It changes to the temporary directory, configures the session to trust the server certificate and use TLS 1.2, then downloads install.cmd and runs it.
cd $env:TEMP; add-type "using System.Net; using System.Security.Cryptography.X509Certificates; public class TrustAllCertsPolicy : ICertificatePolicy { public bool CheckValidationResult(ServicePoint a, X509Certificate b, WebRequest c, int d) {return true;}}";[System.Net.ServicePointManager]::CertificatePolicy = New-Object TrustAllCertsPolicy; [Net.ServicePointManager]::SecurityProtocol = [Net.SecurityProtocolType]::Tls12;Invoke-WebRequest -Uri 'https://<control_node_address>:44300/deploy/installer/sentry-windows?guid=<sentry_id>&token=<auth_token>&base=<target_server>' -OutFile install.cmd; cmd /c install.cmd
The installation is completed only after you run the command on the target host.
View the Sentry list
Open Settings > Sentries to view the Sentry list.
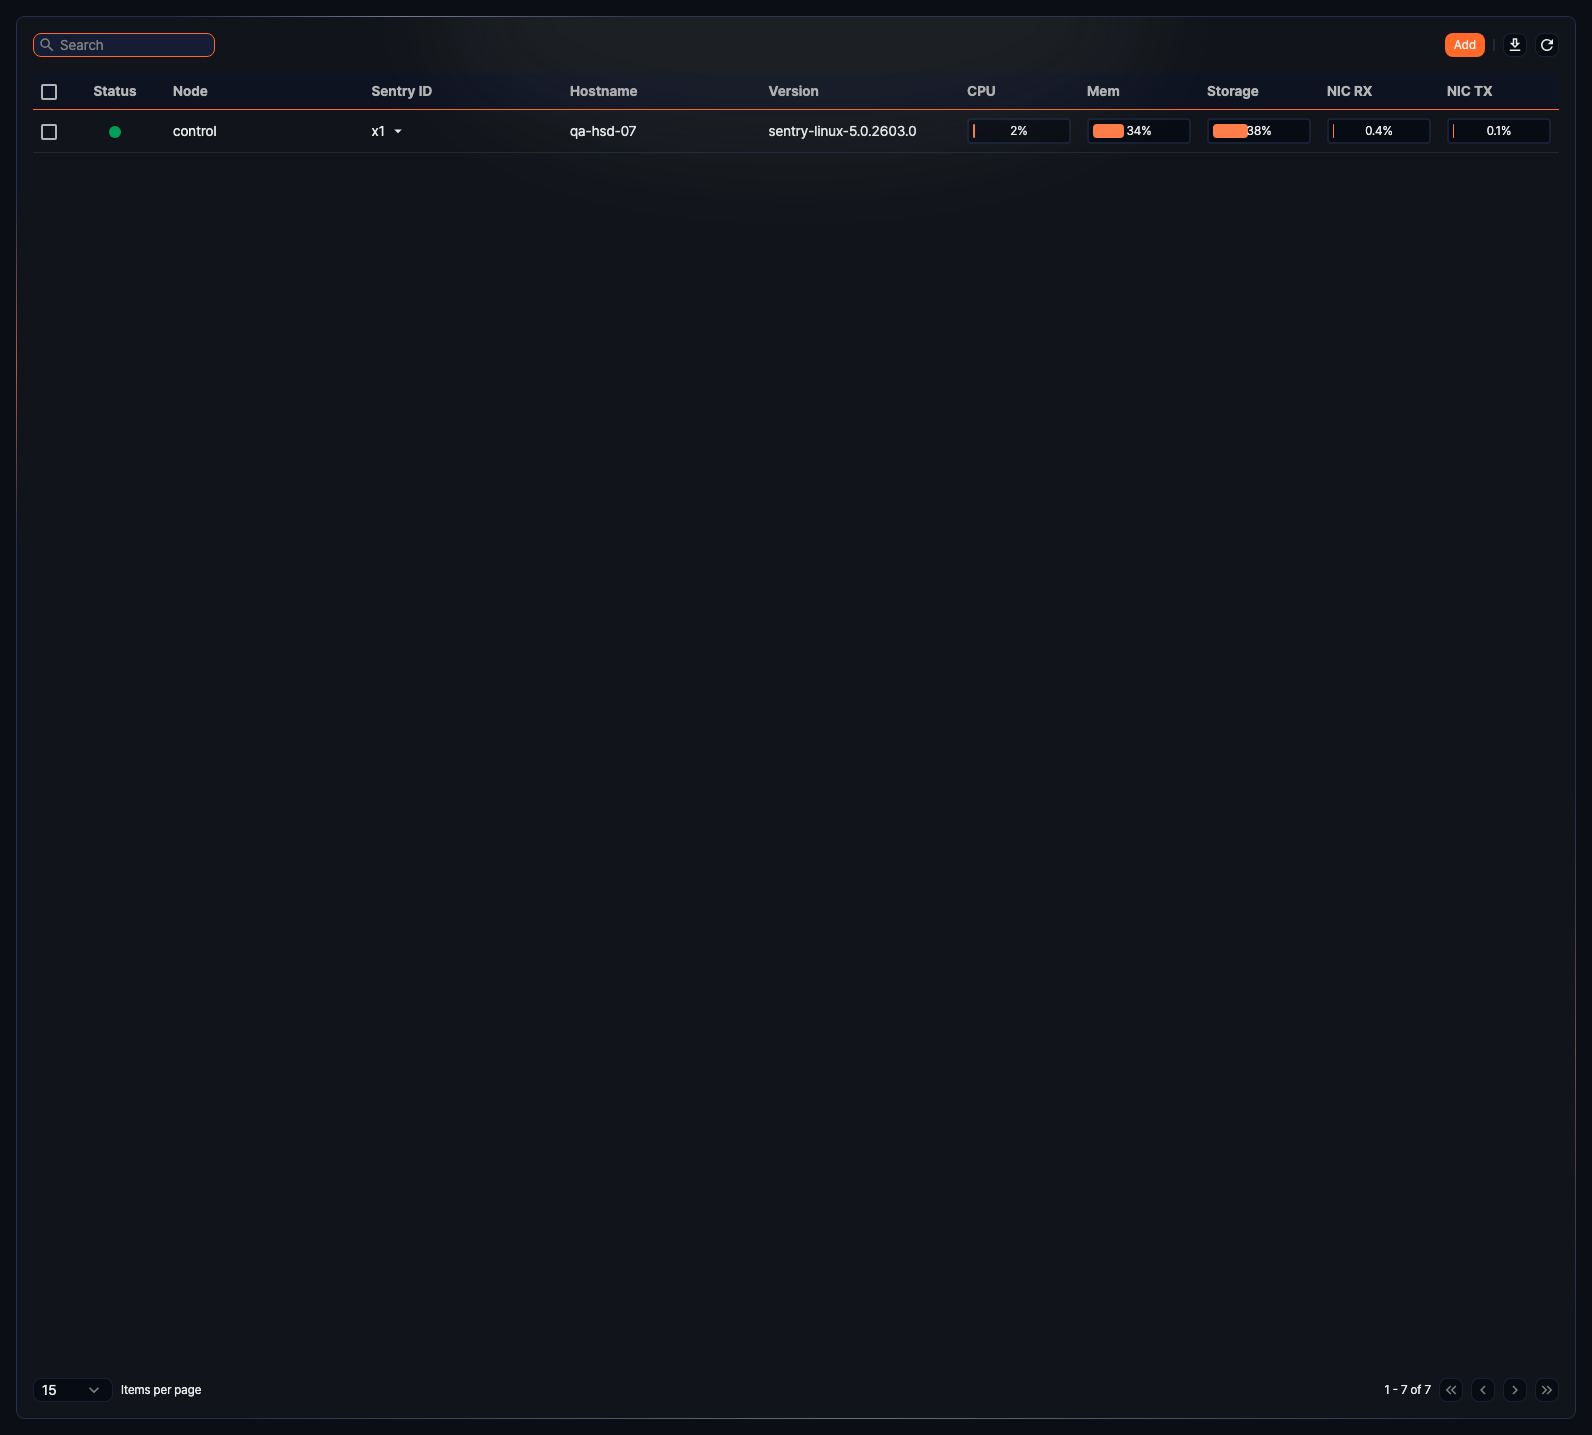
- Status: Shows whether the Sentry is connected. Connected Sentries are shown with an active indicator.
- Node: Shows the cluster node or node pair that the Sentry connects to.
- Sentry ID: Shows the unique identifier of the Sentry. For connected Sentries, clicking it opens the remote action menu.
- Hostname: Shows the hostname where the Sentry is installed.
- Version: Shows the installed Sentry package version.
- CPU: Shows CPU usage as a progress bar and percentage.
- Mem: Shows memory usage as a progress bar and percentage.
- Storage: Shows disk usage. If the host has multiple disks, the highest usage is displayed.
- NIC RX: Shows receive bandwidth usage. If the host has multiple network interfaces, the highest usage is displayed.
- NIC TX: Shows transmit bandwidth usage. If the host has multiple network interfaces, the highest usage is displayed.
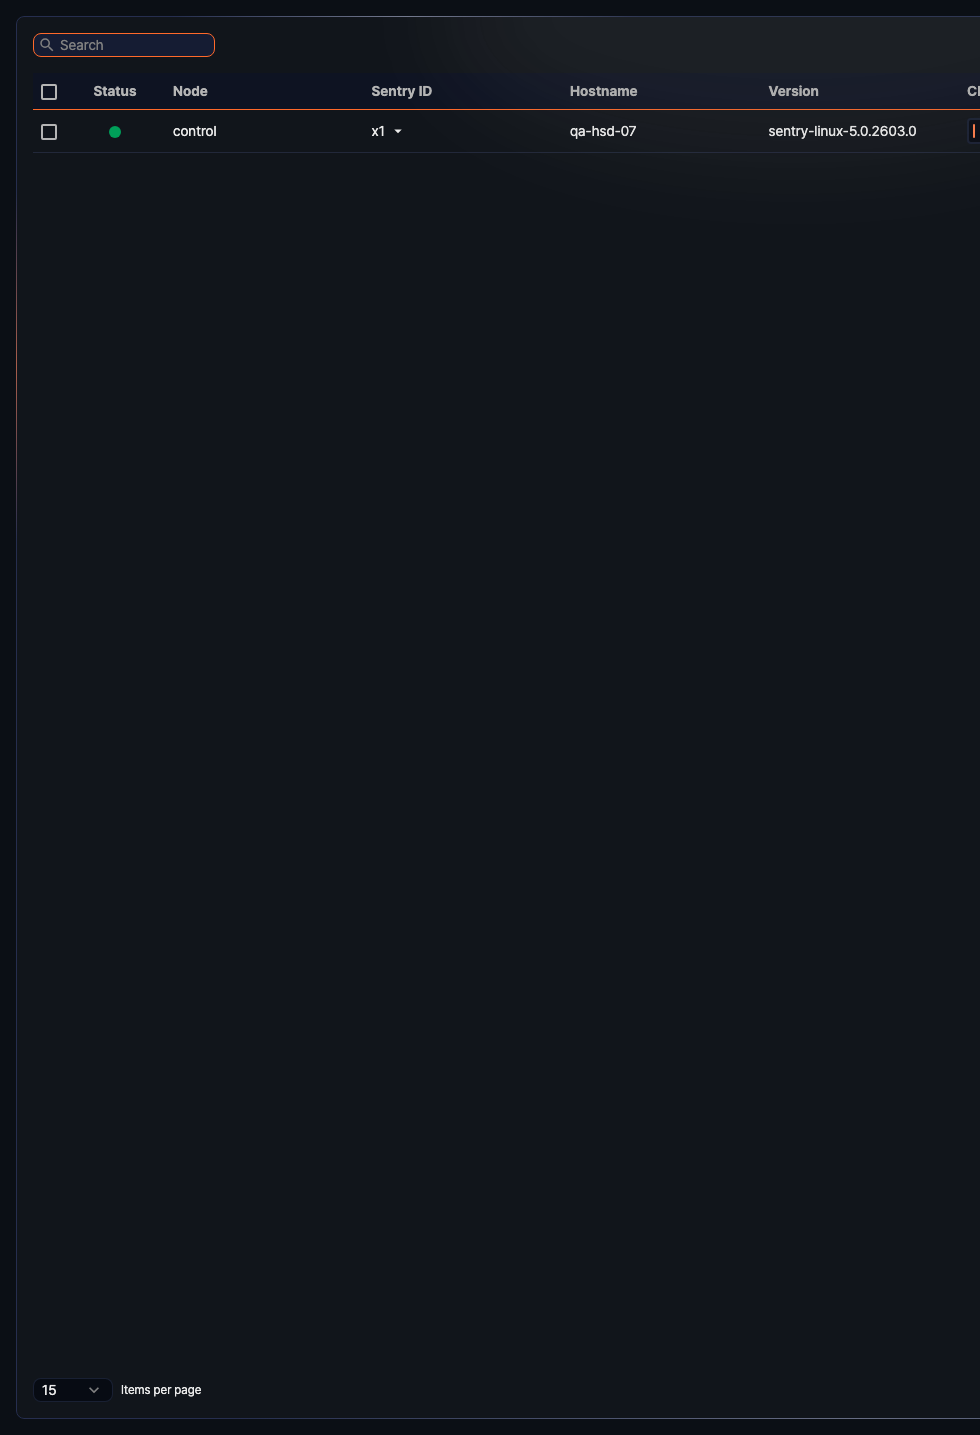
Use the search box to narrow the list by Sentry ID or hostname.
Download the list
To save the list as a file, click ![]() on the toolbar. The downloadable fields are status, node, Sentry ID, hostname, version, CPU, memory, storage, NIC RX, and NIC TX.
on the toolbar. The downloadable fields are status, node, Sentry ID, hostname, version, CPU, memory, storage, NIC RX, and NIC TX.
Refresh the list
To reload the latest status, click ![]() on the toolbar.
on the toolbar.
Remote Sentry actions
For a connected Sentry, click the arrow next to Sentry ID to open the remote action menu. The menu does not open for disconnected Sentries.
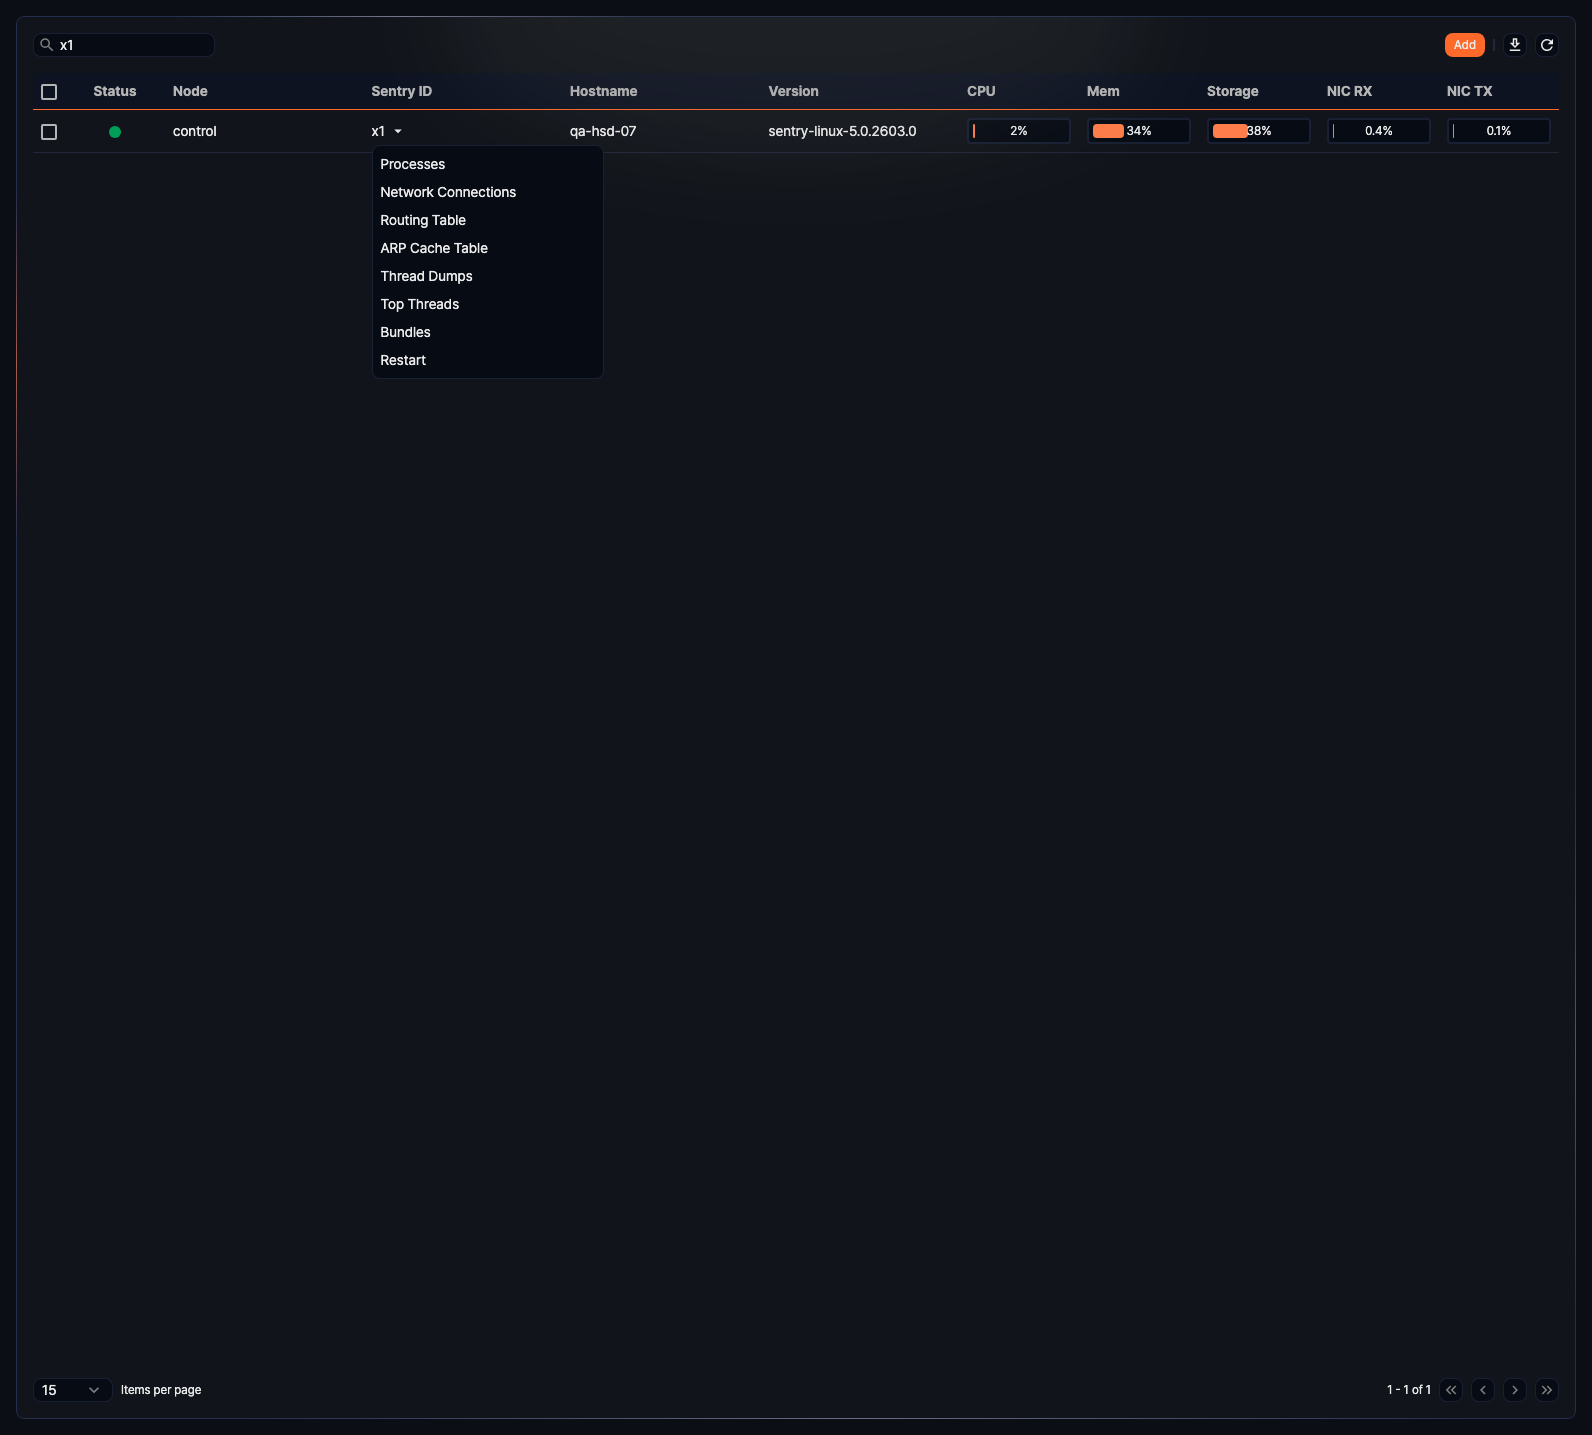
The remote action menu provides the following actions:
- Processes
- Network Connections
- Routing Table
- ARP Cache Table
- Thread Dumps
- Top Threads
- Bundles
- Restart
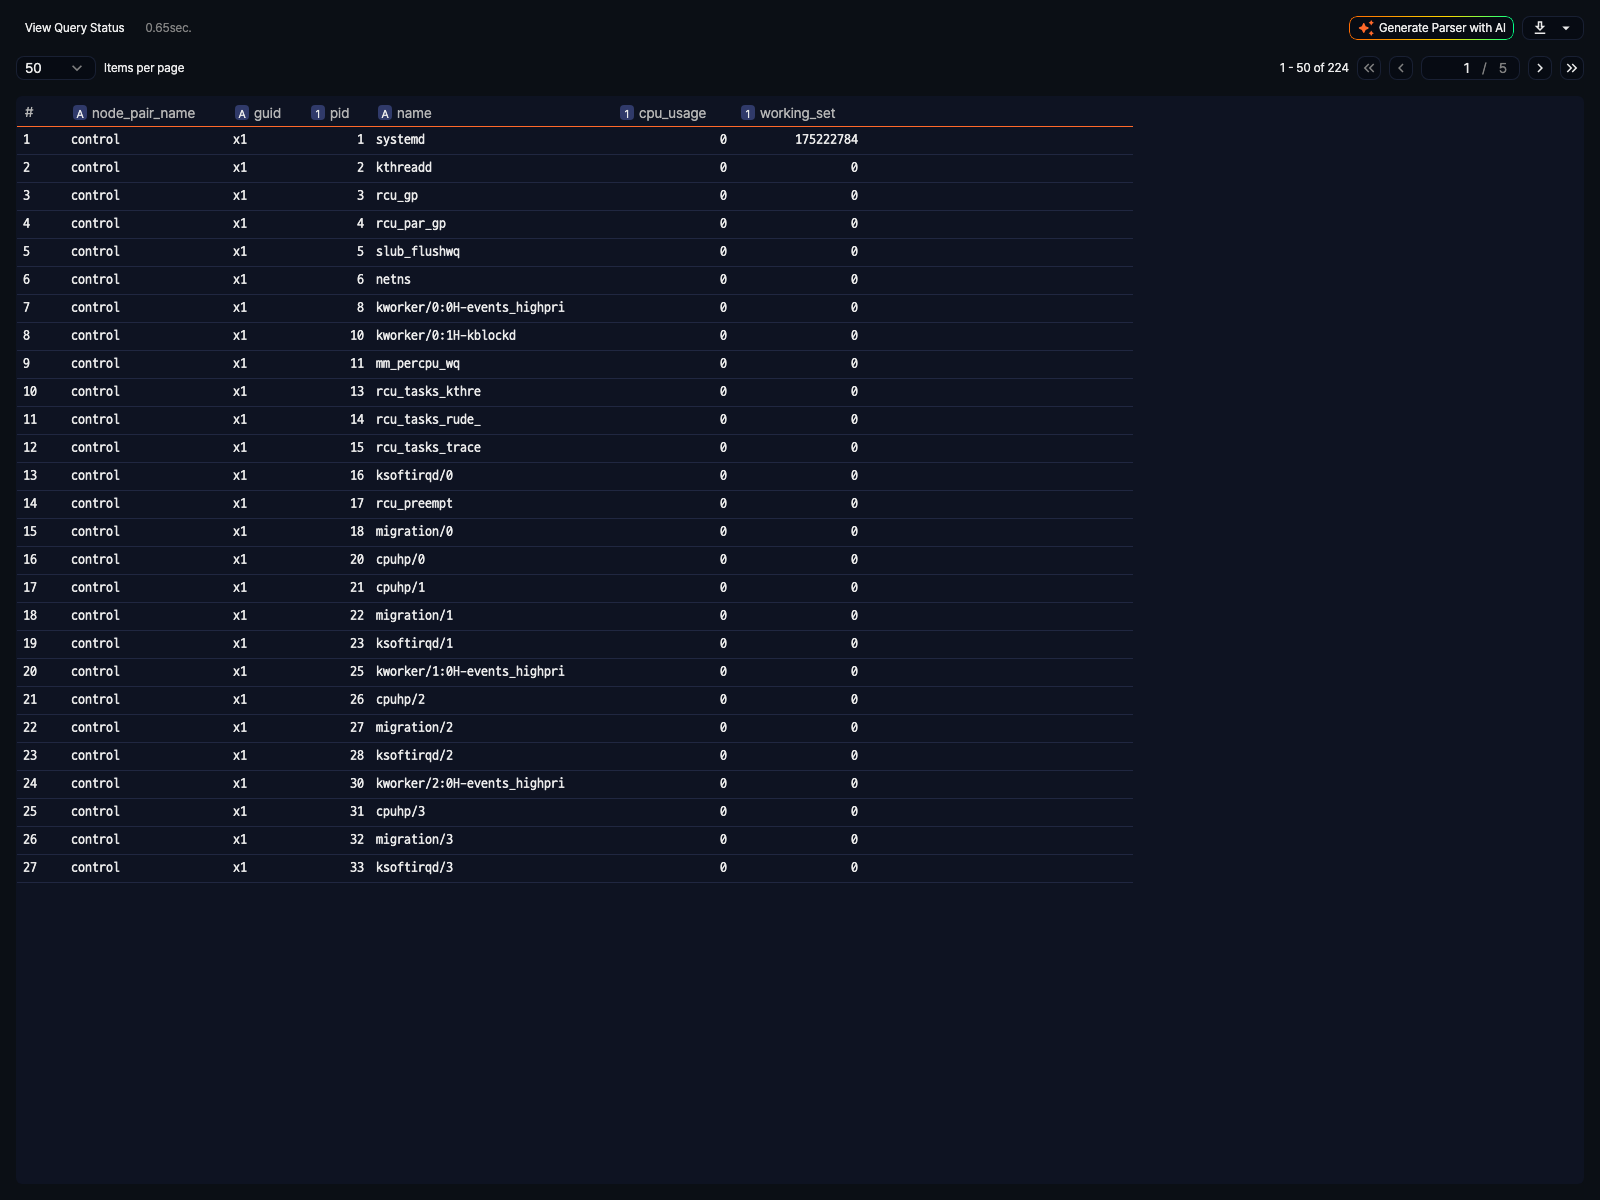
Processes
Click Processes to open the process list of the selected Sentry host in a new window.
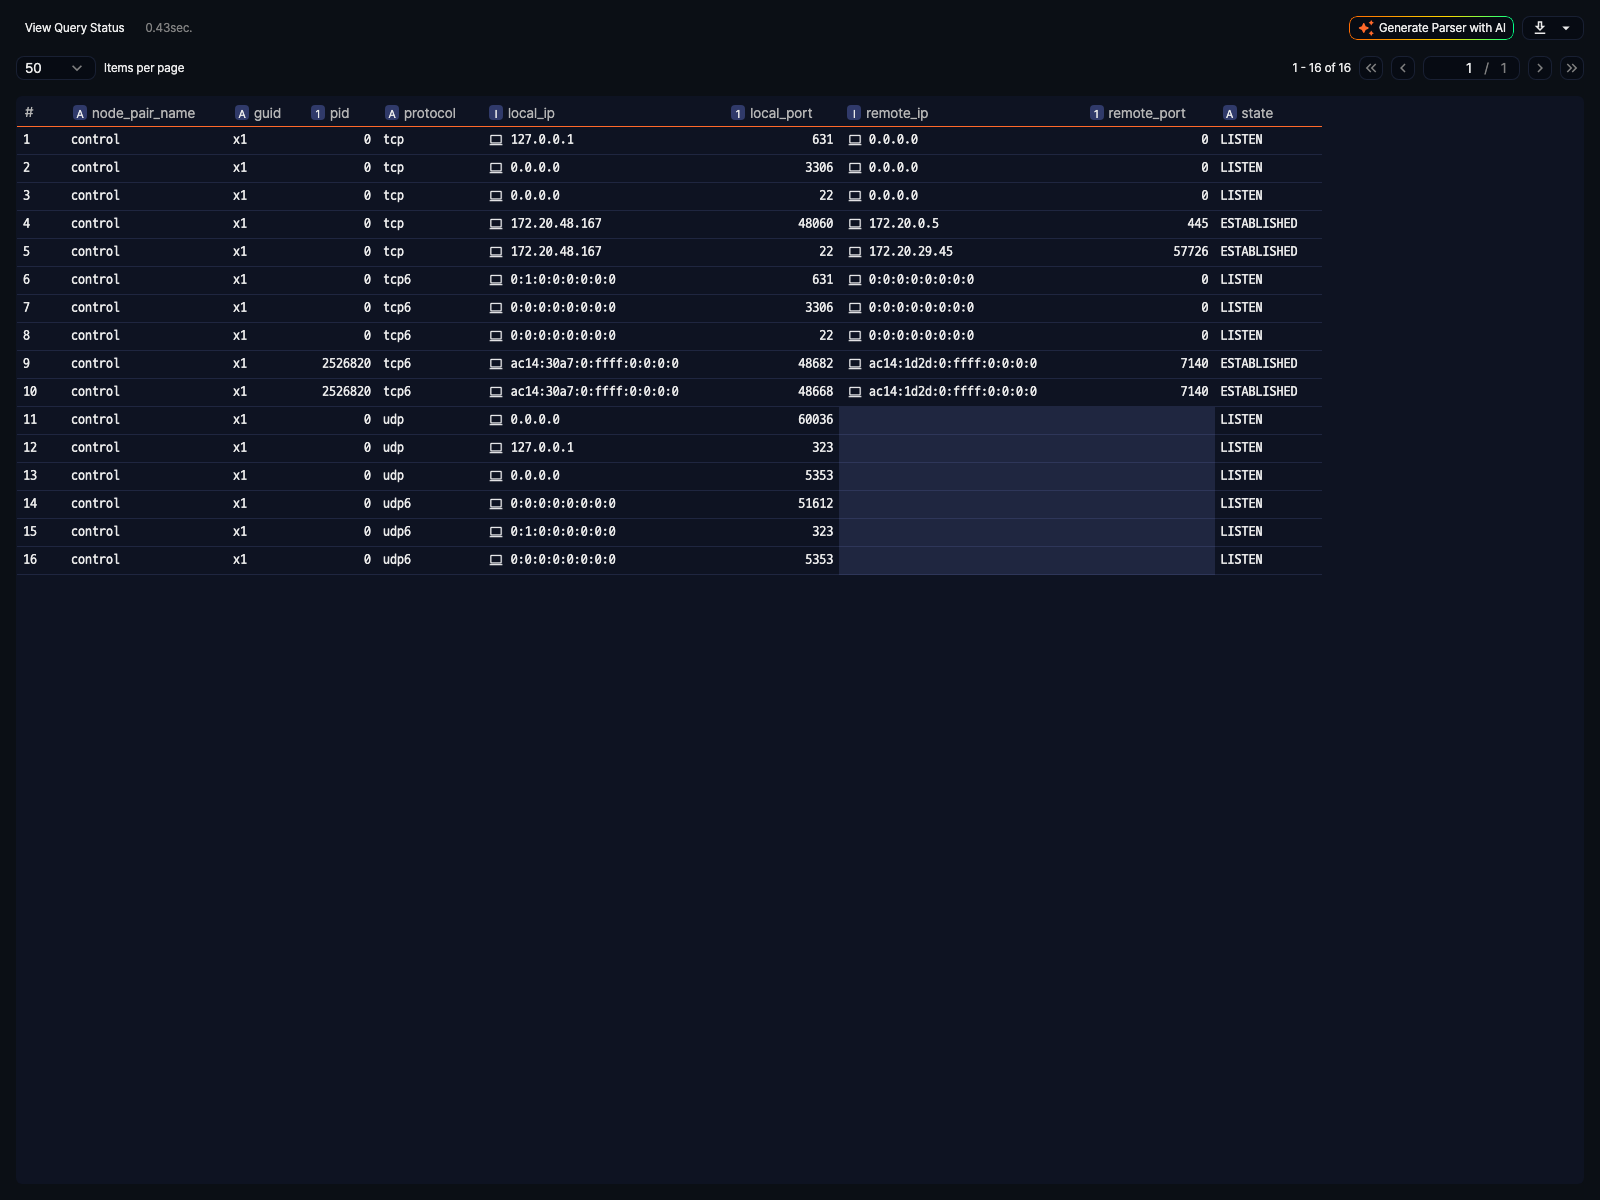
Network Connections
Click Network Connections to open the network connection information of the selected Sentry host in a new window.
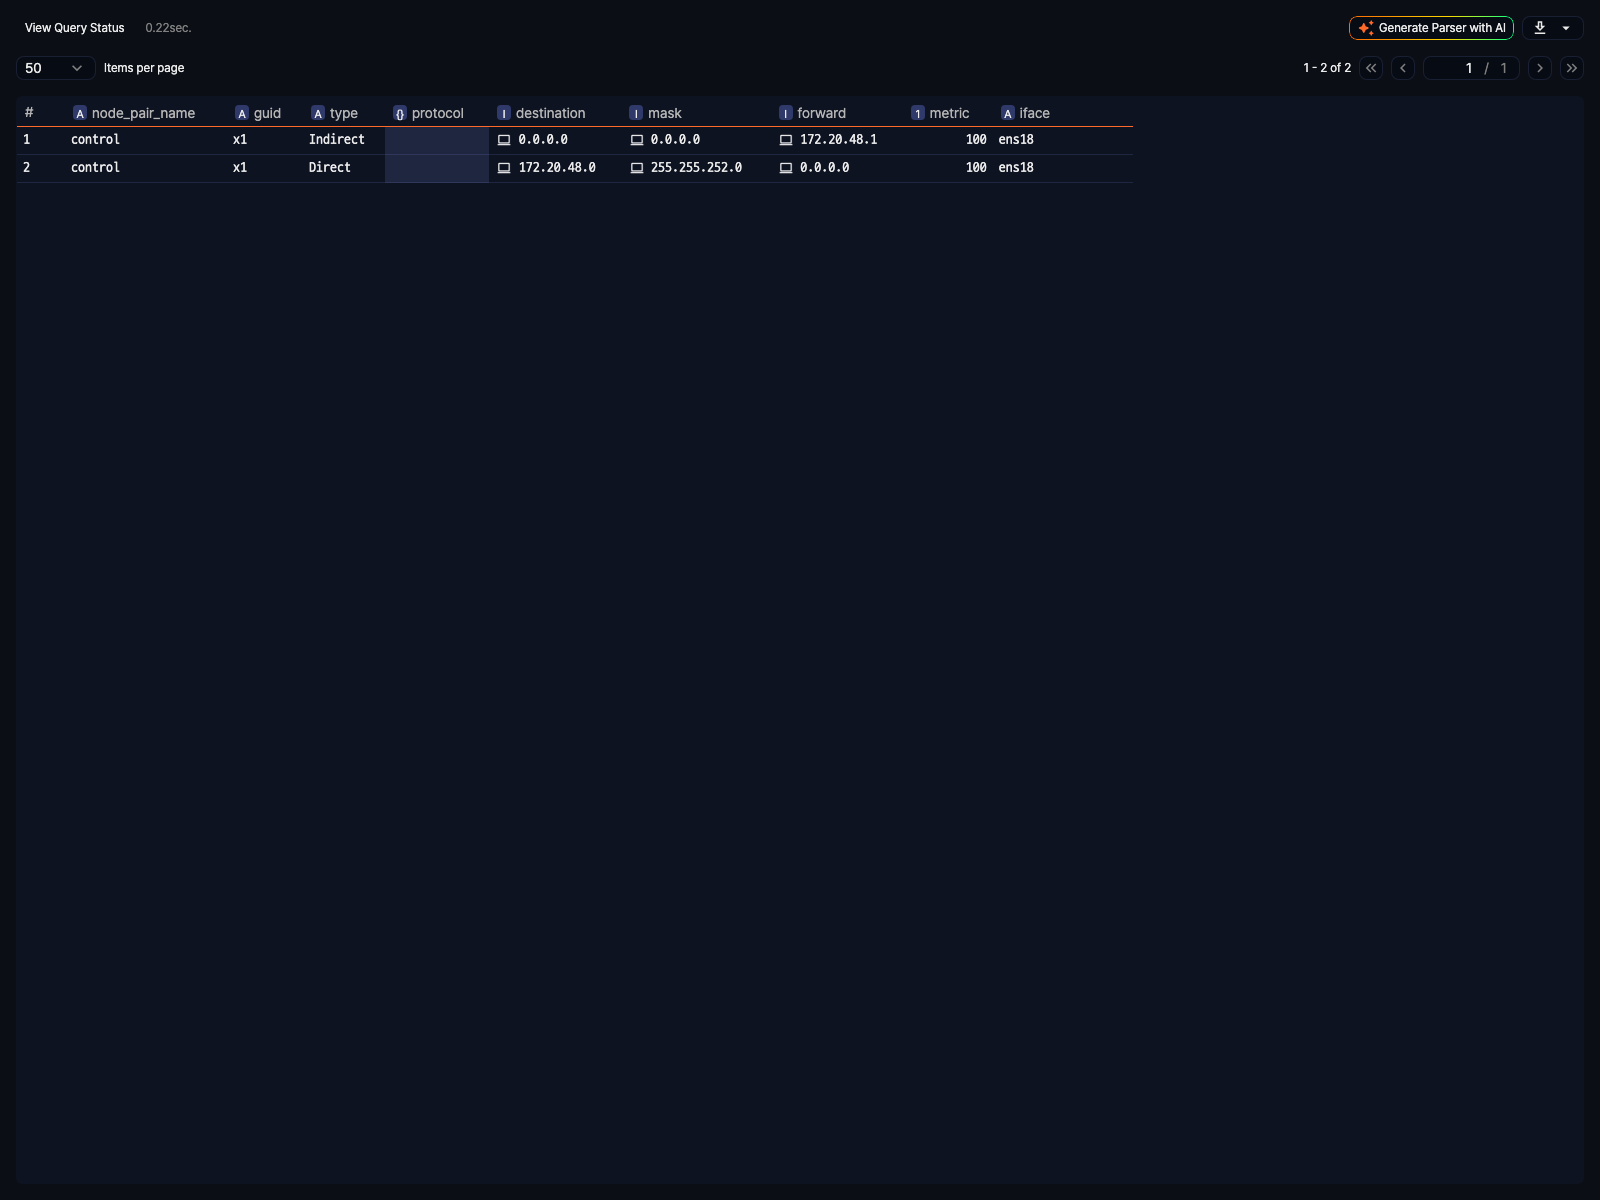
Routing Table
Click Routing Table to open the routing table of the selected Sentry host in a new window.
ARP Cache Table
Click ARP Cache Table to open the ARP cache information of the selected Sentry host in a new window.

Thread Dumps
Click Thread Dumps to open the full thread dump of the selected Sentry in a new window.
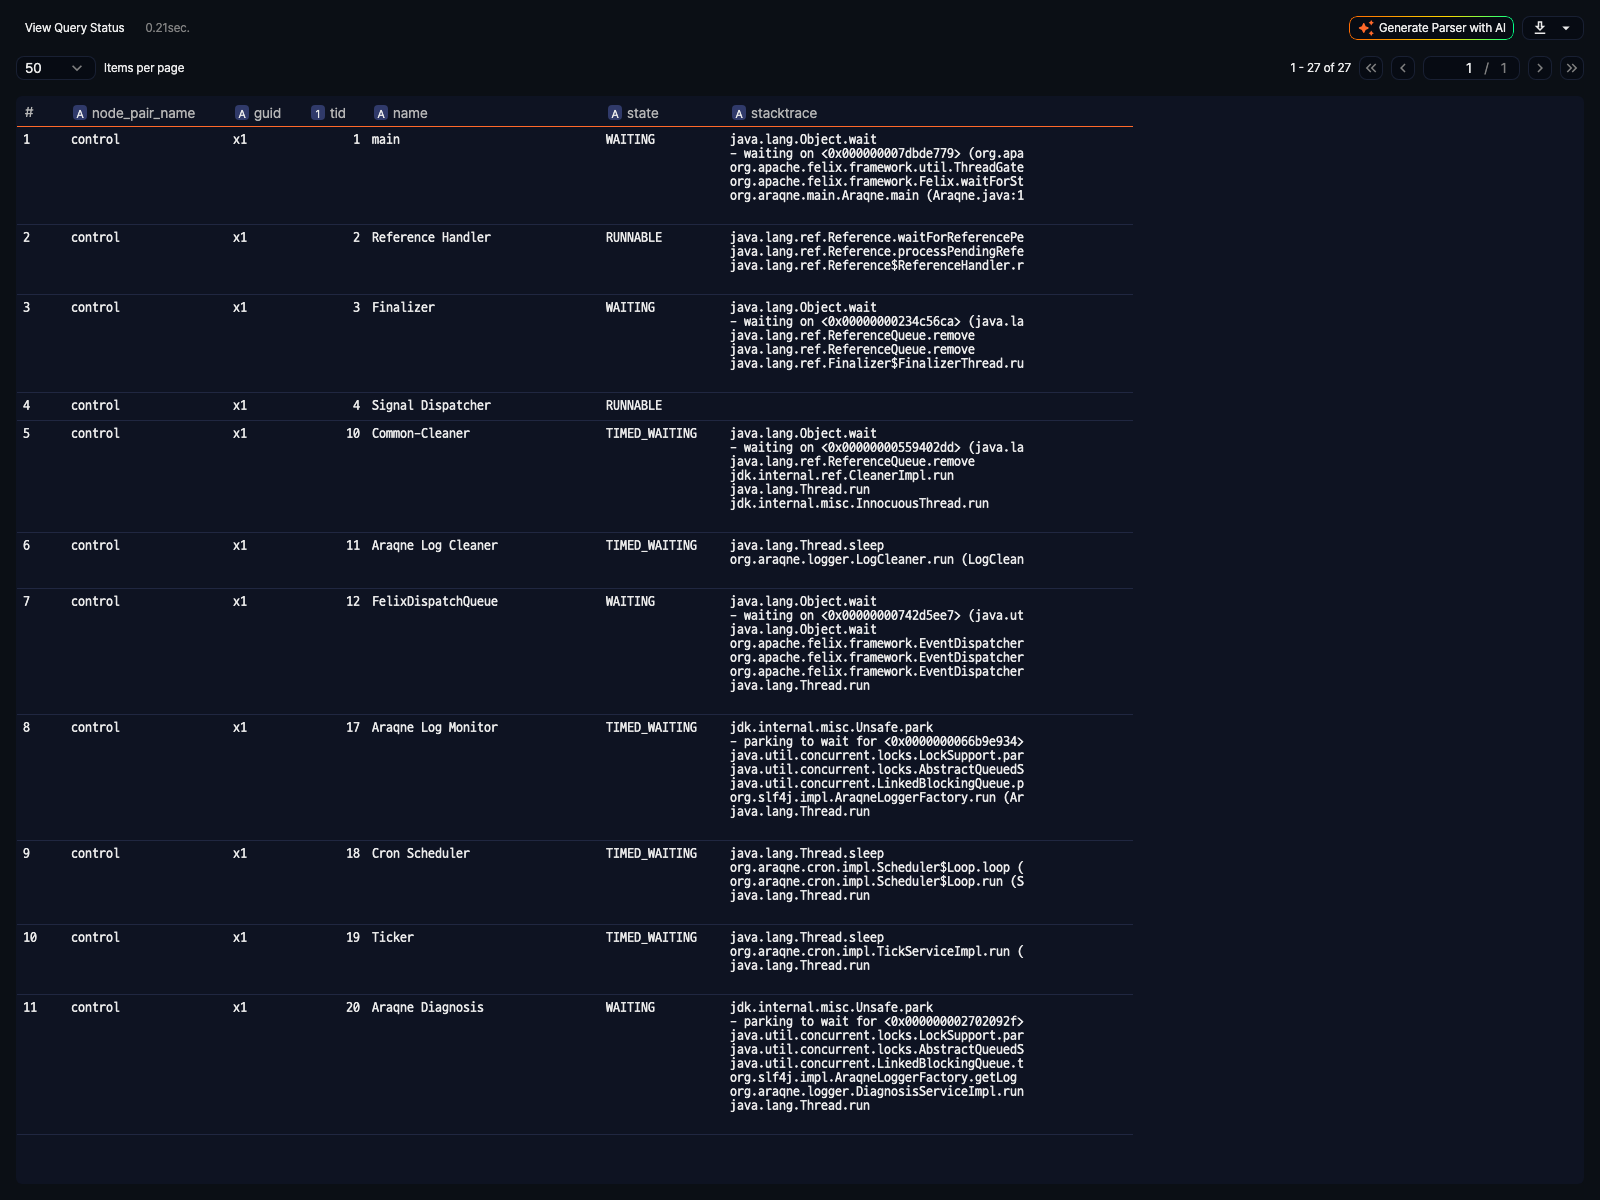
Top Threads
Click Top Threads to open the busiest thread information of the selected Sentry in a new window.

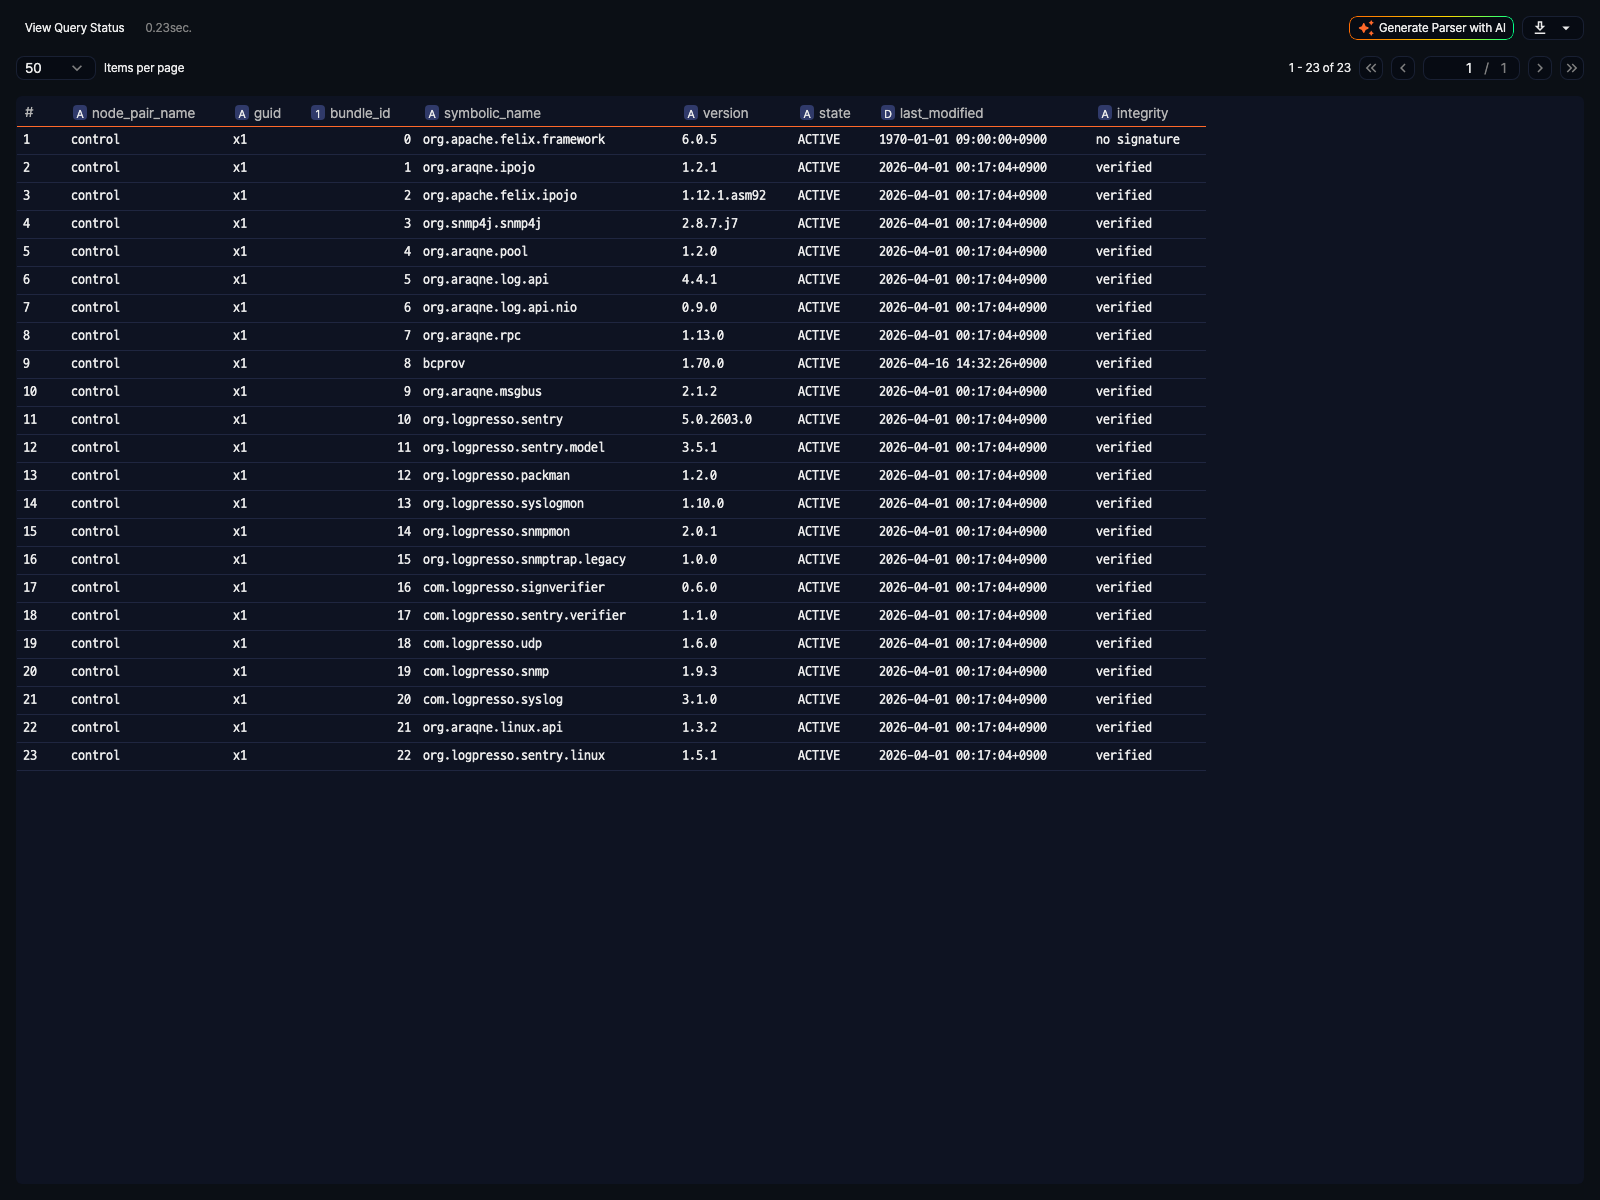
Bundles
Click Bundles to open the deployed bundle information of the selected Sentry in a new window.
Restart
Click Restart to send a restart request to the selected Sentry after confirmation. When the restart completes, the list is refreshed again.
Delete a Sentry
To remove a registered Sentry entry from the list, select the Sentry and click Delete.
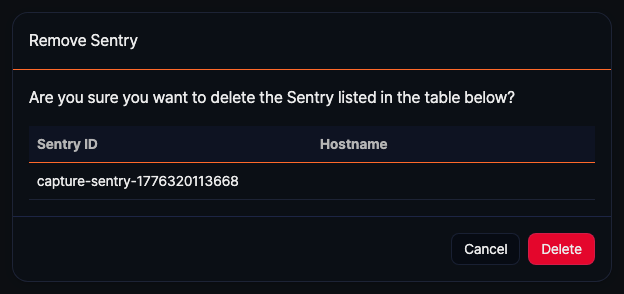
The delete confirmation dialog shows the selected Sentry ID and Hostname.